
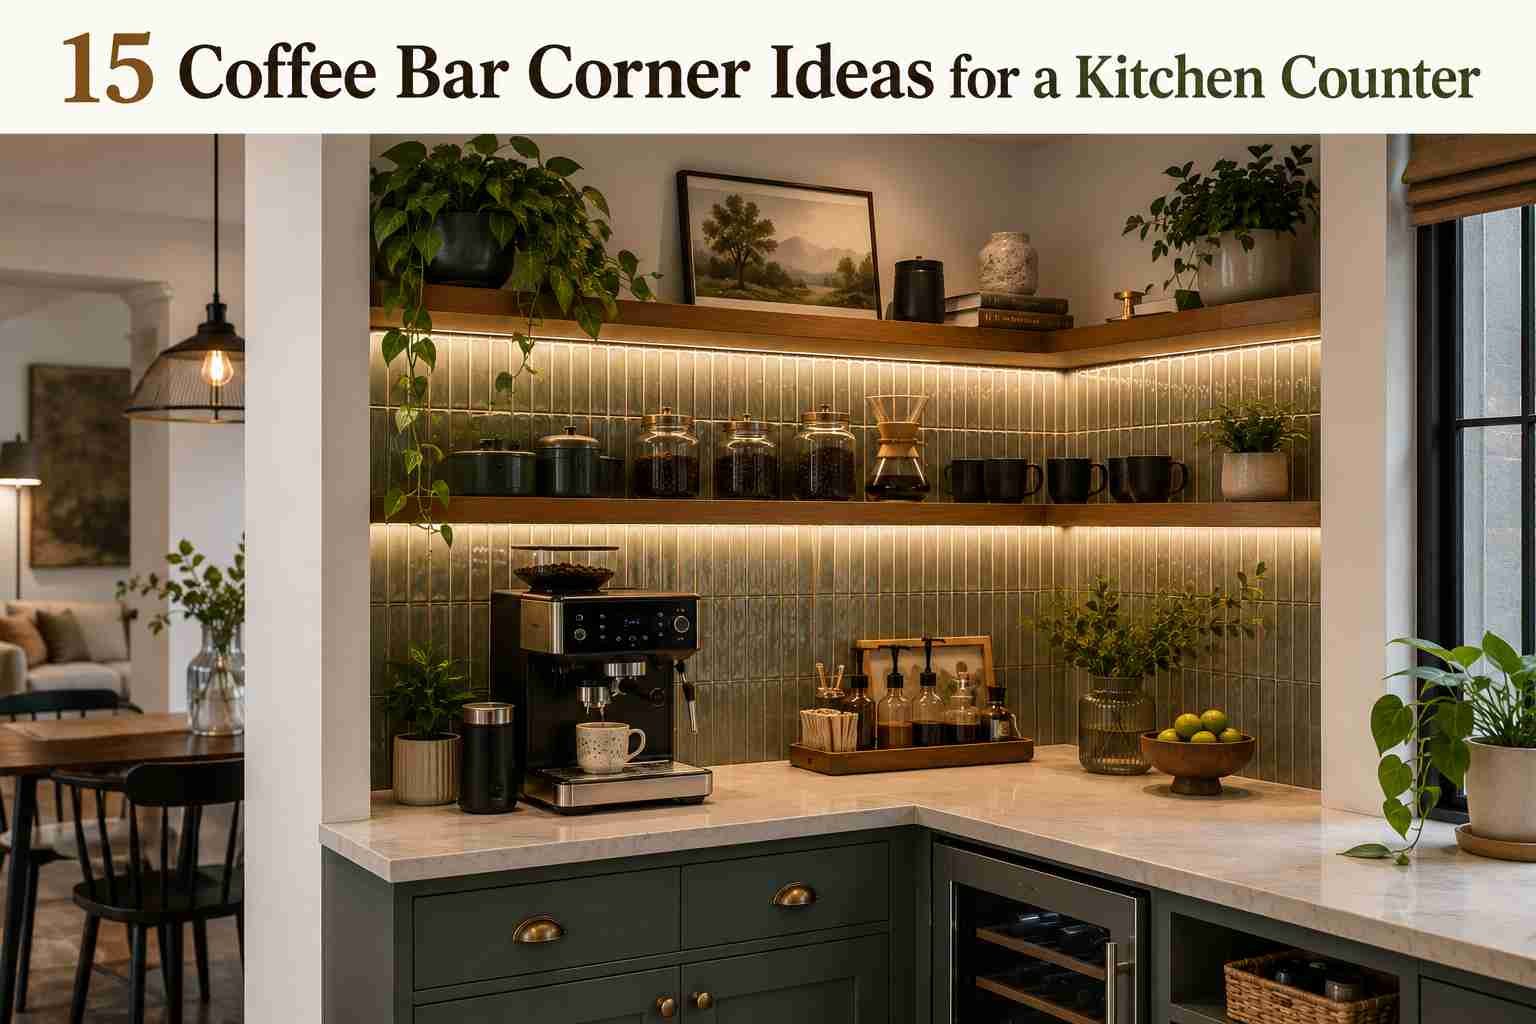
A coffee bar has become the single most-requested small-space upgrade I hear from clients right now- more than a pantry redo, more than open shelving.
It’s a strange thing to be asked for constantly: a few square feet of counter dedicated to one drink. But it makes sense once you see the corner it usually lands in.
Most kitchens have one dead zone- the end of a counter run, the awkward gap beside a fridge, the corner that catches mail and keys and never quite earns its footprint.
Turning that corner into a working coffee station is one of the few decor projects that pays for itself in daily use within the first week.
This guide is built around one constraint that most “coffee bar inspiration” roundups skip: the corner.
Corners aren’t just smaller than a straight run of counter- they have different clearance needs, different lighting angles, and a wall junction that changes what you can mount, plumb, or hang.
A straight counter run gives you two sides to approach from; a corner usually gives you one, which changes how deep a shelf can sit and how wide a door can swing before it hits a wall or a neighboring appliance.
The 15 ideas below are organized by how much space, budget, and permanence you’re working with, from a $40 tray-and-shelf setup to a fully plumbed built-in.
Each one includes a practical build note, a placement clearance, and an image slot so you (or your reader) can see the layout before committing counter space to it.
None of these ideas assume a full renovation budget or a homeowner’s freedom to drill into walls.
Roughly half are renter-safe, reversible, no permits, no permanent damage- and the rest are grouped clearly by the level of commitment they require, so you can filter by what you’re actually allowed to change in your space before falling for a look that needs a plumber.
What Makes a Coffee Bar Corner Actually Work (Before the Ideas)
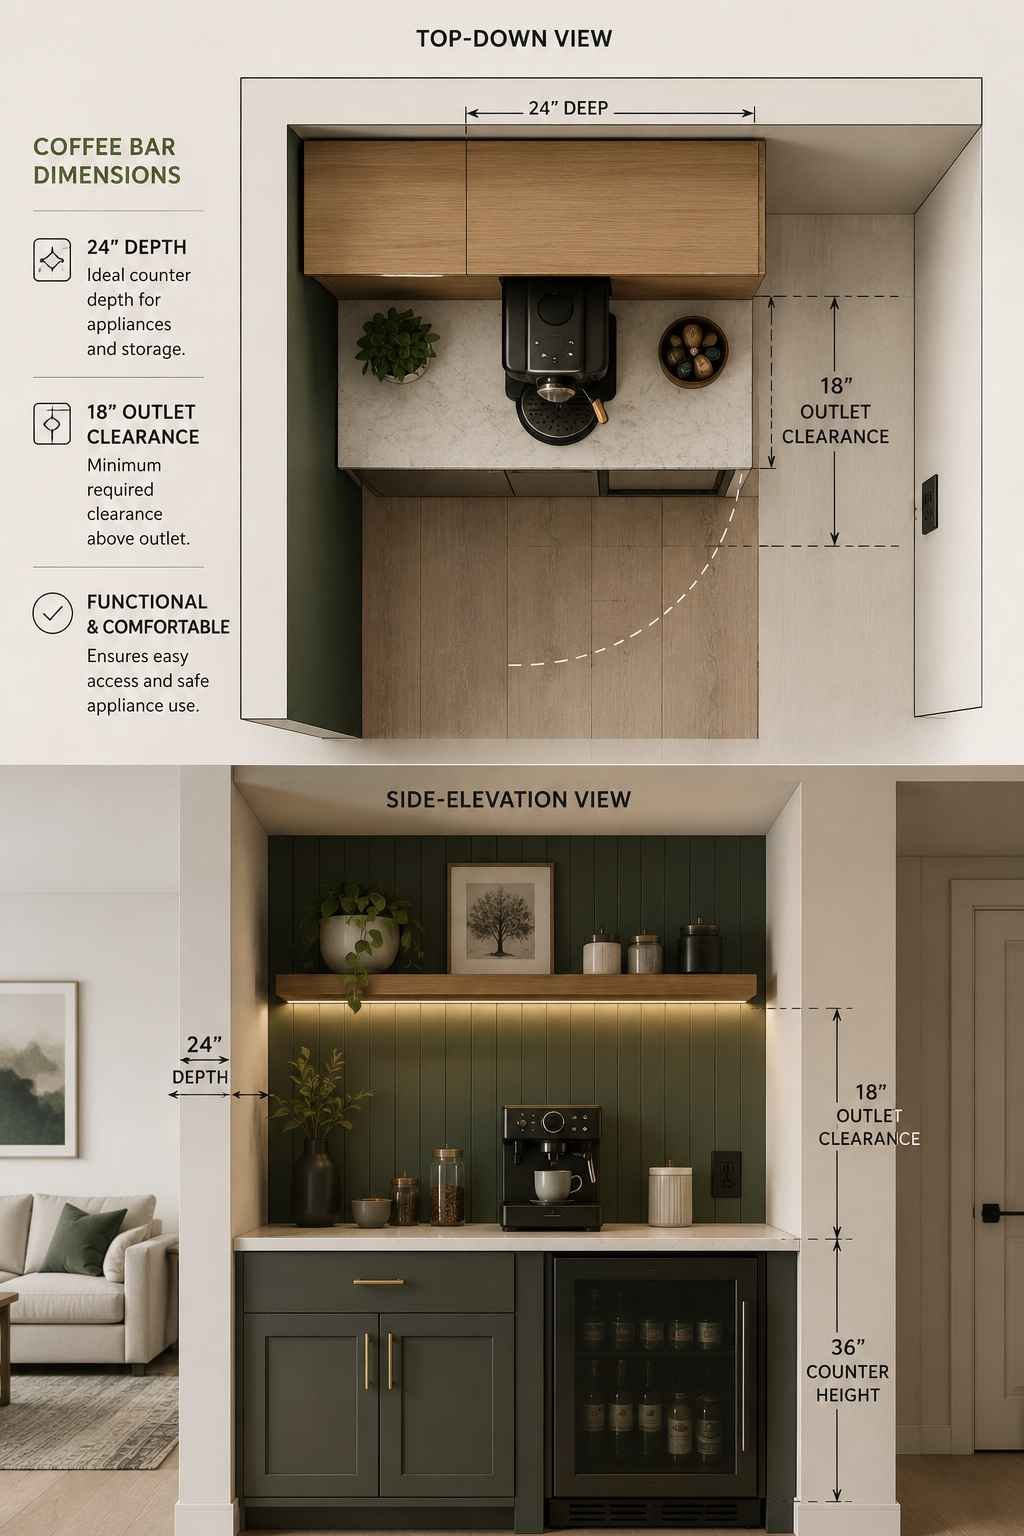
Before jumping into the list, it helps to know the handful of clearances that separate a coffee corner that gets used daily from one that becomes clutter storage within a month.
The National Kitchen and Bath Association’s (NKBA) planning guidelines, the same reference points used for full kitchen layouts, apply at this small scale too, just compressed.
- Counter depth: 24 inches minimum for anything with a drip coffee maker or espresso machine, so the appliance doesn’t overhang the edge.
- Outlet placement: an outlet within 18 inches horizontally of the appliance footprint avoids trailing cords across the counter.
- Vertical clearance: 15–18 inches between counter and the underside of a cabinet or shelf if a kettle or pour-over setup needs headroom.
- Walk clearance: keep at least 30 inches of open floor space in front of the corner if it’s also a walkway, so opening a cabinet door doesn’t block traffic.
- Water and drainage: only relevant for plumbed setups (idea #14 below)- factor in a shutoff valve accessible without removing cabinetry.
Table 1 breaks these clearances down by the size of corner you’re actually working with, since a studio kitchen and a family kitchen island corner need different starting points.
ALSO READ: L-Shaped Kitchen Designs: 20 Ideas With Real Costs, Materials & Honest Advice (2026)
Table 1: Coffee Corner Footprint by Available Space
| Corner Type | Typical Width | Recommended Depth | Best Idea Numbers | Notes |
| Narrow end-of-counter | 12–18 in | 12–16 in (riser/shelf) | #1, #4, #10 | Stack vertically instead of spreading out |
| Standard L-corner | 18–24 in | 24 in | #3, #6, #9, #11 | Most flexible, fits almost any idea below |
| Deep corner near fridge | 24–30 in | 24–26 in | #8, #14, #15 | Enough room for a fridge or plumbed line |
| Open floor corner (no counter) | N/A – floor space | N/A | #5, #12 | Use furniture instead of built-in counter |
1. The Floating Shelf Espresso Ledge
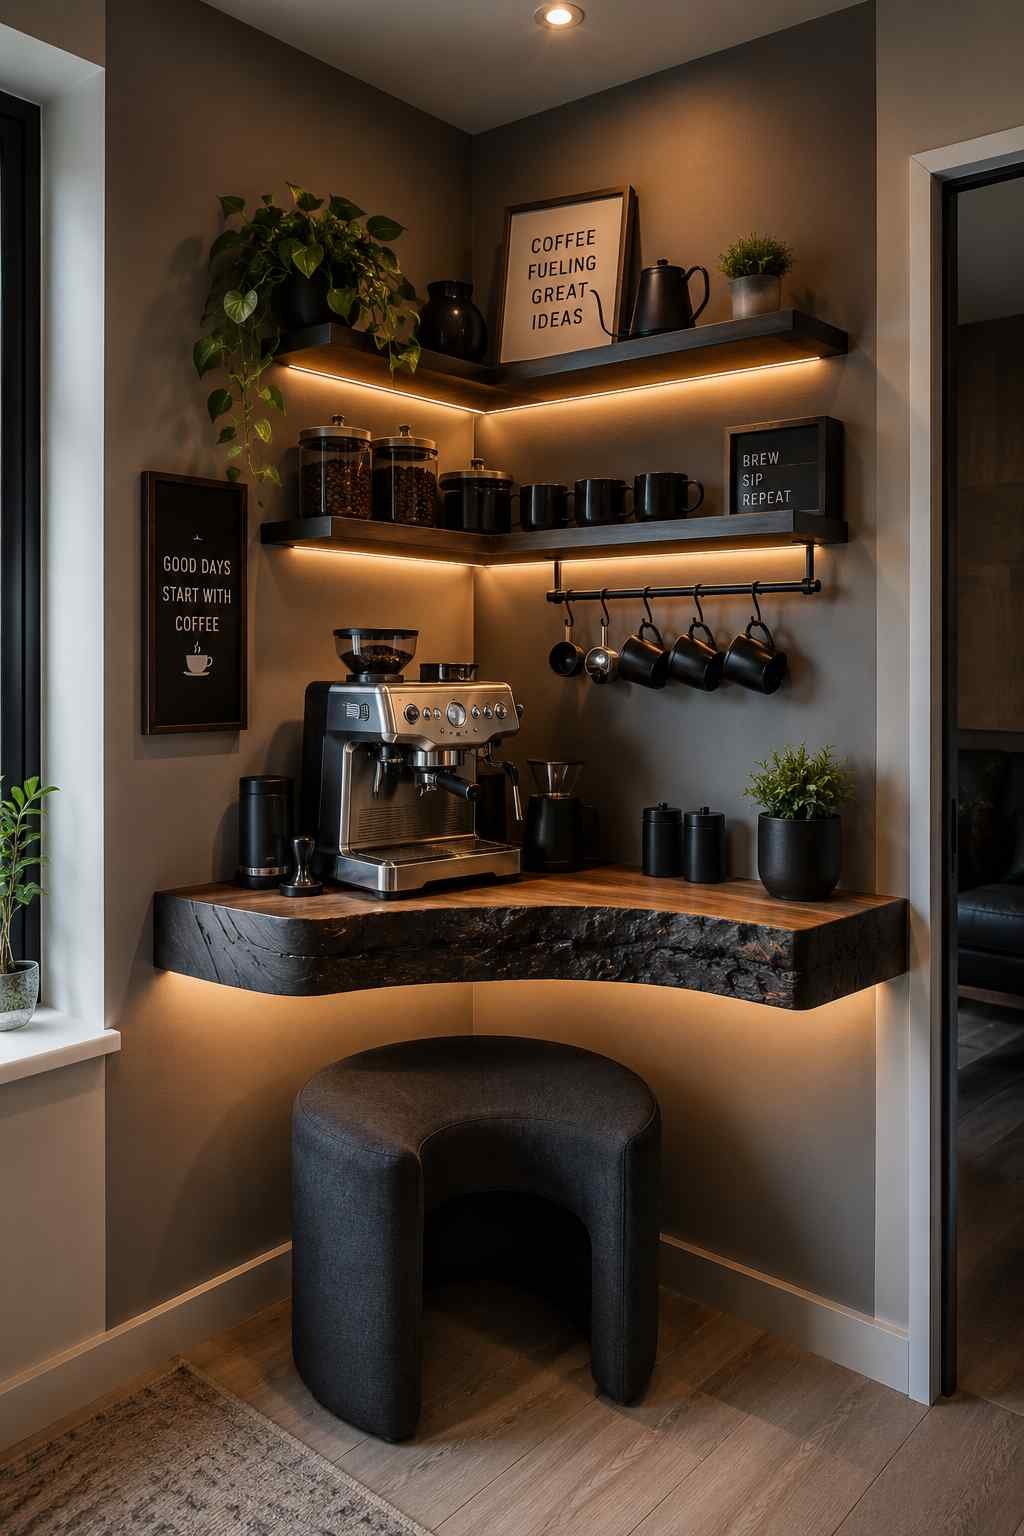
Budget: $40-120 | Best for: Narrow end-of-counter, renters
Two floating shelves, one at eye level for cups, one 6–8 inches above the counter for the machine itself- turn a strip of wall into a working station without touching the counter’s footprint.
This is the single most renter-friendly option on this list: brackets go into studs, no plumbing or electrical work, and the whole setup comes down in twenty minutes at move-out.
Keep the lower shelf load-rated for at least 25 lbs if it’s holding an espresso machine; check the bracket spec sheet, not just the shelf itself.
Designer tip: Mount the top shelf 15–16 inches above the counter; any higher, reaching for cups becomes a stretch; any lower, steam from the machine fogs the underside of the shelf over time.
2. Under-Cabinet Nook with a Built-In Outlet

Budget: $150-400 | Best for: Standard L-corner, homeowners
If there’s already a run of upper cabinets, the space directly beneath one becomes a self-contained nook once you add an outlet inside the cabinet’s footprint (an electrician can typically fish this from an existing circuit in under two hours).
The cabinet above hides bags, filters, and syrup bottles, while the counter below stays visually calm because nothing needs to be stacked on the surface itself.
Designer tip: Ask your electrician for a tamper-resistant duplex outlet mounted horizontally under the cabinet lip- vertical outlets under cabinets catch dust and are harder to plug into one-handed.
3. Butcher Block Corner Extension
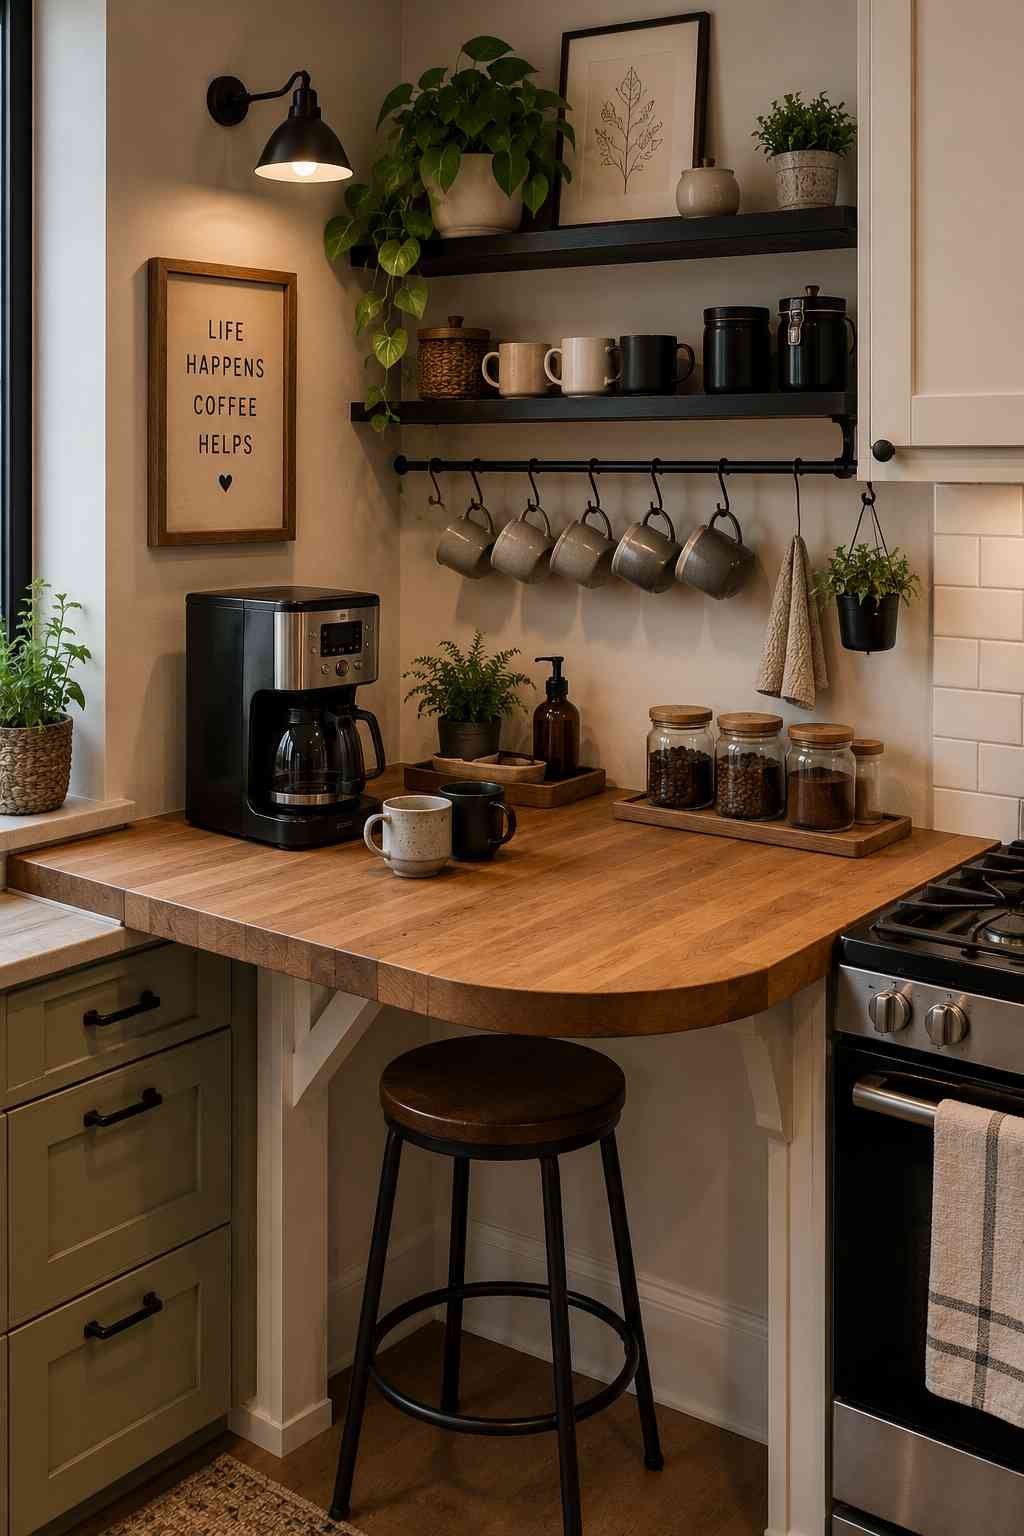
Budget: $200-600 | Best for: Standard or deep L-corner
Where a corner counter run ends abruptly against a wall, adding a short butcher-block extension (even 12–18 inches) creates a materially distinct zone that reads as “the coffee station” without a single sign or label.
Butcher block also tolerates the inevitable water rings and coffee drips far better than laminate; a light food-safe mineral oil once a month keeps it sealed.
Designer tip: Have the extension cut with a slight bullnose edge, not a sharp 90-degree corner — coffee corners get bumped into constantly during the morning rush.
4. Vertical Riser Tier (A Coffee Station Stand)
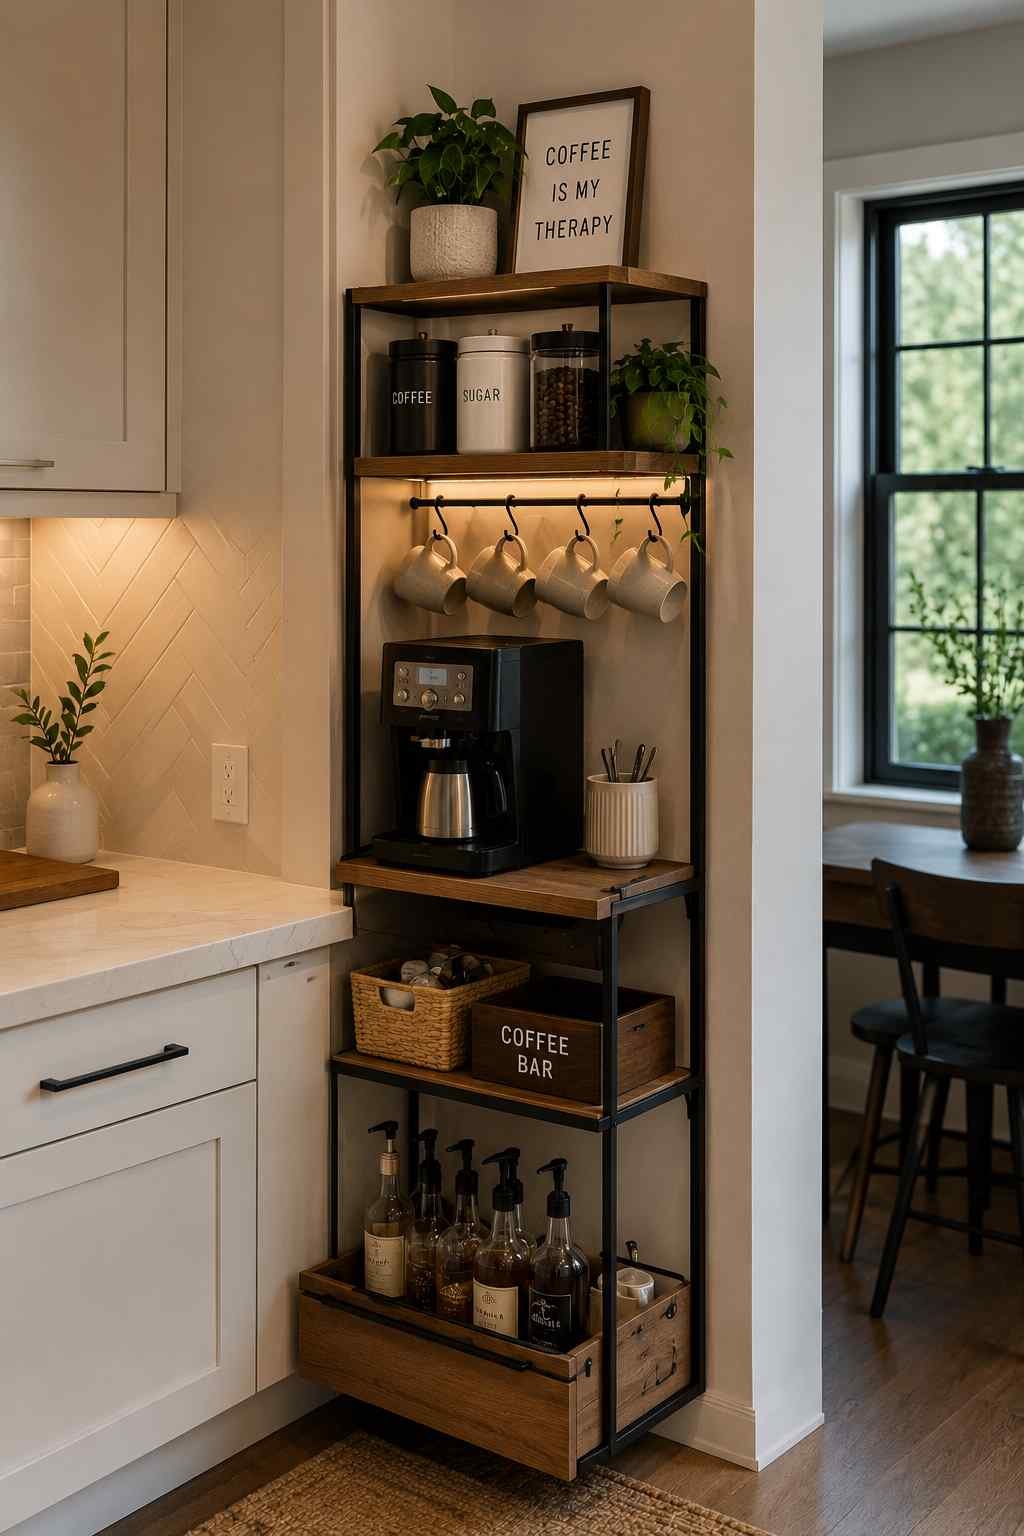
Budget: $25–90 | Best for: Narrow end-of-counter, small kitchens
A two- or three-tier wooden riser (sold as a “coffee bar stand” or repurposed spice riser) solves the classic small-corner problem: everything you need is within an 18-inch footprint, but it’s still organized by function rather than piled up. Machine on the bottom tier, cups and a small canister on the middle, syrups or a plant on top.
Designer tip: Choose a riser with a lip or raised edge on each tier — without one, anything on the top shelf slides forward when the lower tier’s door or lever is used.
5. Repurposed Bar Cart Corner
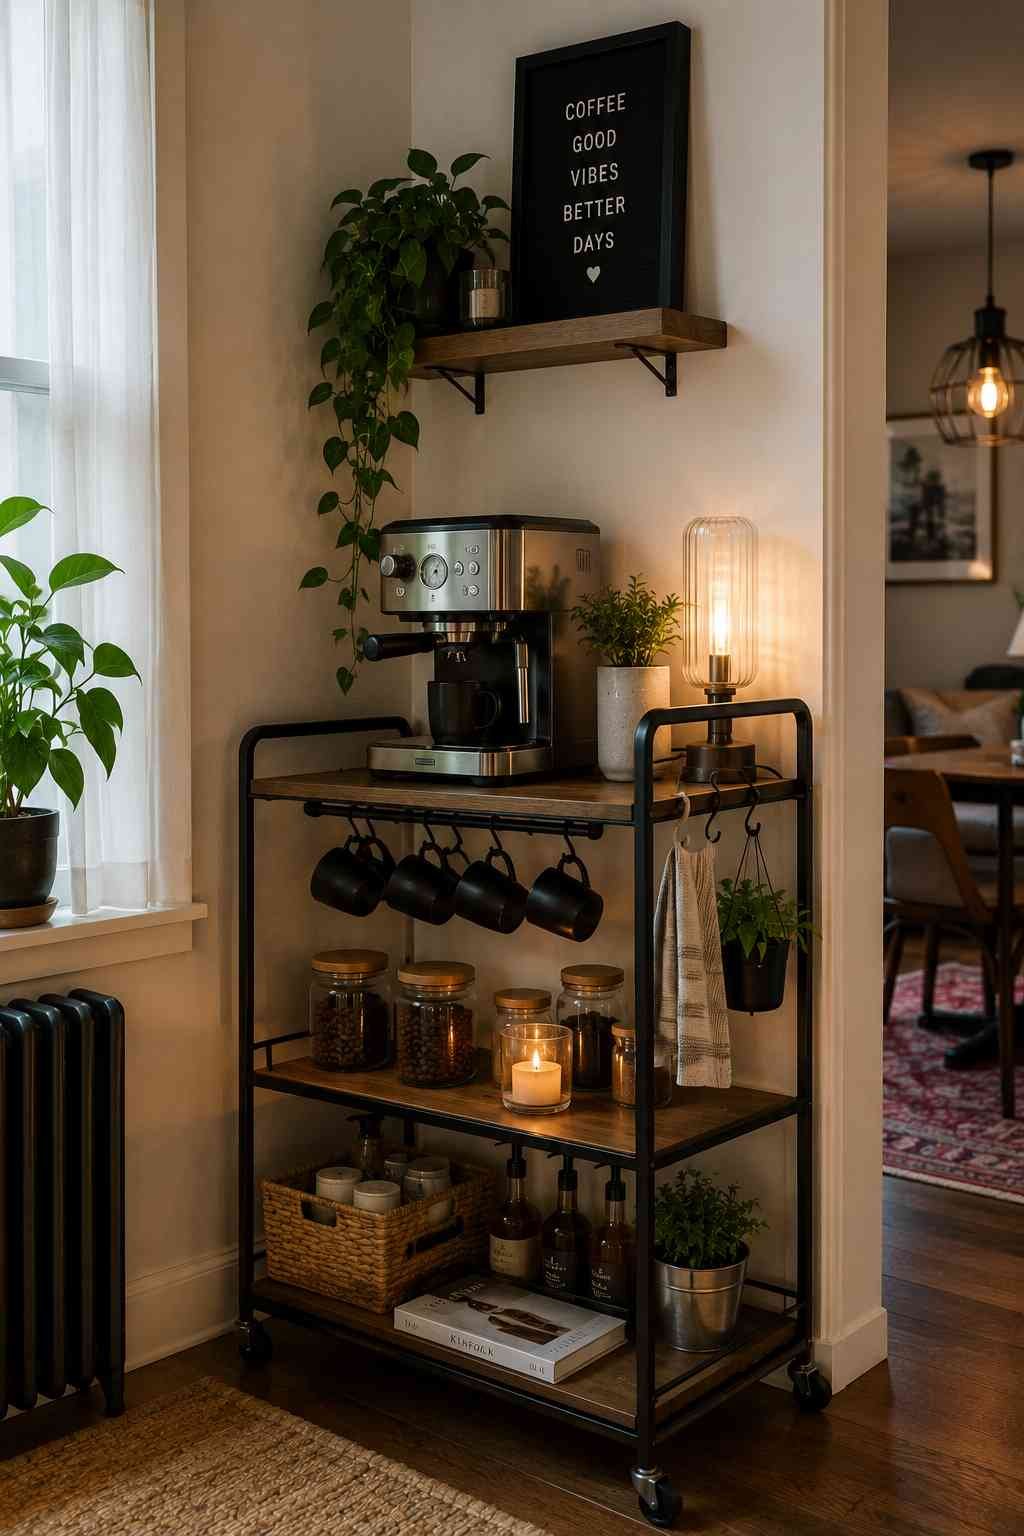
Budget: $60–250 | Best for: Open floor corner, renters
For kitchens with a genuinely awkward corner- one with no counter at all, just floor space beside a fridge or pantry- a bar cart solves the problem without any installation.
It’s fully mobile, which matters more than it sounds: rolling it out from the wall on weekends when you’re hosting, then tucking it back into the corner on weekdays, keeps the space multi-purpose instead of permanently dedicated to one appliance.
Designer tip: Pick a cart with a lower shelf rated for at least 15 lbs if you’re storing a bag of beans or a water reservoir there- many decorative carts are only rated for light display items.
6. Open Shelving with Glass Jar Storage
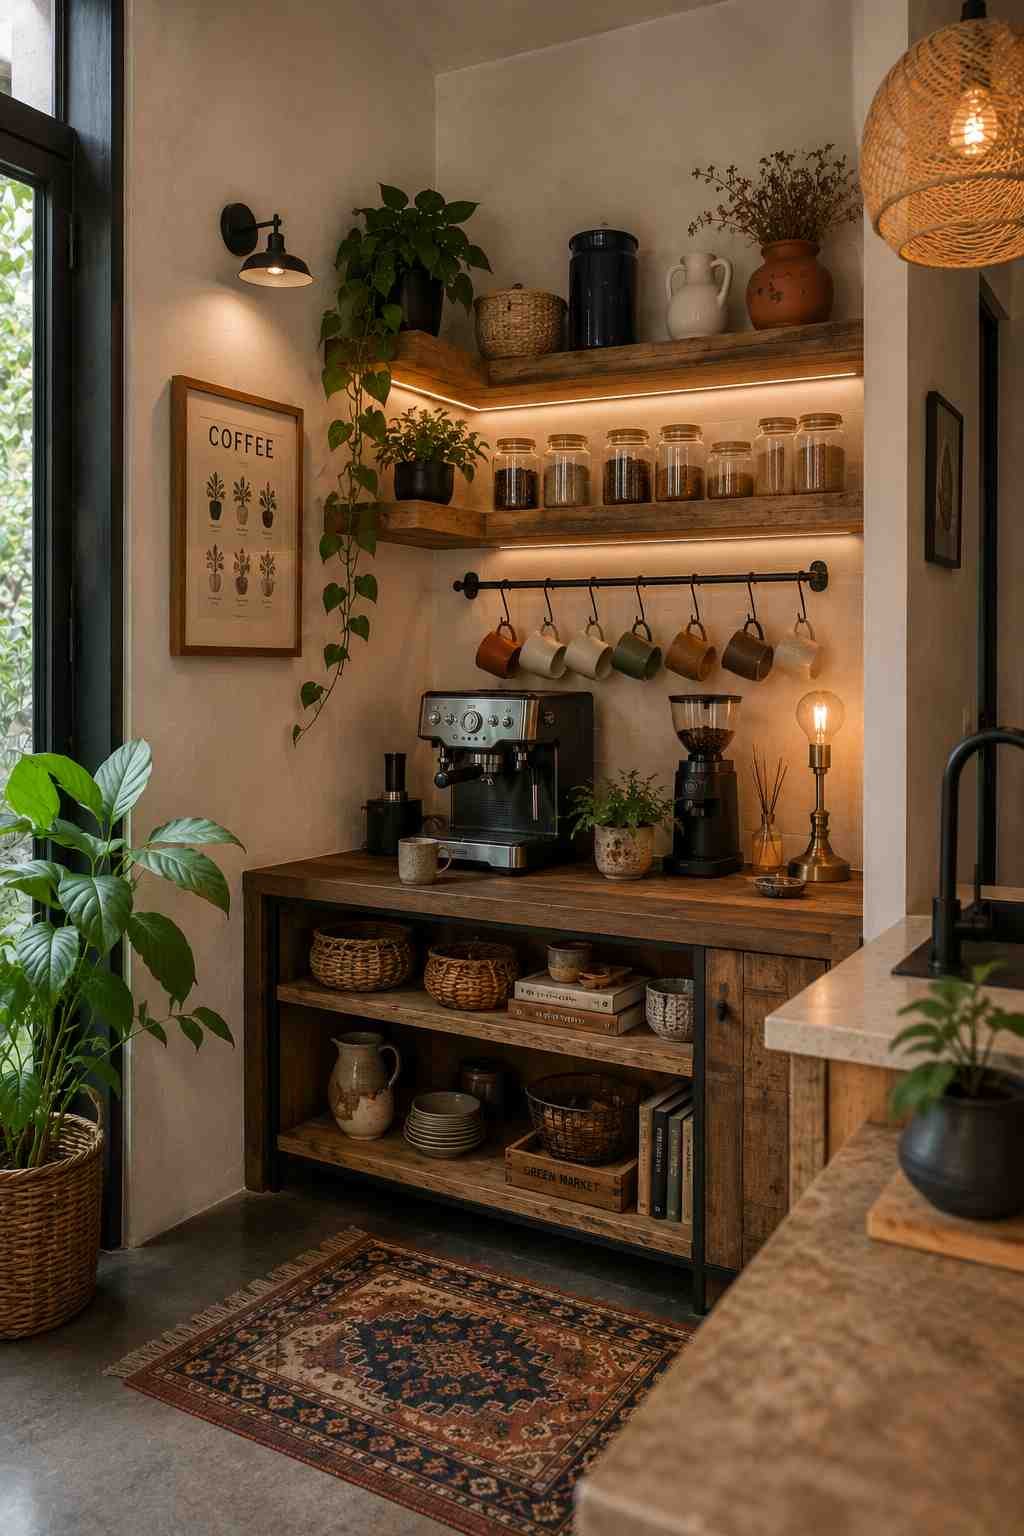
Budget: $80–200 | Best for: Standard L-corner
Swapping the cabinet doors above a coffee corner for open shelving, or simply adding a short run of open shelves if there’s no cabinet there, lets beans, grounds, and sugar double as decor when stored in matching glass jars.
This is where a coffee bar earns its keep as a decor feature rather than just a utility zone, since the jars themselves become the visual interest instead of needing separate styling objects.
Designer tip: Store beans in opaque or amber glass, not clear- direct light degrades roasted coffee’s flavor within about two weeks, even if the jar looks better clear on the shelf.
ALSO READ: 25 Sage Green Kitchen Ideas With Modern Design
7. Tile Backsplash Accent Zone
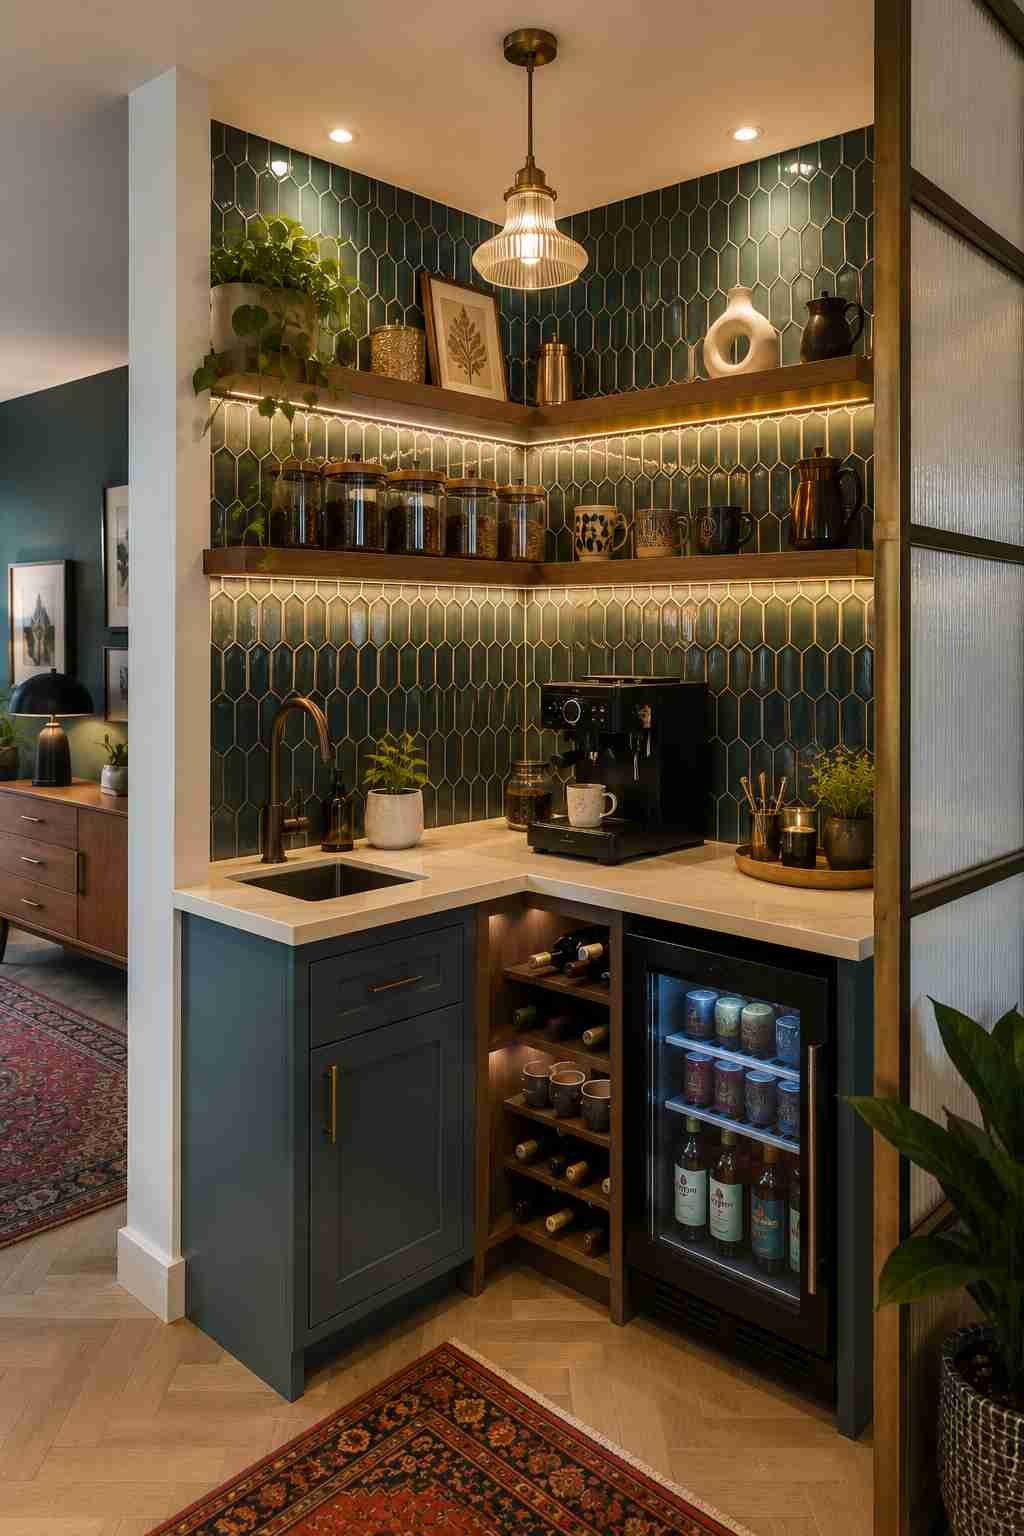
Budget: $150–500 | Best for: Any corner with a wall behind it
A contrasting tile backsplash, even just behind the coffee bar’s specific footprint rather than the whole kitchen wall- visually anchors the zone the way a rug anchors a seating area.
Zellige or subway tile in a color that breaks from the rest of the kitchen (a deep terracotta against white cabinetry, for instance) signals “this spot is different” without needing a sign, shelf styling, or clutter to do the work.
Designer tip: If you’re not ready to tile permanently, peel-and-stick tile backsplash panels rated for kitchen use are a genuinely solid renter-friendly stand-in and remove cleanly if installed over painted drywall, not raw plaster.
8. Mini Fridge Integration
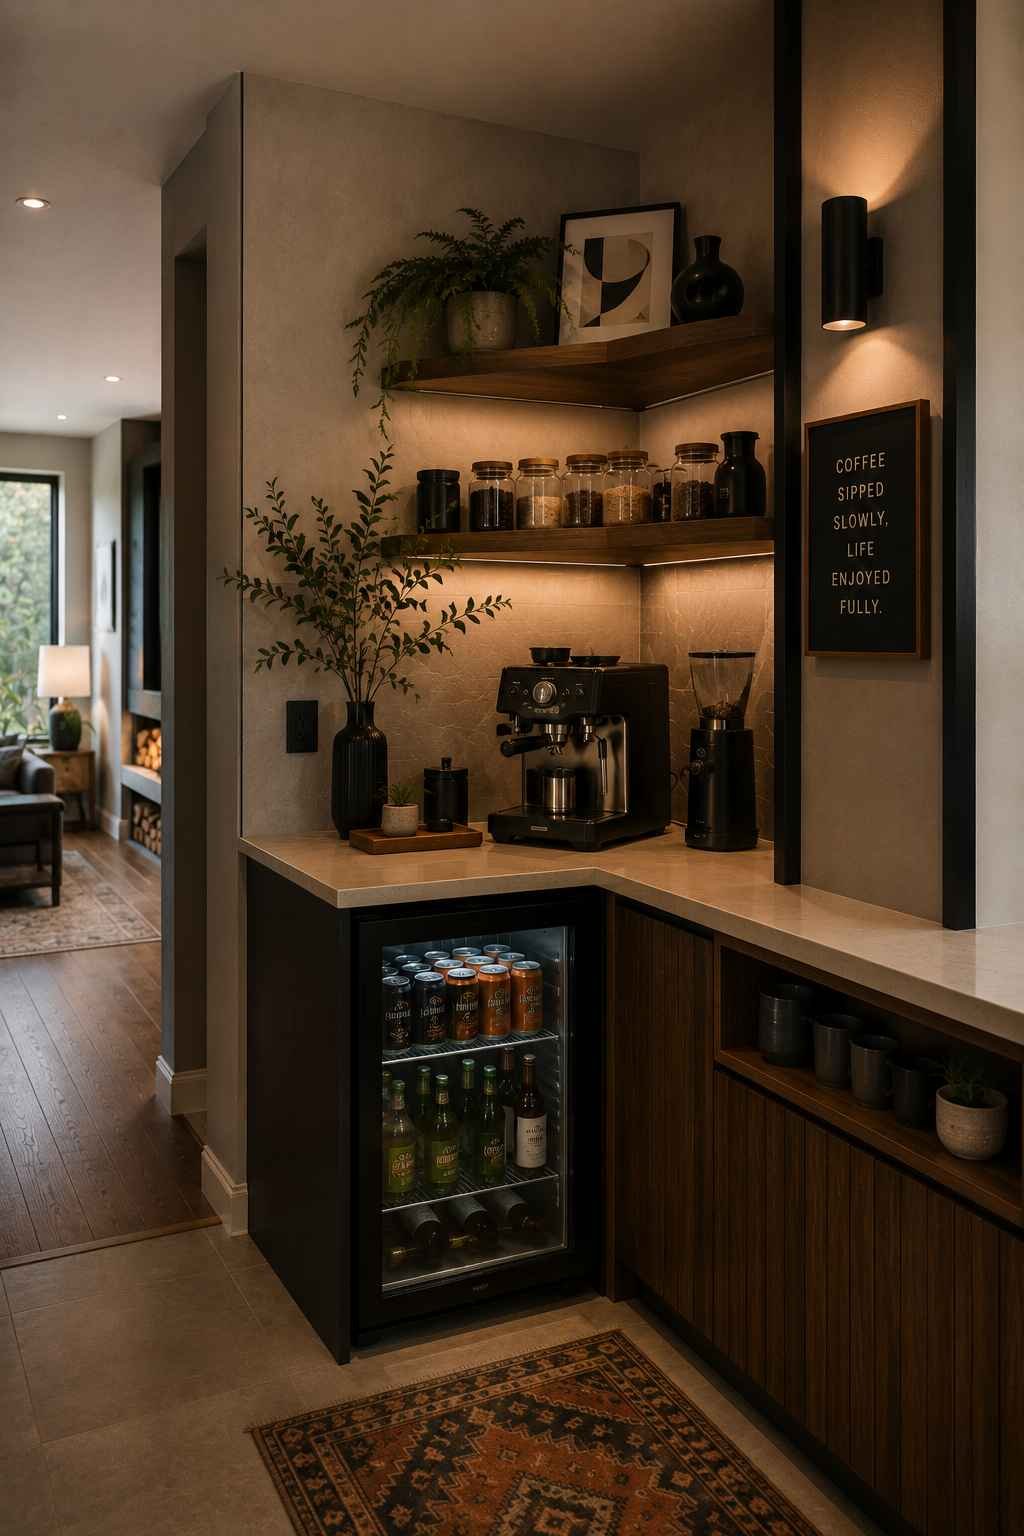
Budget: $150–350 | Best for: Deep corner near existing outlet
For households that use milk, oat milk, or cold brew daily, a slim mini fridge (many run as narrow as 15 inches) tucked into a deep corner removes the single most common friction point in a coffee routine: walking across the kitchen for milk mid-pour. It also frees main-fridge door space, which matters more than people expect once it’s gone.
Designer tip: Leave at least 2 inches of clearance behind and above a compressor-style mini fridge for ventilation — thermoelectric (quieter) models need less clearance if noise near a coffee bar is a concern.
9. Hidden Pocket-Door Coffee Cabinet
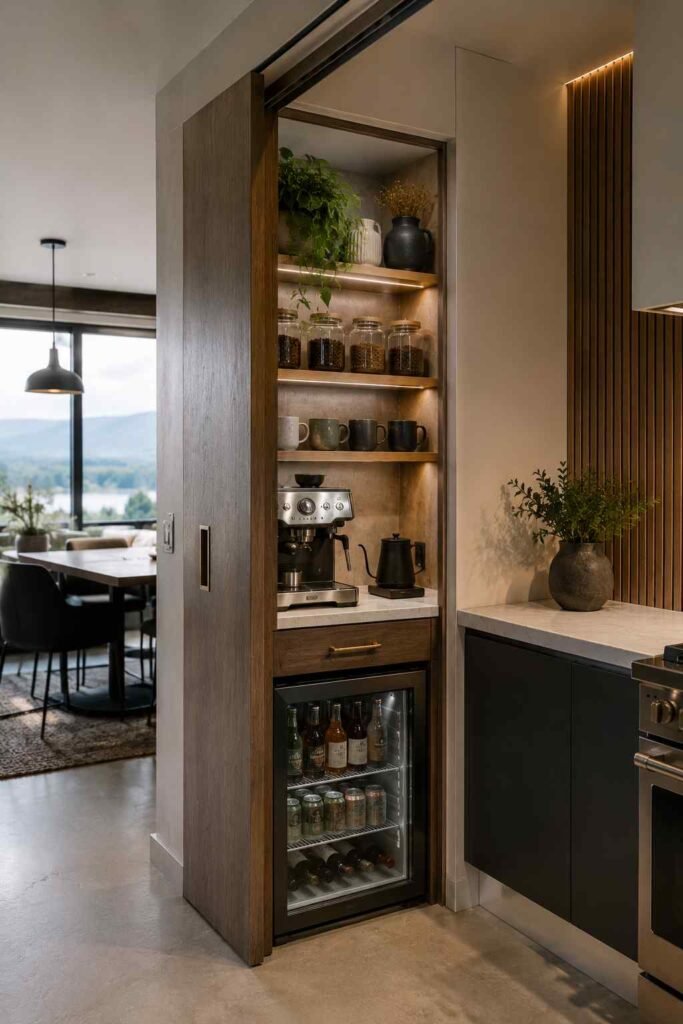
Budget: $300–900 | Best for: Standard L-corner, full renovations
An appliance garage, a cabinet with a tambour or pocket door that slides up and disappears rather than swinging open- is the classic solution for households that want the coffee bar’s function without it being visible when not in use.
The door slides back, revealing the machine already plugged in on a pull-out shelf, and slides forward again once the counter’s needed for something else.
Designer tip: Confirm the tambour door’s track allows for the machine’s height with the door retracted- some appliance garages are built to a 12-inch appliance height, and a taller espresso machine won’t clear it.
10. Pegboard Organization Wall
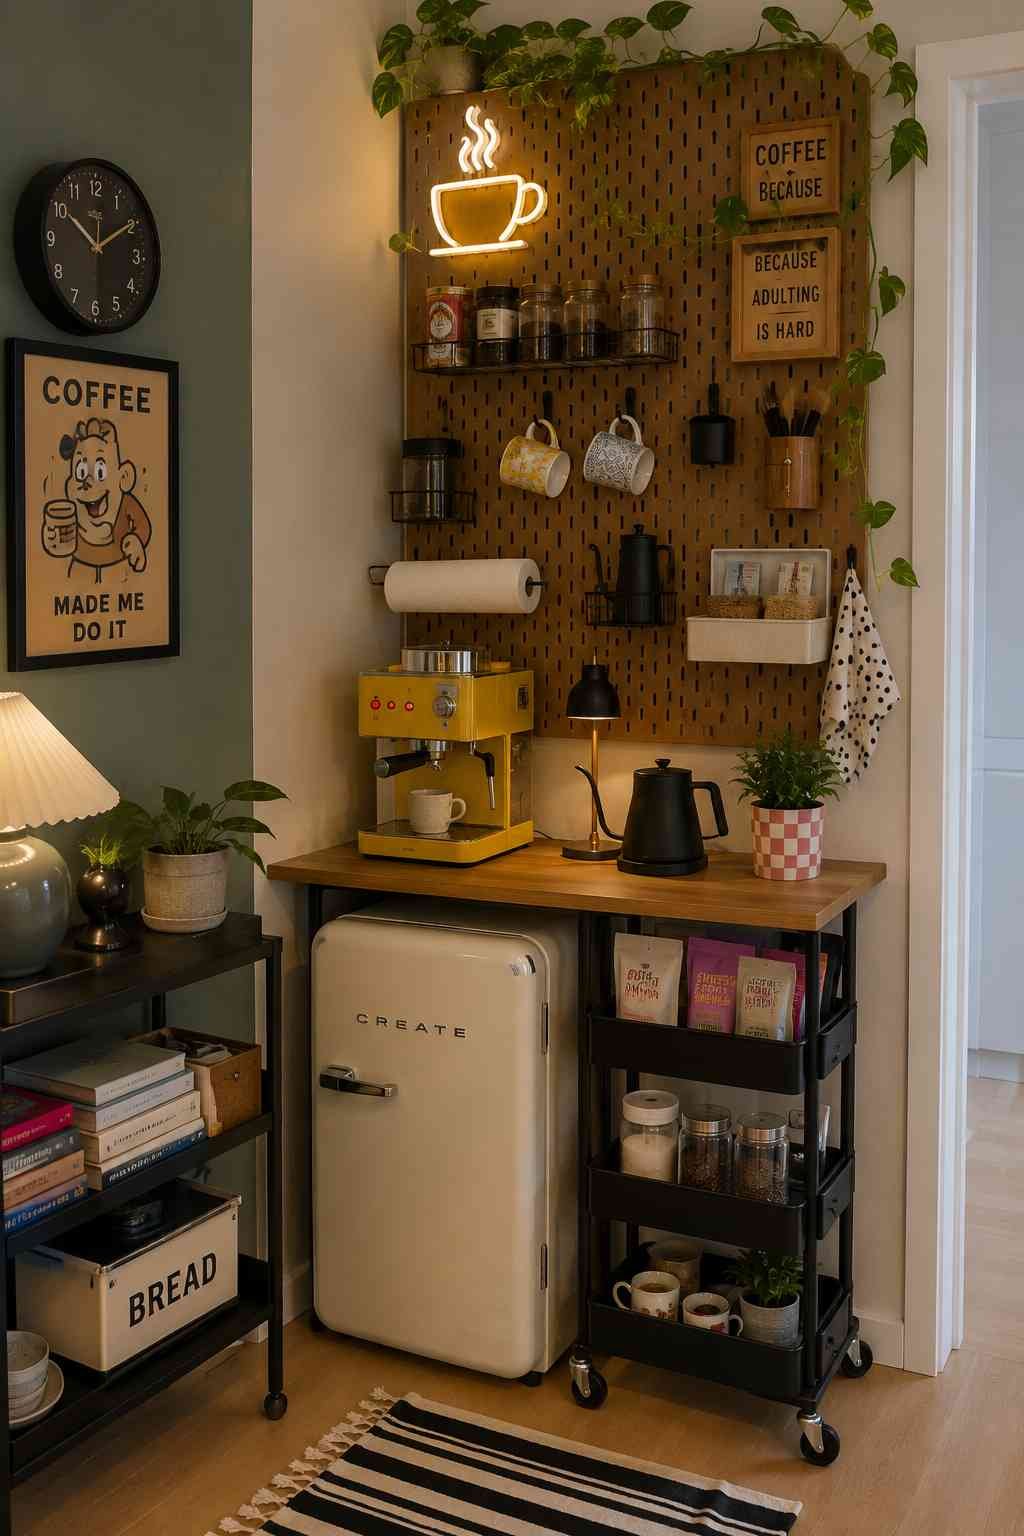
Budget: $50–150 | Best for: Narrow corner, renters
A painted pegboard panel mounted to the wall behind a narrow coffee corner turns vertical wall space into adjustable storage for mugs (on hooks), a small shelf for filters, and even a mounted grinder bracket- all without a single power tool beyond a drill for the initial mounting screws.
Because pegboard hole spacing is standardized, accessories can be rearranged as the setup changes, which matters for a zone that tends to evolve as habits change (adding a French press, dropping a machine that broke, and so on).
Designer tip: Paint the pegboard to match the wall color rather than leaving it raw — a painted pegboard reads as an intentional design choice, while raw pegboard reads as a garage workbench.
11. Corner Lazy Susan Coffee Station
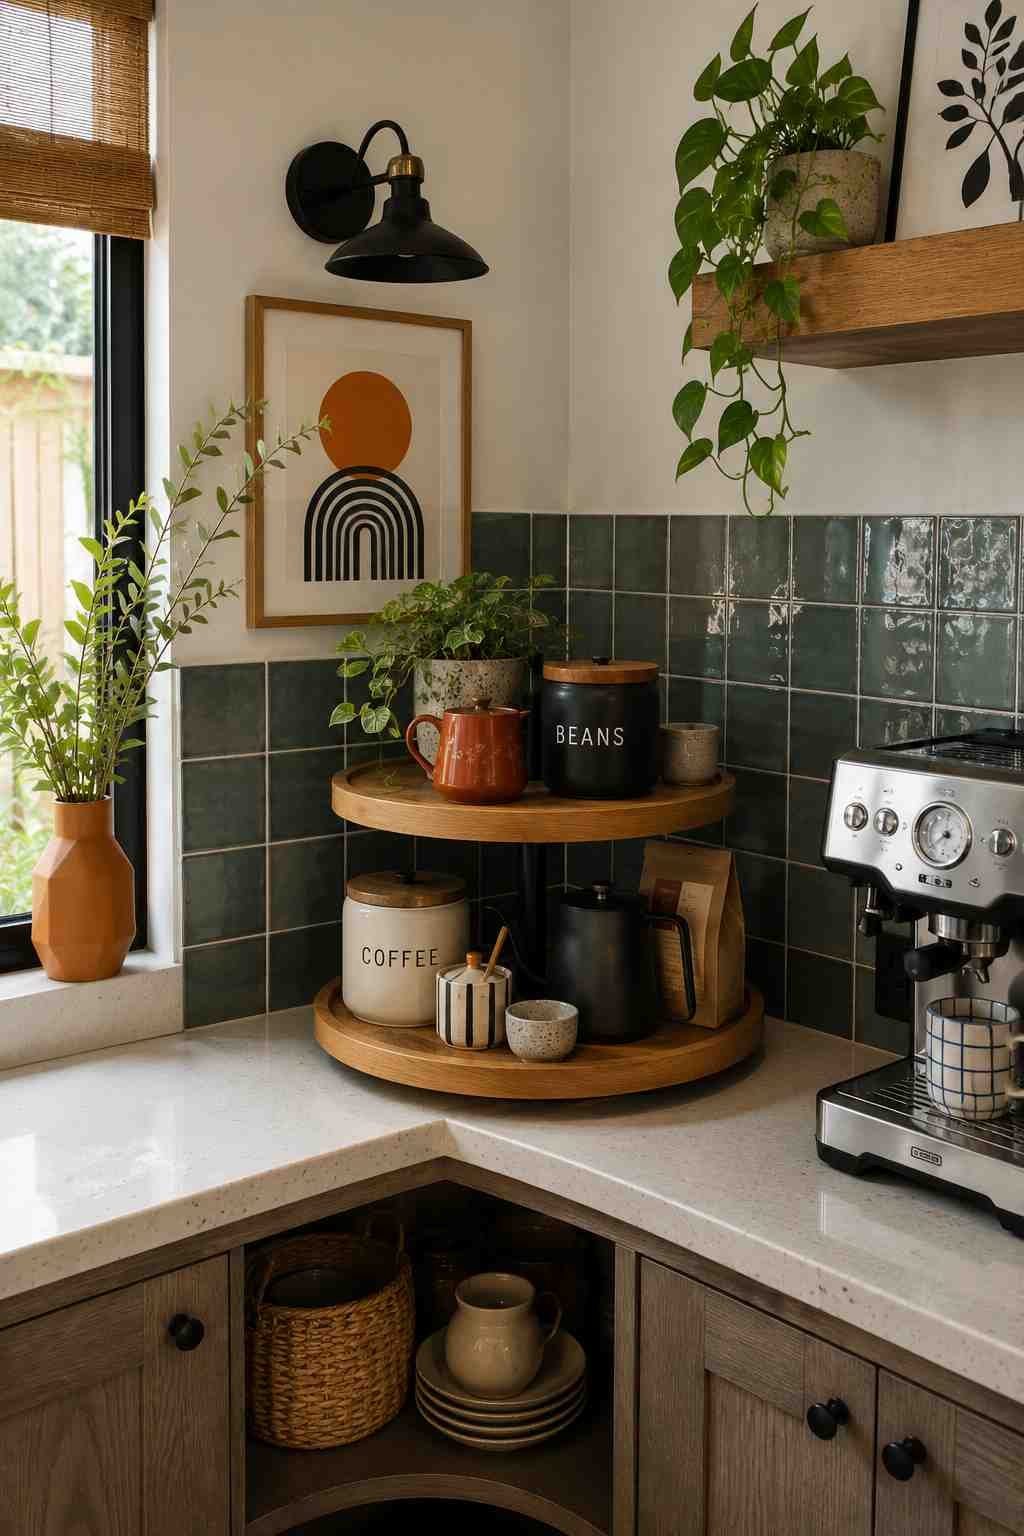
Budget: $30–80 | Best for: Standard L-corner, small households
A rotating lazy Susan tray, the kind usually sold for spice cabinets, works surprisingly well on an open corner counter: rather than reaching over or around equipment, everything spins to face you. This is a particularly good fit for genuinely tight corners where two people share a kitchen and need to access the same small zone from different angles across the morning.
Designer tip: Choose a tray with a raised lip if you’re placing bottles or a creamer pitcher on it — without one, anything unstable tips during rotation.
12. Wall-Mounted Drop-Leaf Counter
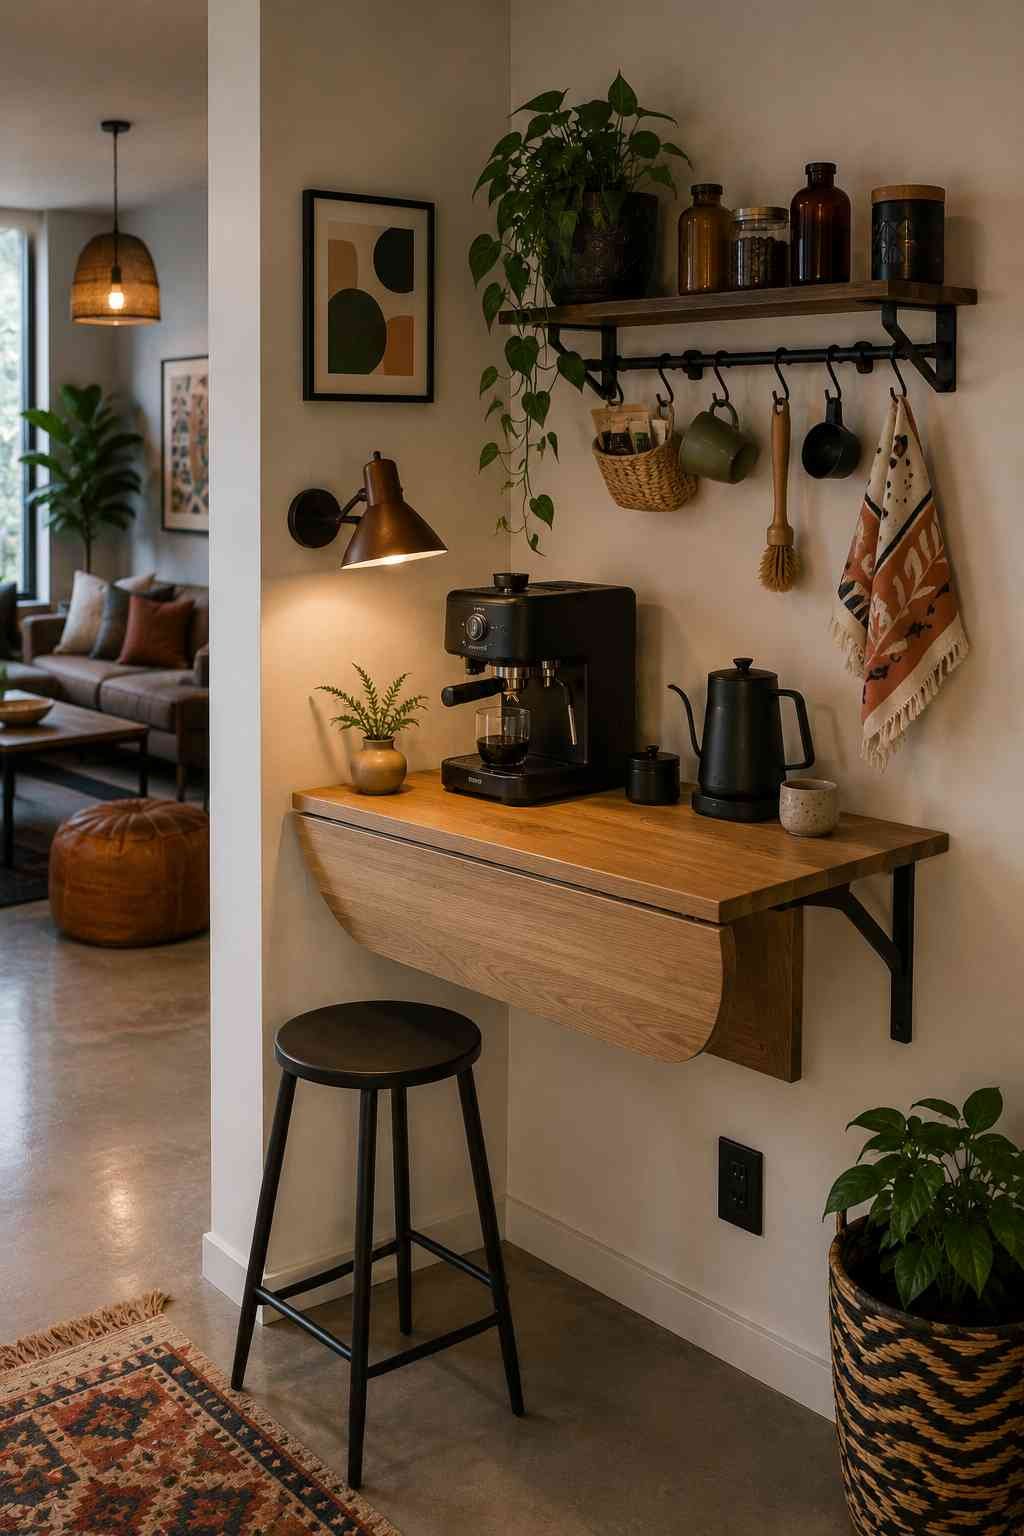
Budget: $100–300 | Best for: Open floor corner, small kitchens
In kitchens with no spare counter at all, a fold-down (drop-leaf) shelf mounted to the wall creates a coffee station that exists only when it’s needed and folds flat against the wall the rest of the time.
This is one of the few genuinely space-neutral solutions on this list- it adds function without permanently claiming floor or counter footprint, which matters in kitchens under roughly 80 square feet.
Designer tip: Support brackets should be rated for at least double the weight of your heaviest appliance plus a full water reservoir, drop-leaf brackets are the most common point of failure in this setup when undersized.
13. Copper and Brass Accent Styling
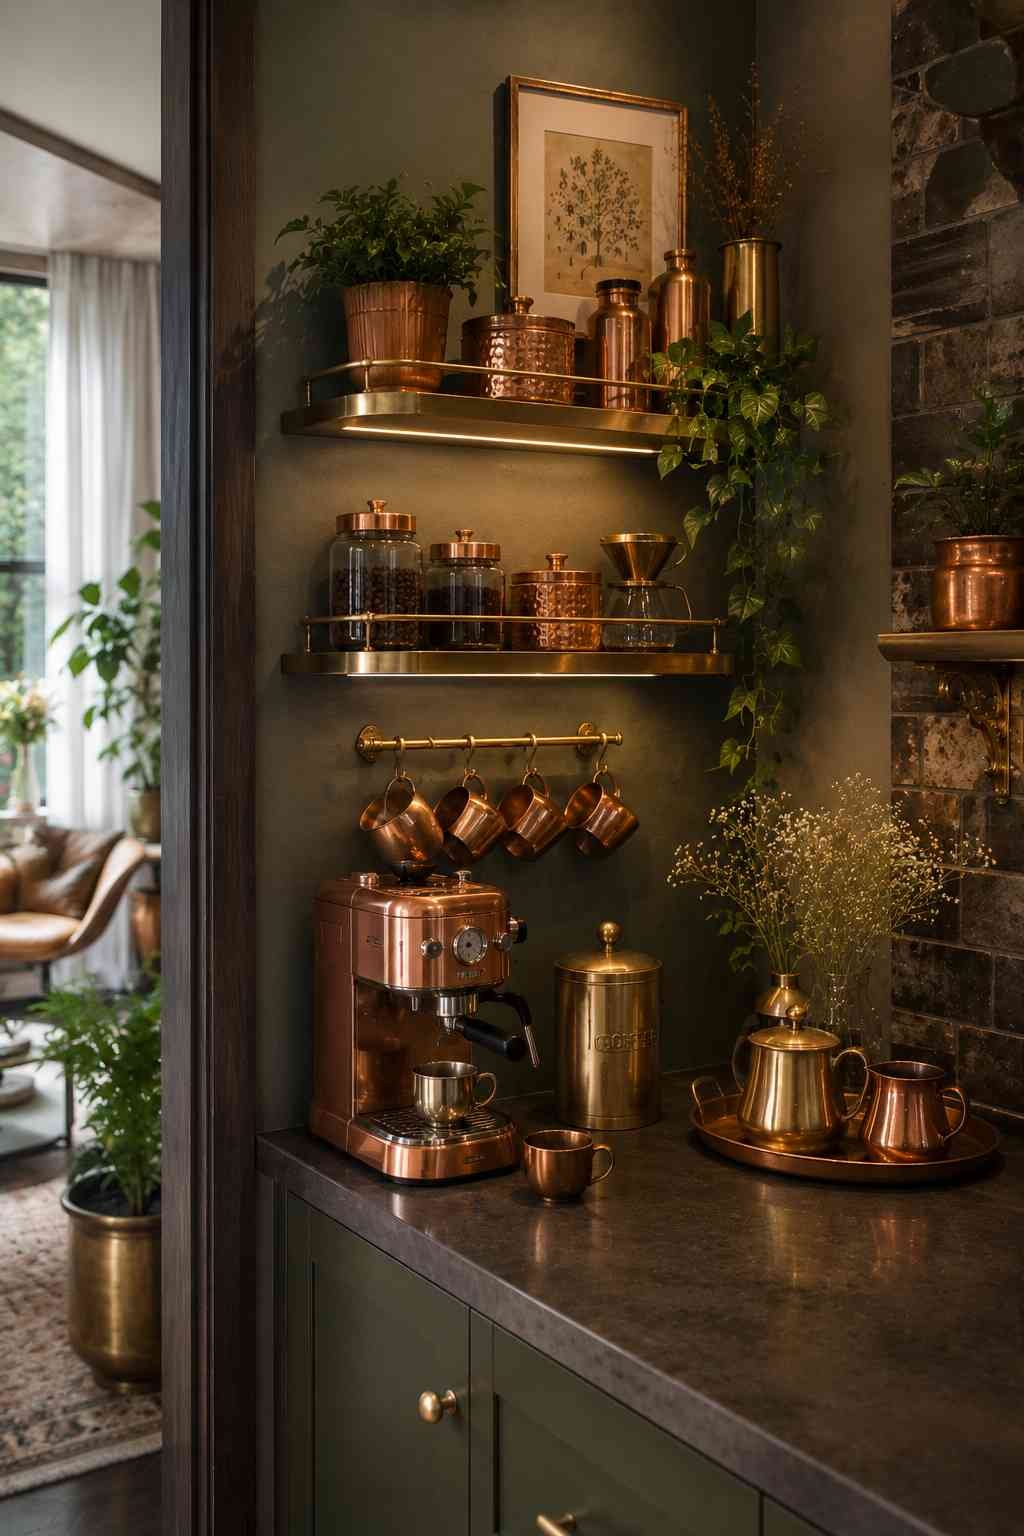
Budget: $40–150 | Best for: Any corner, styling-only
Independent of layout, the finish choice on canisters, a kettle, and cabinet hardware does most of the work in making a coffee corner look designed rather than assembled. Warm metals — copper, unlacquered brass, aged bronze — read as intentional against nearly any cabinet color, and they photograph well against both light and dark backsplashes, which matters if the corner is also going to anchor kitchen photos for a listing or a blog.
Designer tip: Mix no more than two metal finishes in one small zone — copper canisters with brass hardware work; adding chrome faucet trim into the same sightline starts to look uncoordinated rather than eclectic.
14. Plumbed-In Coffee Bar with a Water Line
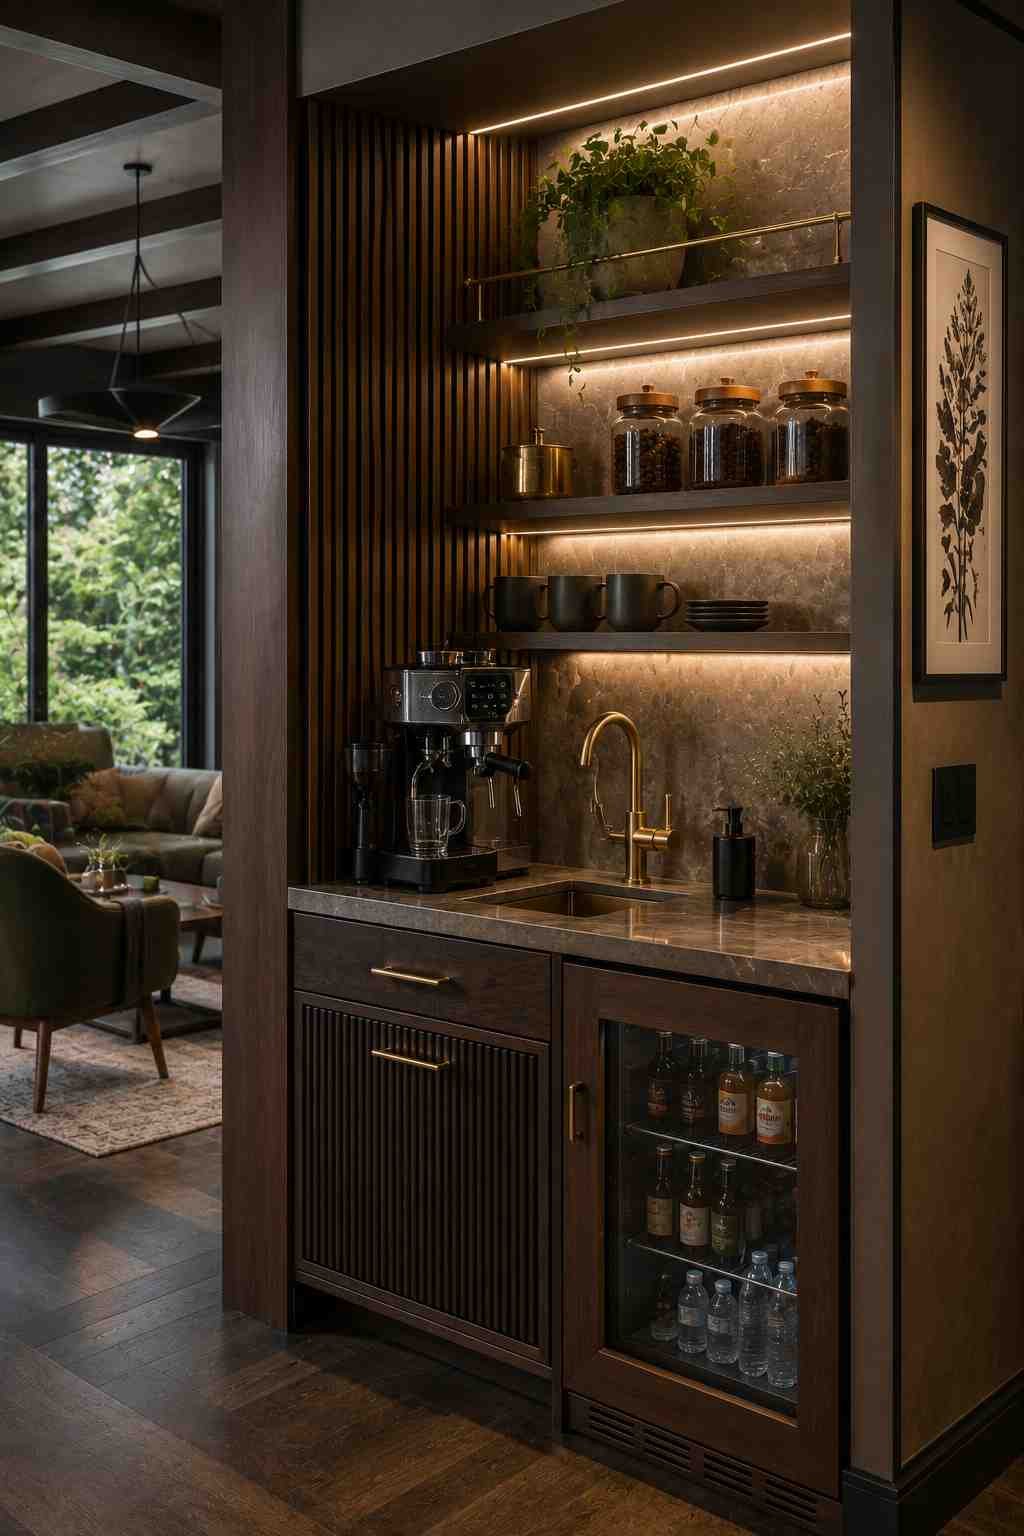
Budget: $400–1,500+ | Best for: Deep corner during renovation
For households renovating anyway, running a dedicated water line to the coffee corner — the same way a fridge’s ice maker is plumbed — supports a built-in espresso machine or hot water tap without ever refilling a reservoir. This is the most permanent option on this list and the only one that meaningfully involves a plumber rather than an electrician or a drill, so it’s worth planning during a full kitchen renovation rather than retrofitting alone.
Designer tip: Route the water line with an accessible shutoff valve inside the cabinet, not behind it — a valve that requires removing cabinetry to reach turns a five-minute repair into a half-day job.
15. Multi-Use Corner: Coffee, Tea, and a Home Bar in One
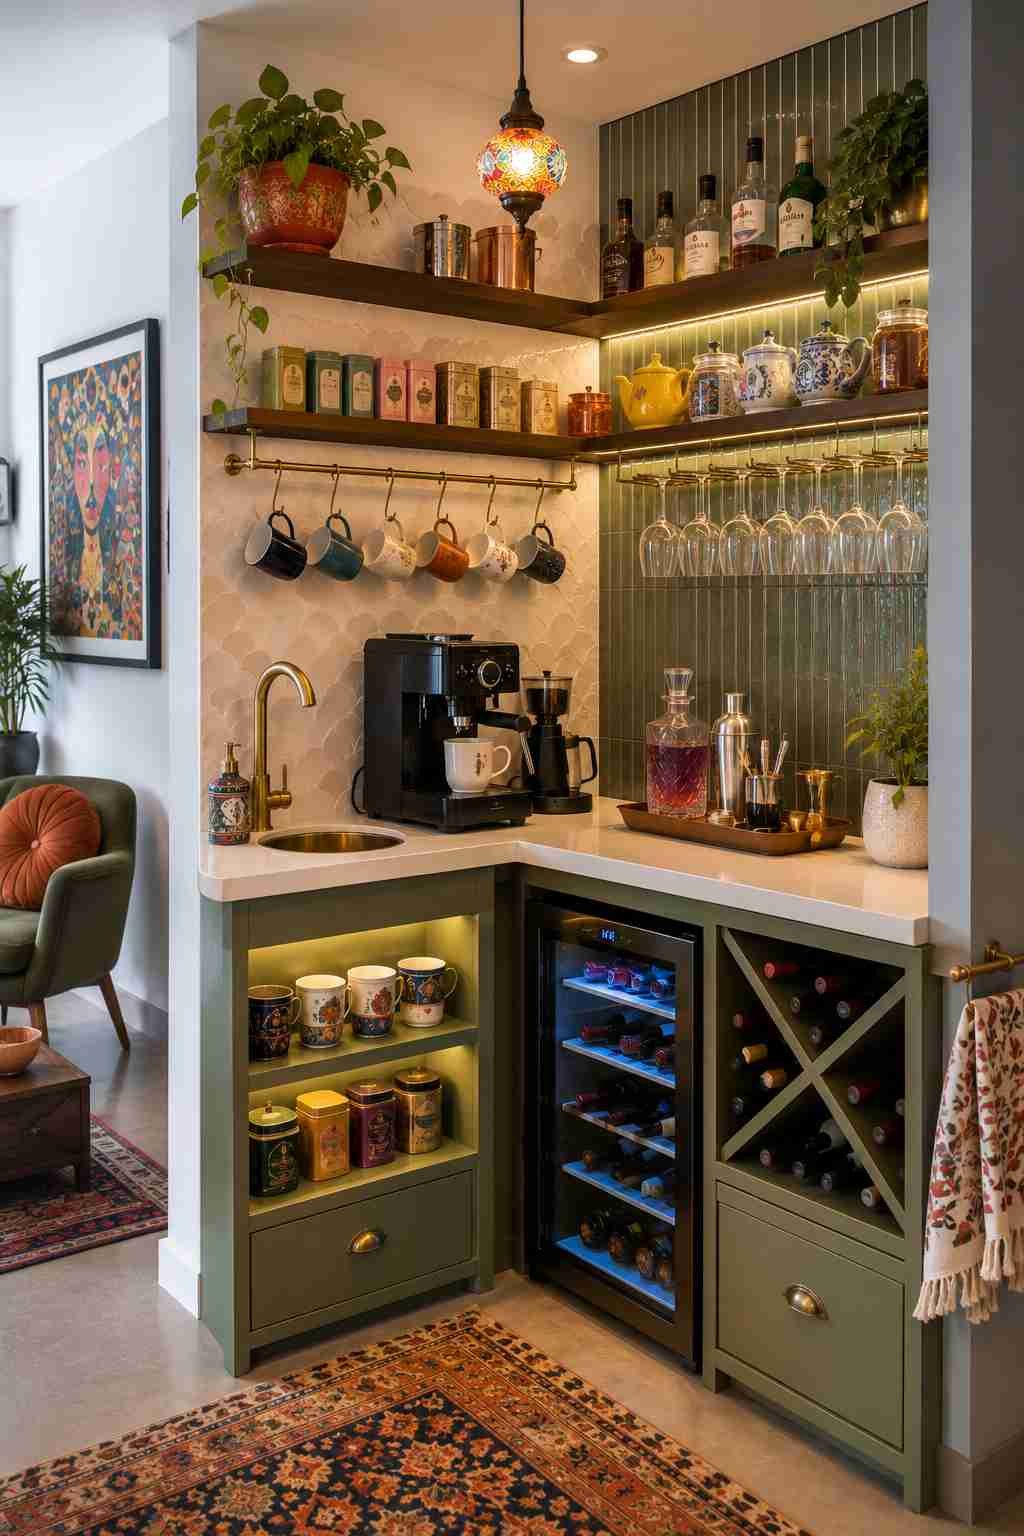
Budget: $100–400 | Best for: Deep corner, entertaining-focused households
Rather than dedicating a corner to coffee alone, combining it with tea supplies and a small selection of spirits or mixers makes sense in households that entertain — the same corner serves breakfast and evening drinks without needing two separate zones. The key to making this work without visual chaos is grouping by height rather than by category: short items (creamer, sugar bowls) in front, tall items (bottles, a kettle) along the back wall.
Designer tip: Use a single tray to define the ‘drinks zone’ within the shared corner — a tray boundary keeps a multi-purpose corner from reading as cluttered, even when it’s serving three different functions.
ALSO READ: 21 Blue and Grey Kitchen Design Ideas: A Practical Guide
Choosing a Style: How the Four Most-Requested Coffee Bar Looks Compare
Every idea above can be styled toward a few recognizable aesthetics.
This table compares the four styles I get asked for most often, so you can match an idea number above to a look rather than starting from a blank slate.
Table 2: Coffee Bar Style Comparison
| Style | Core Materials | Typical Cost | Maintenance | Pairs Well With |
| Minimalist | White oak, matte white, brushed steel | $$ | Low — few surfaces to clean | #1, #9, #13 |
| Farmhouse | Butcher block, open shelving, ceramic | $$ | Medium — open storage collects dust | #3, #6, #10 |
| Industrial | Blackened metal, pegboard, exposed brick/tile | $ | Low | #10, #7 |
| Scandinavian | Pale wood, white ceramic, brass accents | $$$ | Medium | #4, #13, #6 |
Budget Planning: What You Actually Get at Each Price Tier
Because this list spans a $25 riser to a $1,500 plumbed build-in, it helps to see the tiers side by side before picking a starting point.
Table 3: Coffee Bar Budget Tiers
| Tier | Price Range | What’s Included | Idea Numbers | Install Time |
| Starter | $25–100 | Riser, tray, or bar cart; no wall work | #4, #5, #11 | Same day |
| Renter-Friendly | $100–300 | Floating shelves, pegboard, peel-and-stick tile | #1, #7, #10, #12 | 1 weekend |
| Homeowner Upgrade | $150–600 | Butcher block, tiled backsplash, mini fridge | #3, #6, #8 | 1–3 days, may need an electrician |
| Renovation-Level | $400–1,500+ | Plumbed water line, appliance garage, built-in cabinetry | #9, #14 | Best done during a full remodel |
ALSO READ: 21 Glass Partition Ideas Between the Kitchen and Living Room
Coffee Bar Glossary: Equipment, Materials, and Layout Terms
A quick reference for the specific equipment and material terms used throughout this guide- useful if you’re comparing this list against product listings or searching for parts by name rather than by idea number.
- Espresso machine vs. drip coffee maker vs. moka pot vs. pour-over dripper vs. French press- five distinct brewing methods, each with different counter footprints and clearance needs, referenced across ideas #1–#9.
- Butcher block- an edge-grain or end-grain wood counter surface, distinct from a cutting board, used in idea #3 for its water and impact resistance.
- Tambour door/appliance garage- a rolling slat door (like a rolltop desk) used to conceal small appliances, referenced in idea #9.
- Zellige tile- hand-glazed Moroccan clay tile with an irregular, reflective surface, one option for the accent backsplash in idea #7.
- Lazy Susan- a rotating tray or shelf, historically used in cabinets, adapted here as an open-counter organizer in idea #11.
- NKBA (National Kitchen and Bath Association)- the industry body whose clearance and planning guidelines inform Table 1’s measurements.
Frequently Asked Questions
How much counter space does a coffee bar actually need?
A single-appliance coffee corner works in as little as 12-18 inches of width if you stack vertically (idea #1 or #4).
A multi-appliance station with a fridge or plumbed machine needs closer to 24–30 inches of depth and width, per Table 1 above.
Can I add a coffee bar without any renovation, as a renter?
Yes- floating shelves (#1), a bar cart (#5), a lazy Susan (#11), a drop-leaf shelf (#12), and pegboard (#10) all avoid permanent changes to cabinetry, plumbing, or wiring, and most come down cleanly at move-out.
Do I need a plumber for a coffee bar?
Only for a plumbed-in setup with a dedicated water line (idea #14) or a built-in ice/water dispenser. Every other idea on this list uses a standard outlet or no utilities at all.
Where should the outlet go for a coffee bar corner?
Within about 18 inches of the appliance’s footprint, ideally mounted so the cord doesn’t cross the counter’s main workspace. Under-cabinet or inside-cabinet outlets (idea #2) keep cords out of sight entirely.
How do I keep an open-shelf coffee bar from looking cluttered?
Group by height and store loose ingredients in matching opaque jars rather than original packaging (idea #6). A tray boundary, as described in idea #15, also helps define the zone’s edges.
What’s the most budget-friendly coffee bar idea that still looks designed?
A vertical riser (idea #4) or floating shelf (idea #1) paired with copper or brass accents (idea #13) gets a styled look for well under $150 total, without any wall or cabinet modification.
Bringing It Together
The corner you’re working with- narrow or deep, floor-only or full counter, rented or owned- narrows this list down fast.
Start with Table 1 to identify your footprint, cross-reference the budget tier in Table 3, and pick one idea rather than trying to combine several at once.
A coffee bar corner that does one thing well beats one that tries to be a coffee station, a bar, and a display shelf simultaneously and ends up looking like storage overflow instead.
If you build one of these, the detail that separates a good coffee corner from a great one is almost always the clearance planning in Table 1, not the styling.
Get the depth and outlet placement right first- the jars, the tile, and the brass accents are the easy part after that.
 Sumit Banerjee
[…] crammed together. If you’re planning a coffee setup somewhere else in the kitchen instead, this coffee bar corner ideas guide covers layouts that pair well with […]