

A window naturally does something no lamp can fully replace: it changes throughout the day. Morning light is cooler and more diffuse; afternoon light warms and angles lower, and by evening, the same corner needs an entirely different kind of light to stay usable. That shifting quality is part of why a spot beside a window becomes a favorite corner rather than just another chair in the room- it never looks quite the same twice.
It’s also one of the most overlooked pieces of usable square footage in an average home. The strip of floor directly under or beside a window is rarely wide enough for a full piece of furniture, so it tends to sit empty, collecting nothing but a stray plant or a pile of laundry waiting to be put away. Every idea in this guide is built around that exact strip of space — narrow, oddly shaped, and usually free.
Search “window reading nook ideas,” and you’ll get the same five suggestions on repeat across a hundred posts: add a cushion, hang fairy lights, put up a shelf. What’s usually missing is the part that actually matters in a real budget- what a cushion insert costs, what to do if your window has no ledge to sit on, and how to avoid drilling into a wall you don’t own. As an interior designer who’s set up small-space reading corners for clients working with genuine budgets, not styled-for-photos ones, I wanted a list that’s actually usable: specific sourcing, specific costs, and ideas that are about this exact kind of corner rather than generic room styling with a window nearby.
ALSO READ: Corner TV Unit Setup: The Complete Guide to Transforming Your Living Space
Plan This Like a Designer Before You Buy Anything
The projects below work best when you spend five minutes on the space itself before shopping for it. Skipping this step is the most common reason a reading nook stops getting used within a month of being styled.
Measure before you choose a seating style
Note the width beneath your window, the depth of any ledge, and the floor space available to either side. A window with less than a foot of ledge depth won’t comfortably fit a sitting cushion on the sill itself- that’s a floor-nook or bench situation, not a windowsill cushion. A wide, deep ledge can go either way; a narrow one narrows your options fast, and knowing that before you buy anything saves a return trip.
Watch how the light actually moves through the room
Spend one full day noticing when direct sun hits the window and for how long. A window that gets several hours of harsh afternoon sun needs a glare plan, idea #10, more urgently than one with brief, gentle morning light. If you’ll mostly use the nook after dark, prioritize the lighting idea over the seating upgrade; a beautiful cushion in a dim corner still doesn’t get used.
Decide how you’ll actually use the space
A nook built purely for reading needs less than one built for reading, plus laptop work, plus morning coffee. If you’ll use it for more than one activity, budget a small side surface early rather than trying to add one later once the seating has already claimed most of the space.
Where to Actually Find These Materials
Half of what makes these ideas cost under $50 is knowing what to search for, not just where to shop. A general trip to a thrift store with no plan tends to come up empty; a specific search term almost always turns something up within a week or two.
| Idea | Search this exact term | Where |
| Drawer ledge | “antique drawer” or “damaged dresser” | Flea market, thrift store clearance bin |
| Papasan cushion | “papasan cushion only” (not “papasan chair”) | Facebook Marketplace, OfferUp |
| Ladder shelf | “wooden ladder shelf” or “blanket ladder” | Thrift store, estate sale |
| Suitcases | “vintage suitcase” or “train case” | Flea market, estate sale |
| Cinder blocks | any hardware store, sold individually | Hardware store |
| Sari/scarf | “vintage sari” or “silk scarf lot” | Thrift store, secondhand textile sellers |
| Blackout panel | “blackout curtain” — condition “good” only | Thrift store, Marketplace |
13 Window Reading Nook Ideas Under $50
1. Build a Floor Nook Instead of Waiting for a Window Seat
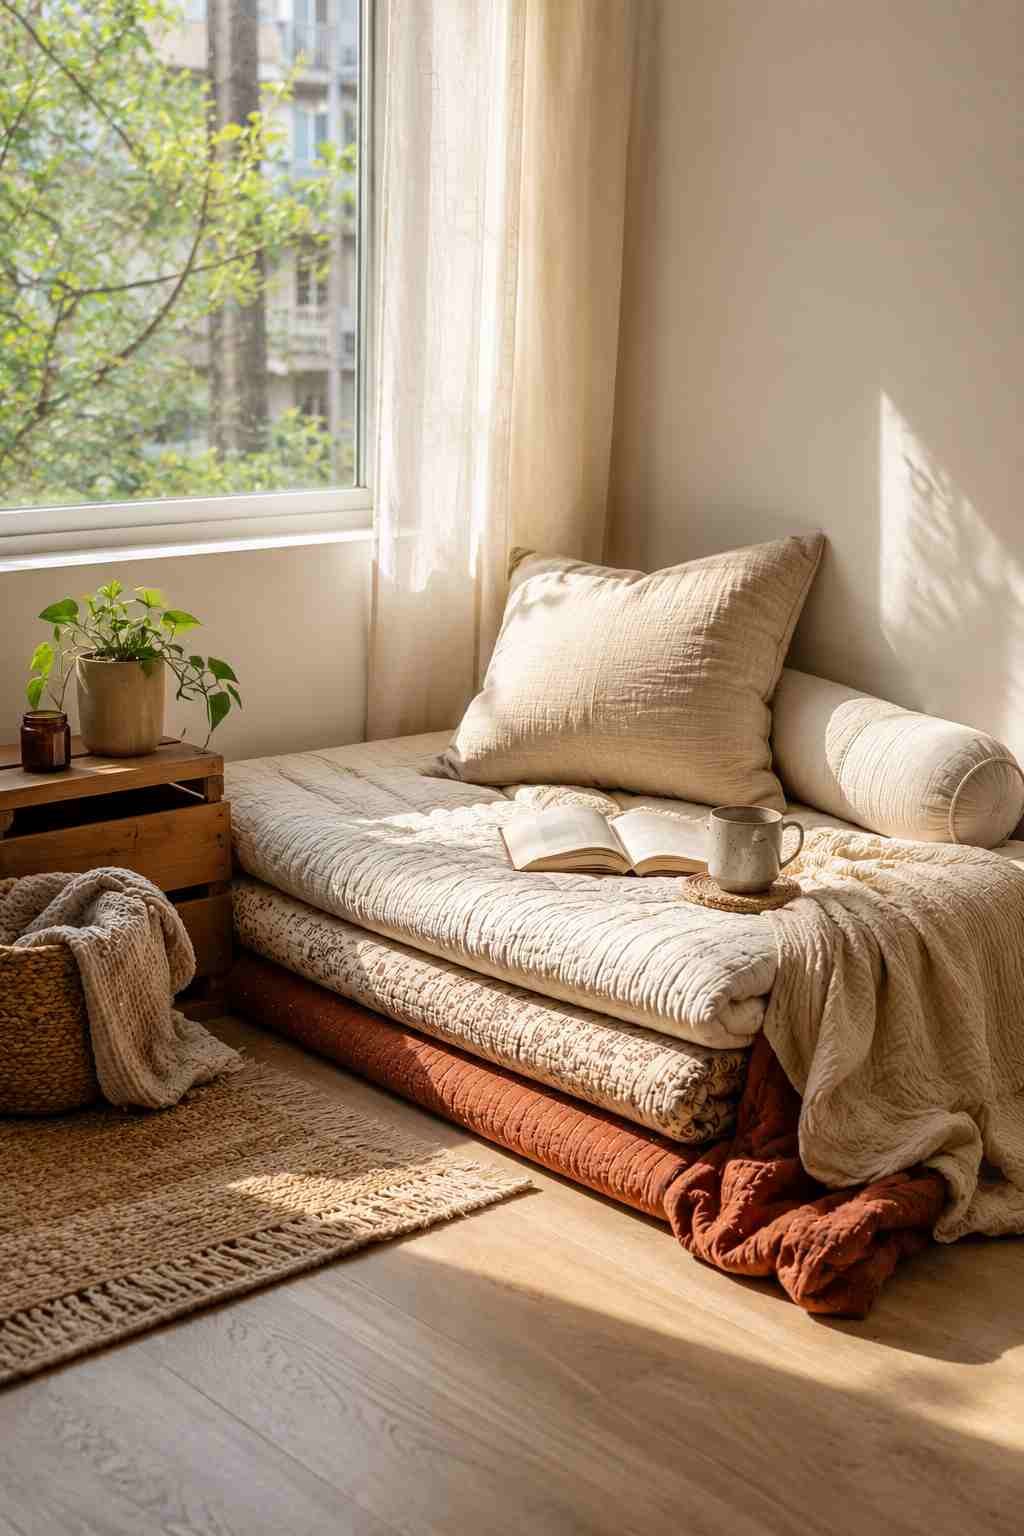
Most window-seat advice assumes you already have one. If your window sits flush with the wall, the honest fix isn’t a carpenter- it’s floor seating, stacked with intention rather than dropped in a heap. Layer two or three quilts of slightly different weights and tones directly under the window, then anchor the pile with a single bolster so it holds its shape rather than sprawling.
The layering is what separates this from “I gave up and put a pillow on the floor.” Tonal variation between the quilts reads as collected, not matched, and low seating pulls the eye straight to the window light instead of competing with it. This also happens to be the single best idea on this list for a first-time apartment, because it requires no tools, no measuring, and no commitment- you can rebuild it in a different corner the same afternoon if it doesn’t work where you first tried it.
If you want it to hold up past the first week, choose your bottom quilt for structure (a denser cotton or kantha weave) and save the softest, most textured piece for the top, where it actually gets seen and touched.
Budget: A thrifted quilt runs $5–8, so two or three plus one $10–15 bolster keep this between $10 and $39- often less if you’re using bedding you already own.
2. Turn a Salvaged Drawer Into a Floating Book Ledge

This one takes an extra trip to a flea market, which is probably why it’s rare, but it’s a genuinely different shape from another flat shelf. Find an old dresser with a solid wood drawer (thrift stores often sell single drawers from broken units cheap) and mount it sideways beneath the window on two brackets, interior facing up.
The raised front lip of the drawer does something a flat shelf can’t: it holds books, a small trailing plant, or a candle without anything sliding off, and the visible dovetail or box joints at the corners give it a handmade quality a new shelf won’t have. If you’d rather not drill, skip the brackets and just rest the drawer on top of a low secondhand side table pushed under the window- same effect, no holes.
Sand only the top edge and the inside base lightly before use; leave the outer sides with their original finish intact. A drawer that’s been oversanded loses the aged character that makes this idea work in the first place.
Budget: A salvaged drawer costs $10–20, brackets $6–10, so budget $19–35 depending on whether you mount or rest it.
3. Drape a Sheer Scarf Over a Tension Rod
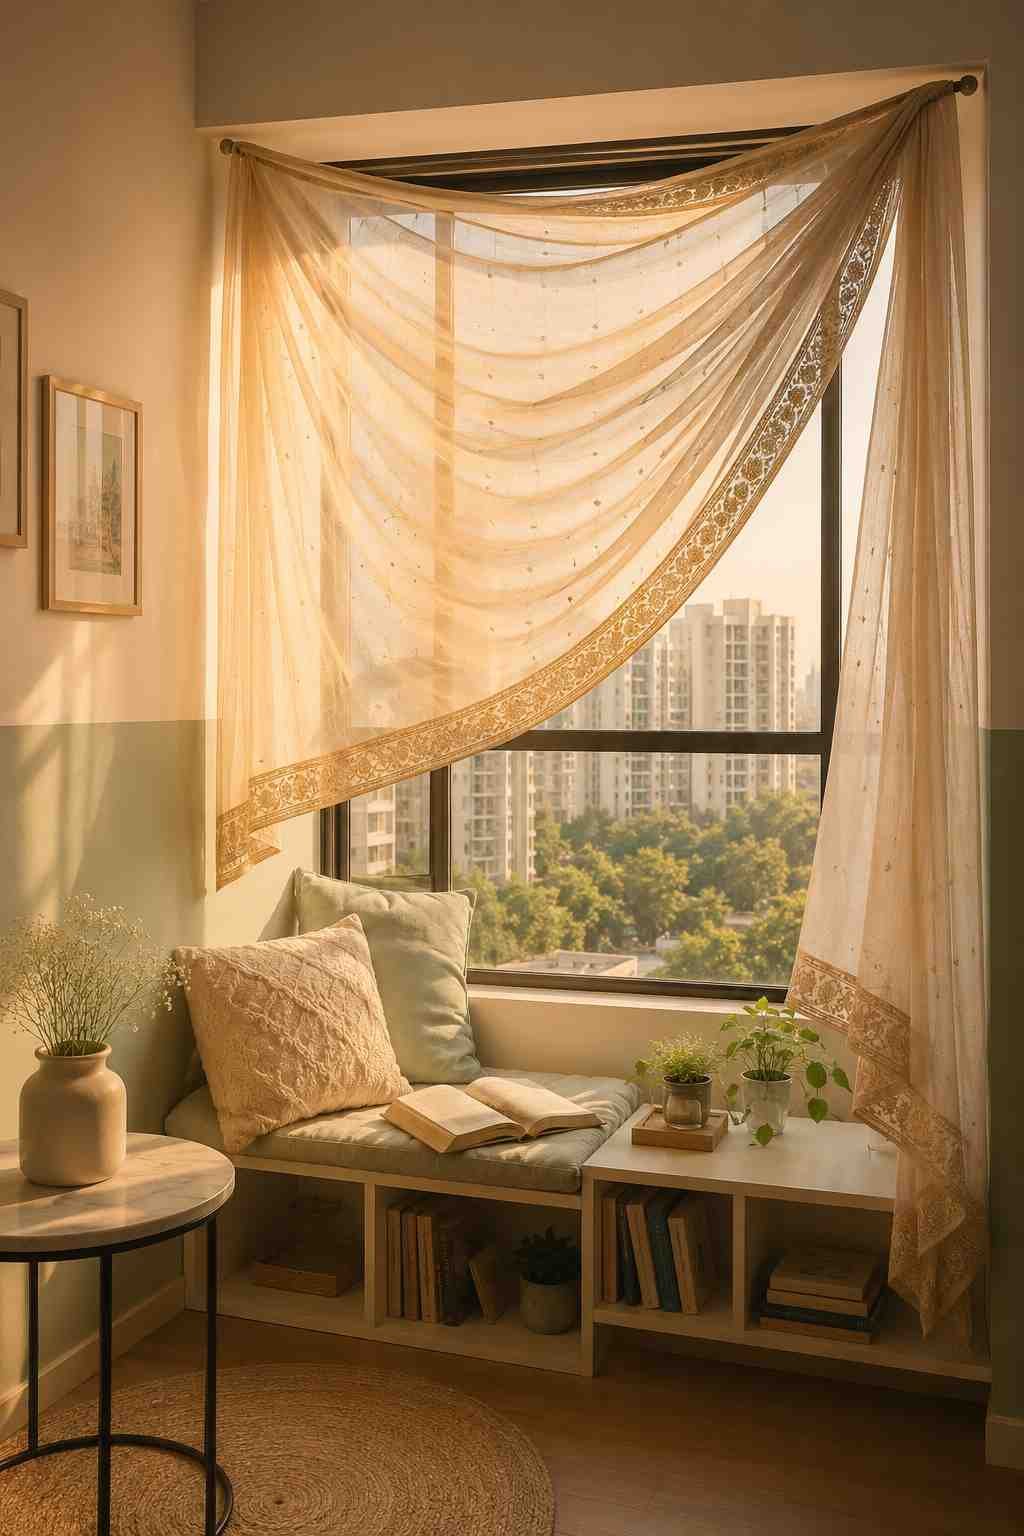
A ready-made canopy curtain kit runs $40–70 before you’ve added anything else. A tension rod and a single secondhand sari, dupatta, or wide sheer scarf get you the same soft, draped effect for under half that – and it looks sourced rather than boxed.
Mount the rod inside or just above the window frame, drape the fabric loosely across the top, and let the two ends fall unevenly rather than symmetrically. That asymmetry is what keeps it from reading as a plain curtain doing canopy duty. A sari with a visible woven or embroidered border works especially well here, because the border naturally frames the bottom edge of the drape without you having to hem anything.
Test the drape for a day before committing – sheer, lightweight fabric billows more with airflow near a window, which some people love, and others find distracting during actual reading. If it moves too much, tuck one corner behind the rod to anchor it.
Budget: Tension rod: $8–12. Secondhand fabric: $5–15. Total: $13–27, and since tension rods grip by pressure, there’s nothing to patch when you move out.
4. Build a Low Bench from Painted Cinder Blocks and a Reclaimed Plank
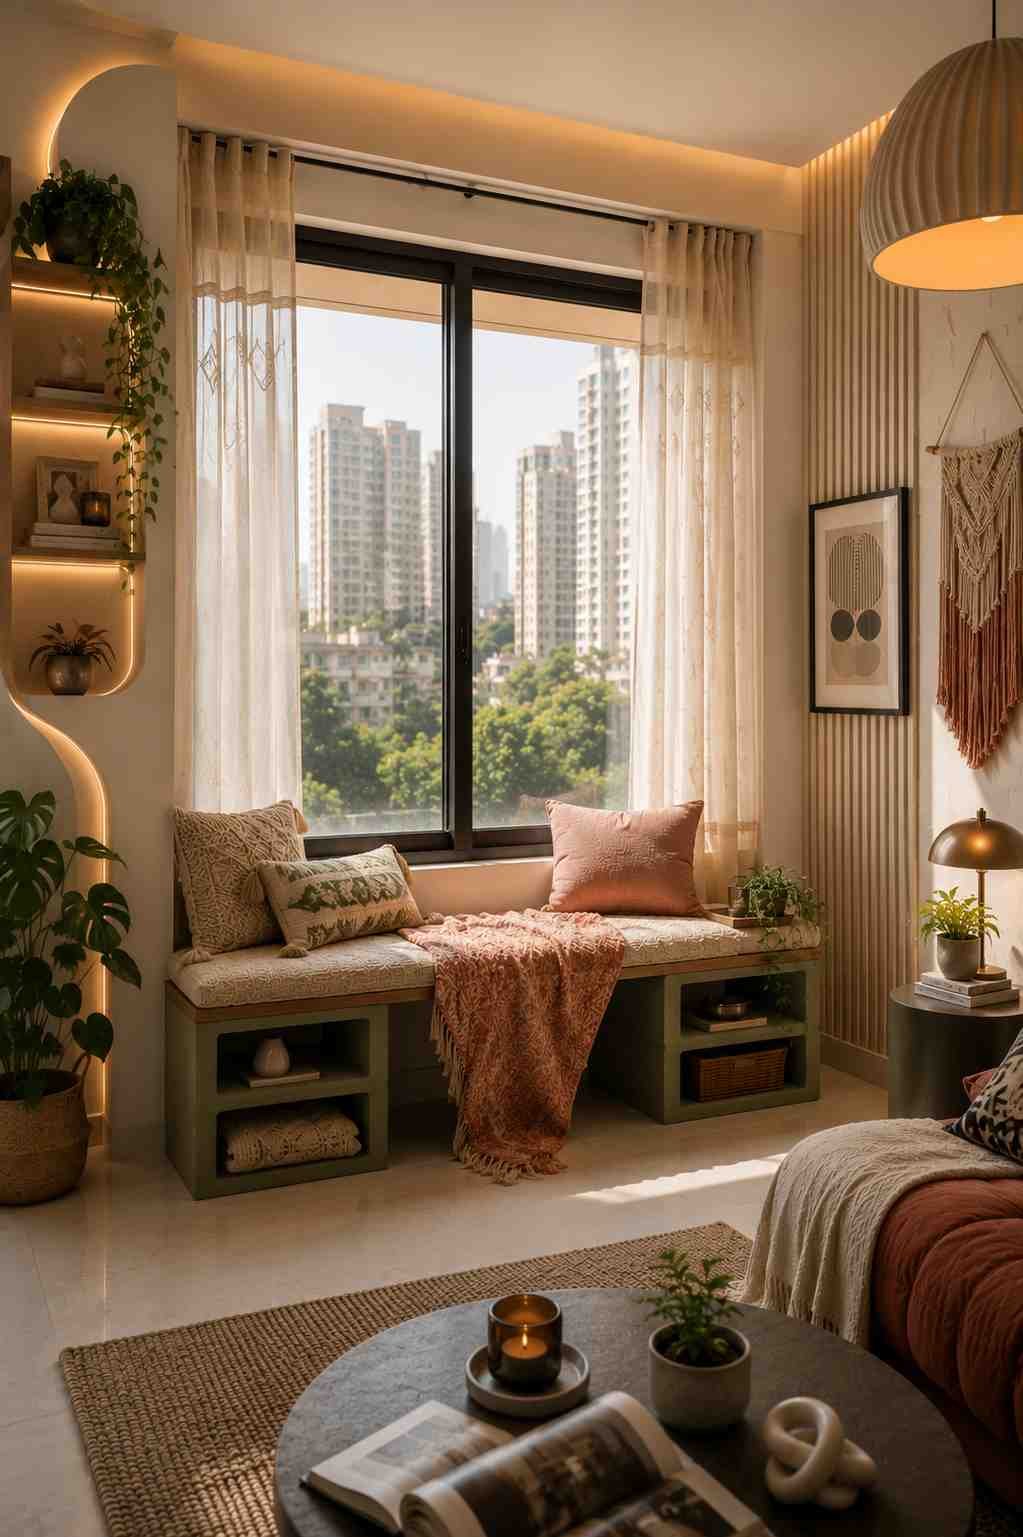
If your landlord doesn’t mind a freestanding piece, two painted cinder blocks and a plank cut to your window’s width give you real seating height and open storage underneath for very little money. Most hardware stores will cut a plank to size for free or for a couple of dollars, which is worth asking for before you buy any tools.
The detail that keeps this from looking like leftover construction material: paint the blocks a color pulled from your existing decor instead of leaving them raw concrete. A matte finish in warm white, terracotta, or deep sage reads as designed; glossy paint on cinder block tends to look like a patio project that wandered indoors.
Use the open cavities inside the blocks, not just the space underneath the plank — a rolled blanket or two paperback stacks slide neatly into the block holes themselves, which most people walk past without noticing as usable storage.
Budget: Two blocks: $2–4. Plank, cut to size: $12–18. Sample pot of paint: $6–8. Total: roughly $20–30, and it’s heavy enough to skip anchoring entirely.
5. Lay a Wooden Ladder Shelf on Its Side as a Backrest
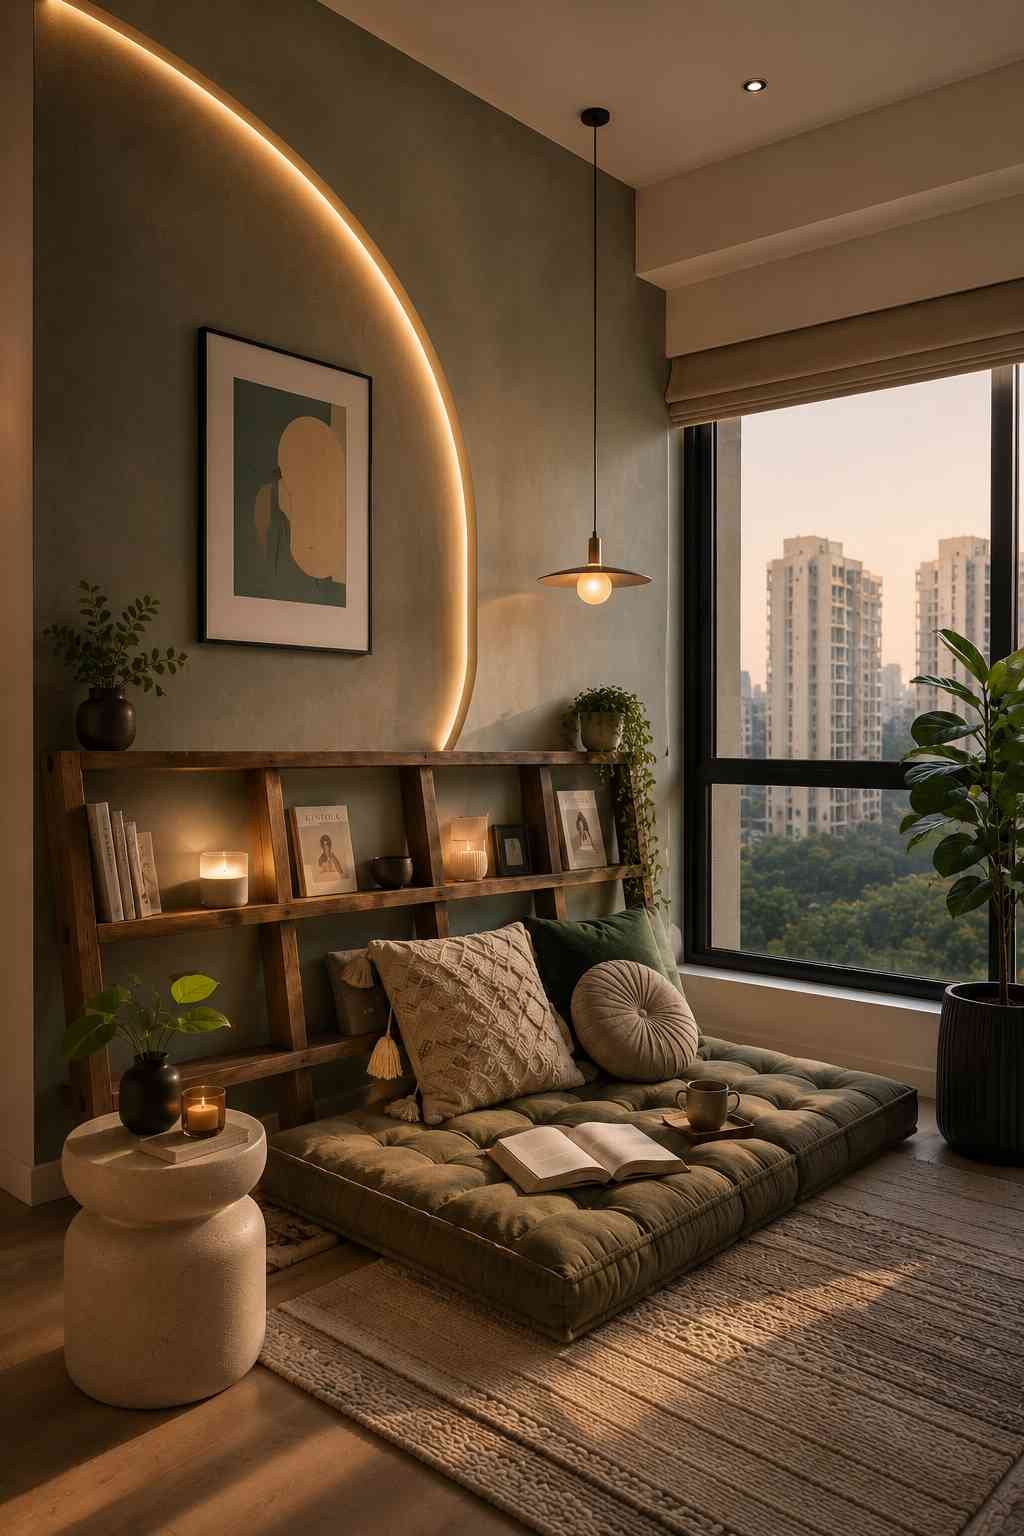
A ladder shelf standing upright is common enough decor at this point. Laid flat against the wall under the window, it becomes something else – a slatted backrest for a floor cushion, with each rung doubling as a narrow display spot for a book or a candle. Same object, unfamiliar use, which is exactly what makes it worth photographing.
Choose a ladder with rungs spaced at least four inches apart; anything tighter won’t hold a book upright without it slipping through. Weathered or raw wood works better here than a painted or lacquered ladder — the texture reads as intentional against soft cushions, where a glossy finish looks accidental.
This pairs particularly well with idea #1, the floor nook — the ladder becomes the backrest for the quilt stack, turning two budget ideas into one finished-looking corner for under $60 combined.
Budget: A secondhand ladder shelf runs $15–28. Lean it rather than mount it — the cushion in front holds it in place, and it lifts away in seconds.
6. Mount One Narrow Picture Ledge Instead of a Full Bookshelf
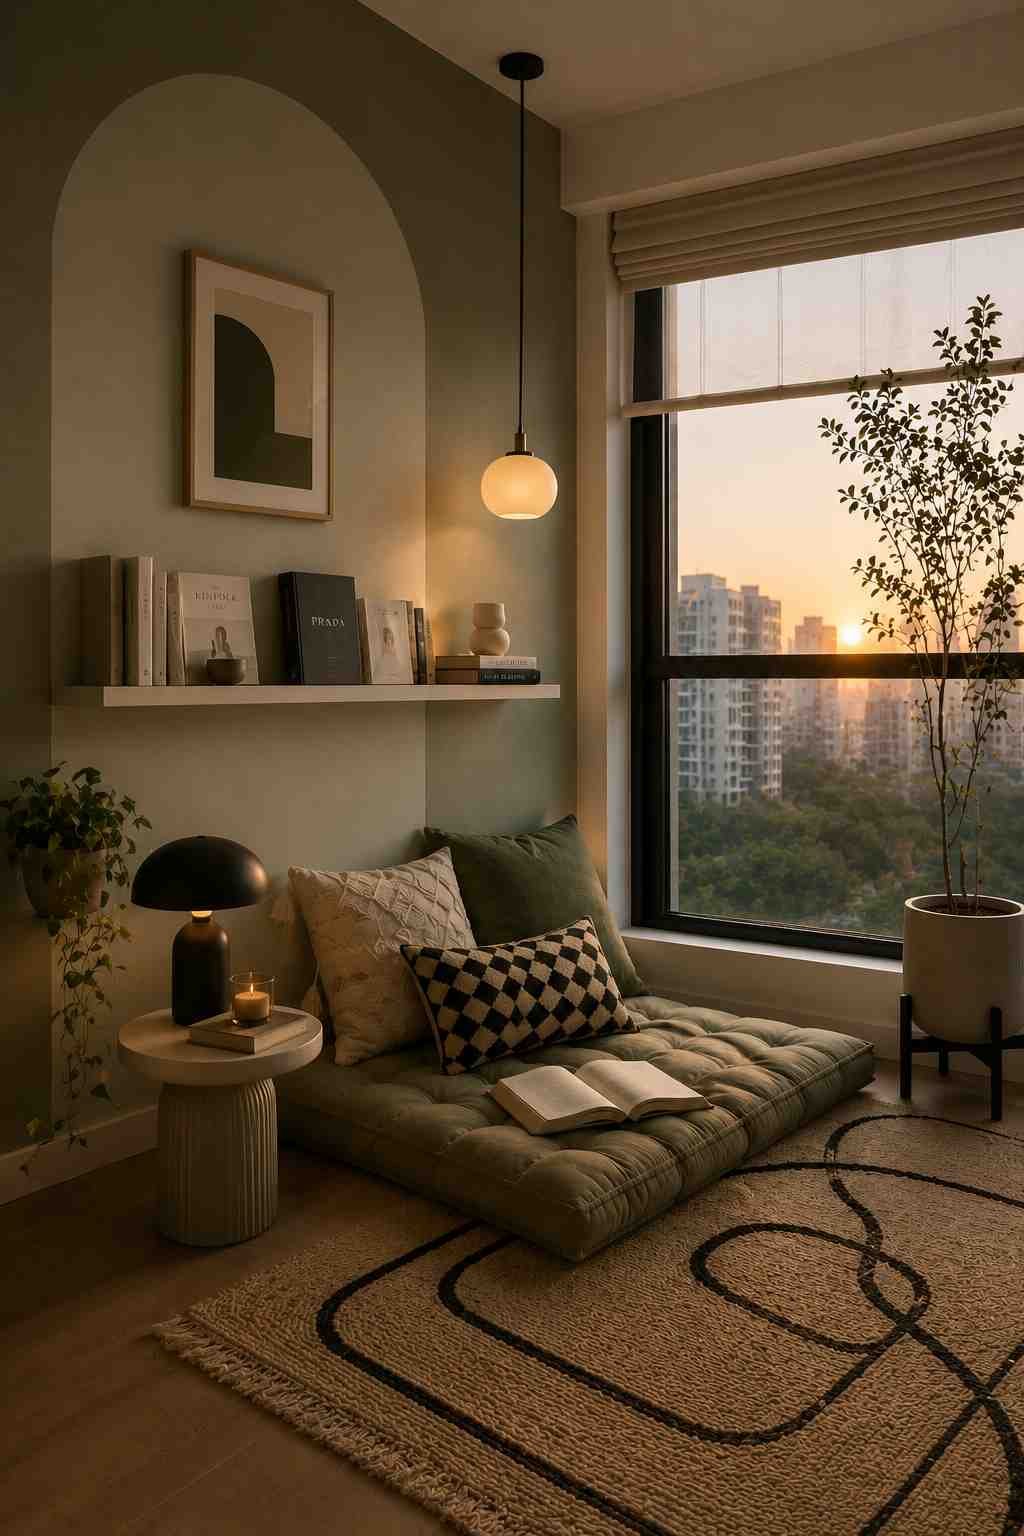
A full floating bookshelf changes the proportions of a small nook and eats up the wall space you need for light. A single narrow picture ledge — sold for framed art, not books- holds five or six curated titles without visually crowding the window, because it’s shallow rather than deep.
The part most people skip: rotate what’s on it every season instead of trying to fit your whole to-read pile. Five books look intentional. Twelve crammed books look like the overflow shelf finally gave out. Mix orientations – two or three books spine-out, one stack laid flat with a small object on top, rather than lining every title up the same way.
Position the ledge at a height you can reach without standing up fully from the nook. Most people mount these too high, which turns a reading ledge into a display shelf you never actually use.
Budget: One or two ledges (12–24 inches) run $12–18 each, so $12–36 total. Weight-rated adhesive strips (most hold 5–7 lbs) skip drilling entirely if you’re not allowed to.
7. Buy the Papasan Cushion- Skip the $150 Frame
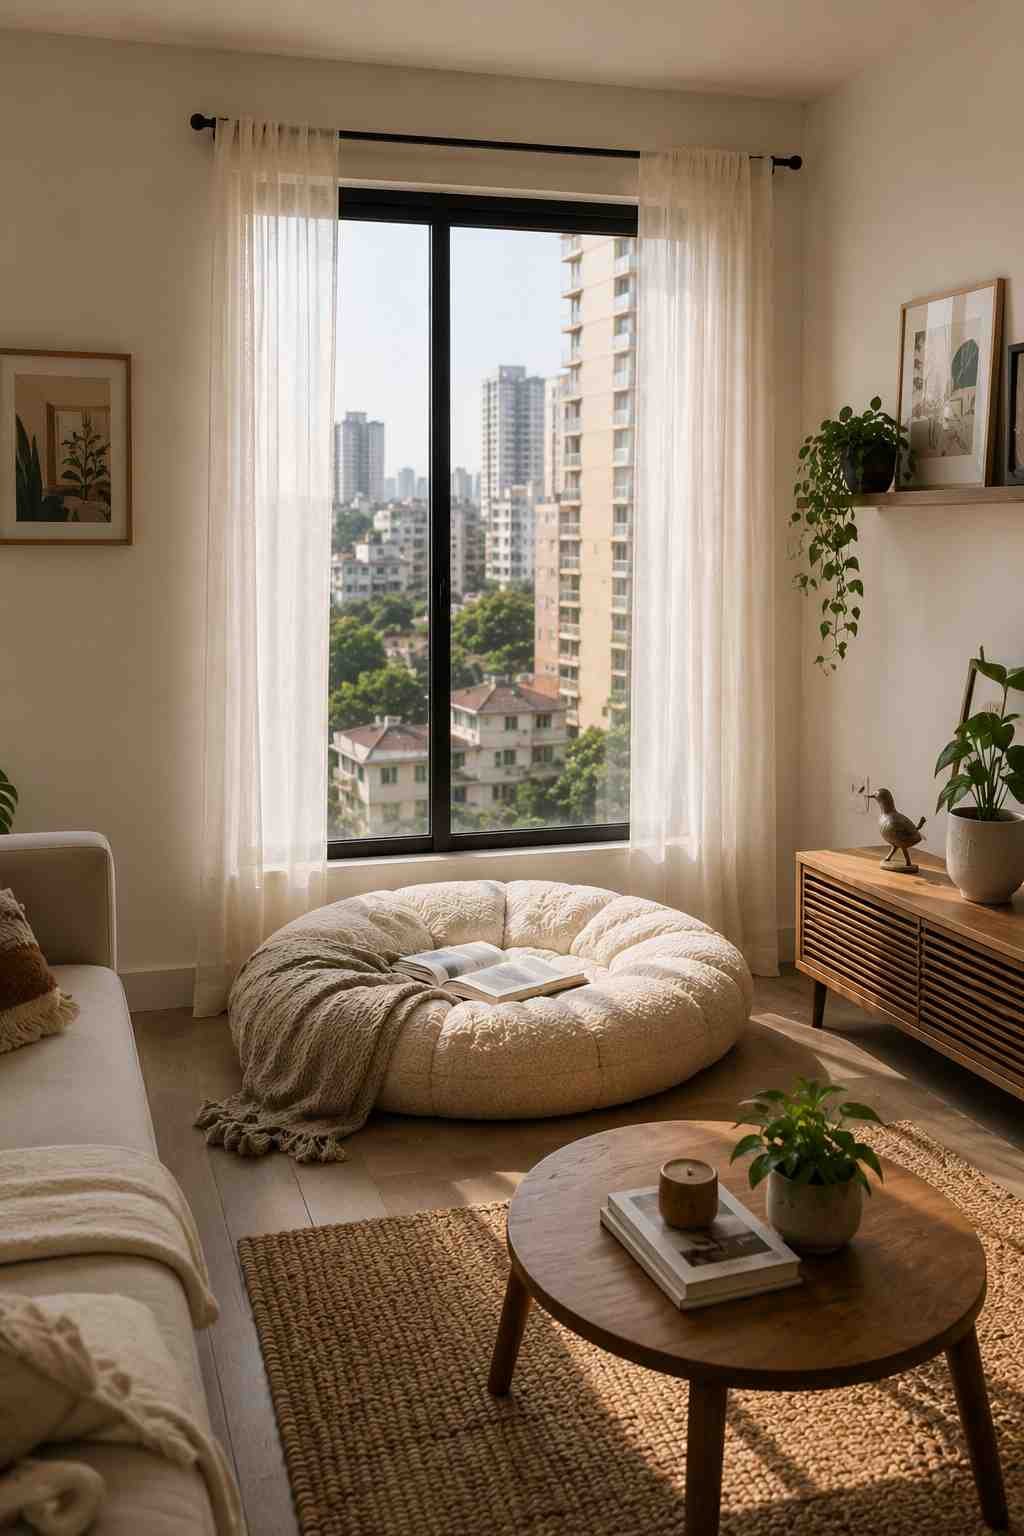
A full papasan chair with its rattan frame runs $120–180, which blows the budget on one item. What actually reads as soft, rounded, and woven-textured in photos is the round cushion itself, and most retailers and secondhand sellers list it separately. Set it straight on the floor or on a low round base you already own.
You lose the frame’s height, which is actually a plus in a tight nook- lower seating makes a cramped corner feel bigger, not smaller. Search secondhand listings for “papasan cushion only”; people sell it constantly after the frame cracks, and the cushion is almost always the part still in good condition.
Fluff and reshape the cushion by hand after unpacking it. Papasan cushions ship compressed, and giving them a full day to expand before styling photos makes a noticeable difference in how full and round it looks in the final shot.
Budget: Replacement cushion alone: $25–35.
8. Sew Patchwork Cushion Covers from Kantha Quilts
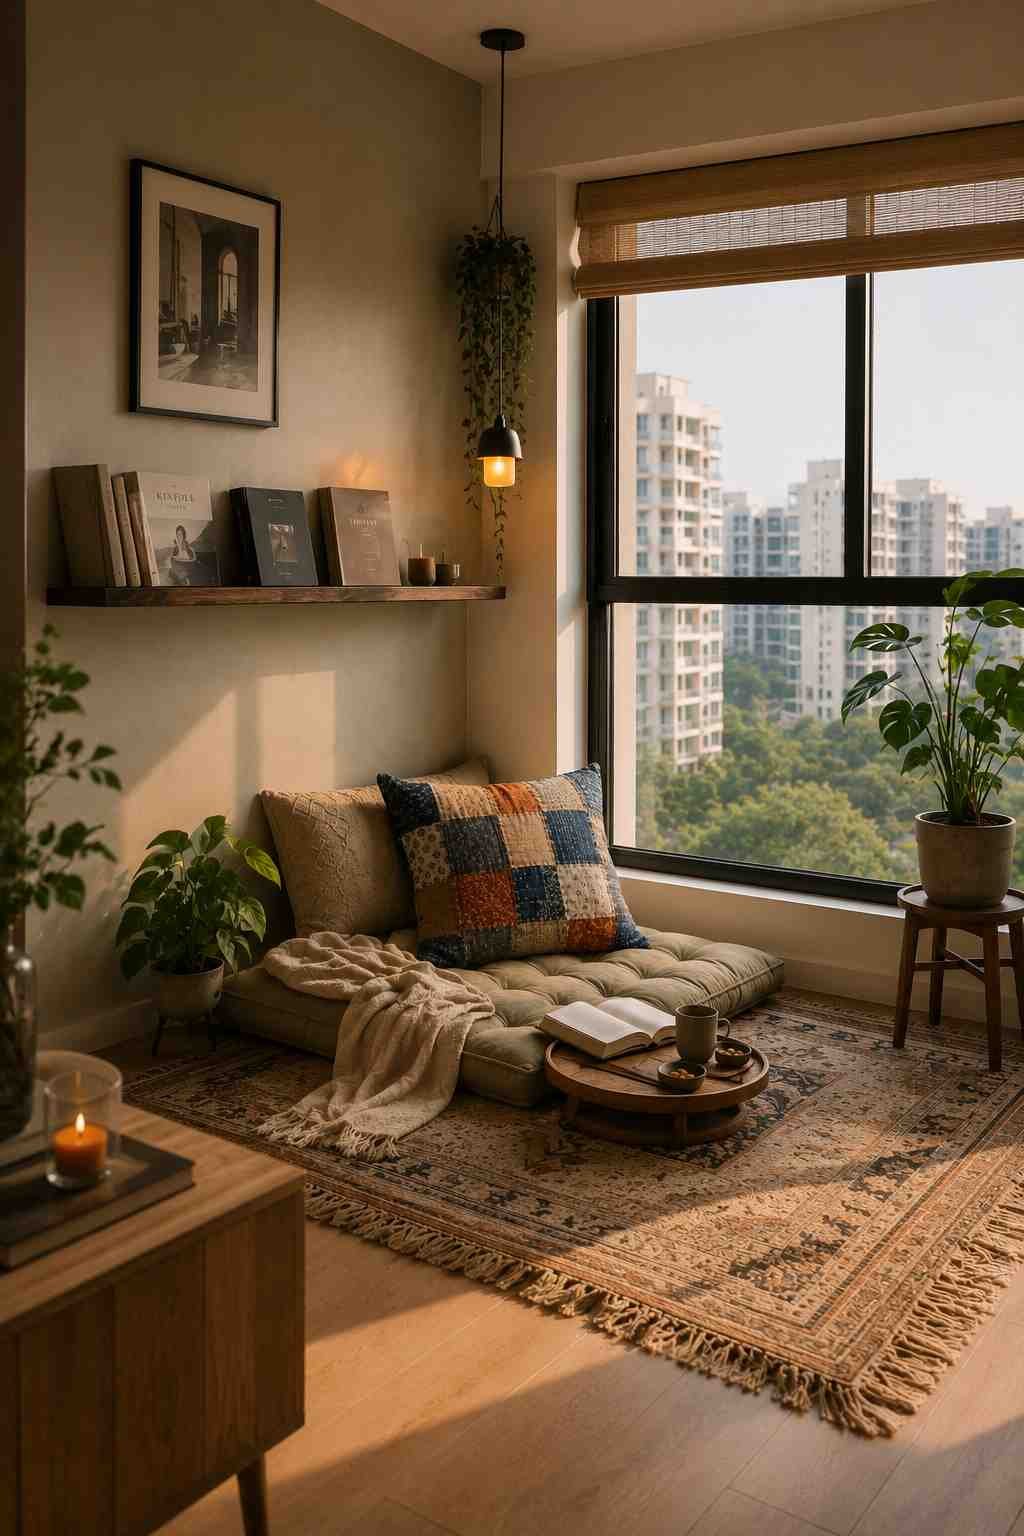
This is the one idea here with real staying power on Pinterest, because it’s a tutorial people save and come back to, not just a styling suggestion. Cut squares from an old kantha quilt, worn cotton fabric, or scraps you already own, and hand-stitch them into a simple patchwork cover for a cushion insert you already have — no sewing machine required for a single cover, just a basic whip stitch.
Keep the patchwork intentionally mismatched rather than color-coordinated. It should look collected over years, not bought as a set — that’s the entire visual point of a kantha patchwork. Cut your squares slightly oversized and trim after stitching; it’s far easier to correct a slightly uneven seam than to add fabric back once it’s cut too small.
If you don’t already own fabric scraps, ask at a local tailor — most have offcut bins they’re happy to give away or sell for almost nothing, and tailoring scraps are usually higher quality than what you’d find pre-cut at a craft store.
Budget: Fabric: $0 if using scraps, $8–12 if sourcing secondhand. Thread and needle: $2–4. Total: $0–16, since the cushion insert is reused.
9. Light It with Battery Fairy Lights in Secondhand Glass Jars

A proper reading lamp with a usable angle starts around $30, and clip lamps rarely look intentional in a soft, styled corner. Coil battery-powered fairy lights inside two or three secondhand glass jars of different heights for warm, diffused evening light — genuinely useful if your nook isn’t near an outlet, since there’s no cord to plan around.
Treat this as ambient light, not task light. Reserve it for evenings and let daylight do the actual reading work during the day — the two aren’t interchangeable, and expecting jar lights to substitute for daylight is where this idea tends to disappoint people. If you do read after dark regularly, pair this with one small battery-operated clip light rather than relying on the jars alone.
Warm white lights (around 2700K, usually labeled on the packaging) look considerably cozier than the cooler white lights sold in the same aisle- check the box before buying, since this single detail changes the entire mood of the light.
Budget: Two sets of battery fairy lights: $10–14. Two or three jars: $0–6 if secondhand. Total: $10–20.
10. Layer a Sheer Panel Over a Secondhand Blackout Curtain
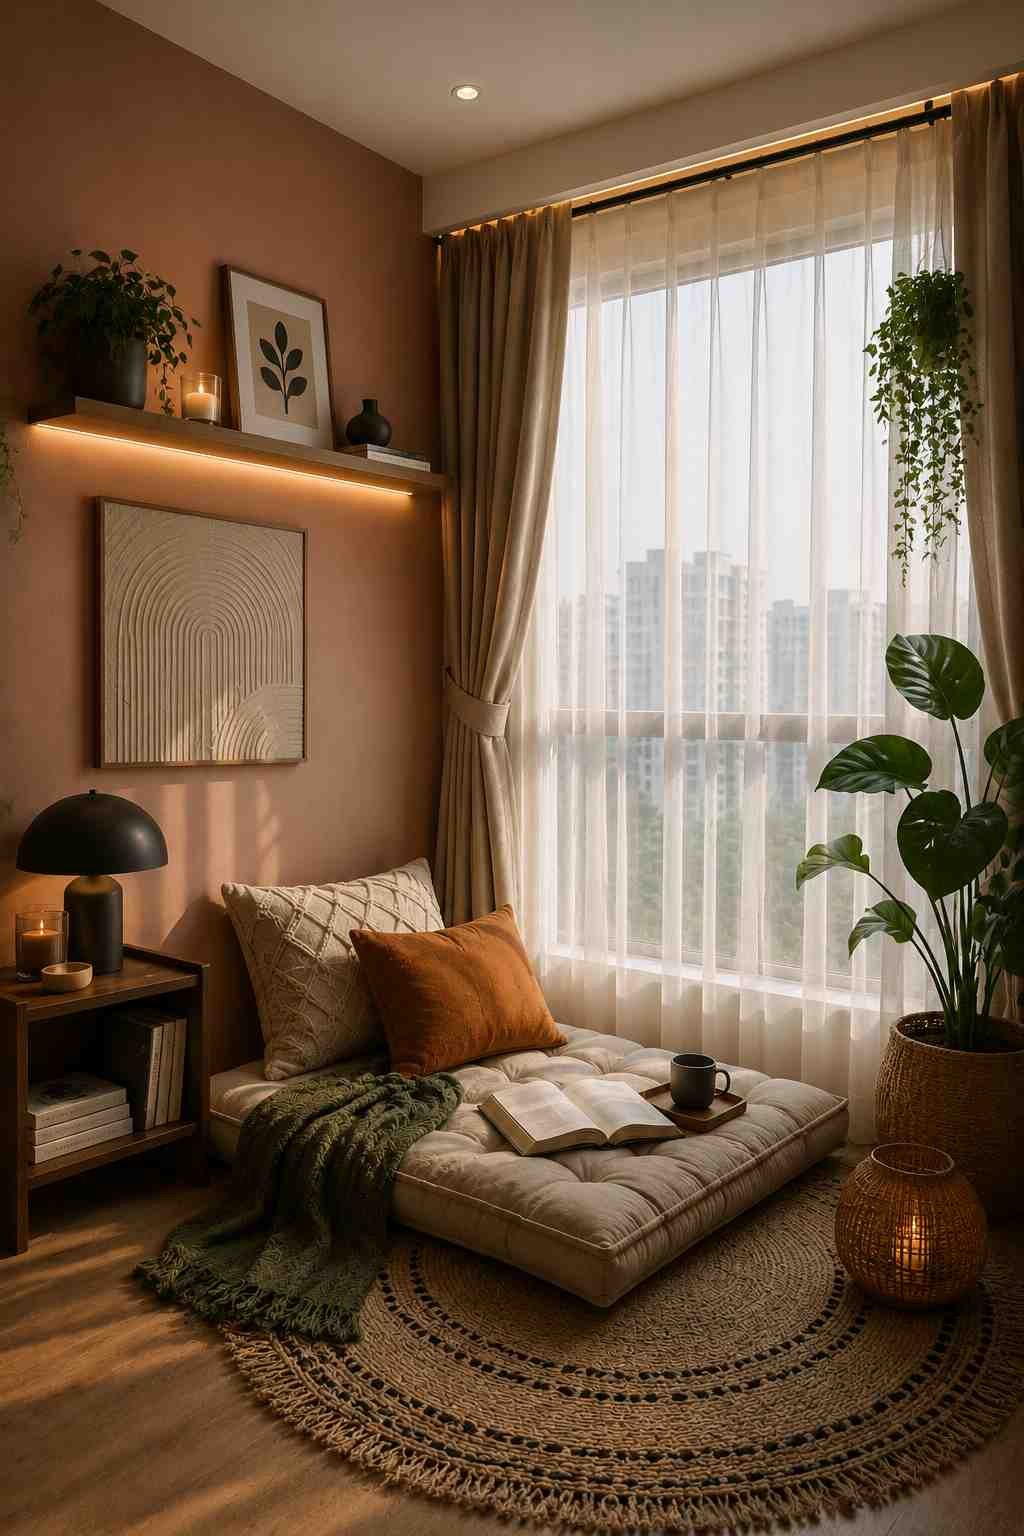
Nook comfort lives or dies on glare control, which rarely makes it into decor roundups because it isn’t especially photogenic. One curtain forces a choice between glare (sheer only) and a cave (blackout only). A double rod solves it: secondhand blackout panel on the back layer, cheap sheer panel in front.
Push the blackout layer fully open during the day for diffused, glare-free light through the sheer, then close it in the evening for privacy. It’s a functional fix dressed up as a styling one — and if you can’t drill for a double rod, a tension rod handles the inner sheer layer while the blackout panel goes on a full mount.
Check a secondhand blackout panel for sun damage before buying- heavily faded or brittle-feeling fabric near the top (where it would have hung closest to a window) usually means the lining has broken down and won’t block much anymore, even if the price looks like a bargain.
Budget: Double rod: $10–14. Sheer panel: $10–14. Secondhand blackout panel: $8–12. Total: $28–40.
11. Stack Vintage Suitcases as a Side Table with Real Storage

Every reading spot needs somewhere for a mug, a phone, the book you’re not currently reading, and a side table is also one of the easiest places to overspend. Two or three stacked vintage suitcases, largest at the bottom, do the job while hiding spare throws or off-season books inside. It’s storage with a function, not just a surface to style around.
Mismatched leather tones and hardware finishes actually help here; a stack that looks collected over time reads as more intentional than two suitcases bought as a matched pair. Look for hard-sided cases specifically; soft-sided luggage won’t hold a mug or a small lamp steady on top.
Check the latches close before buying, or it stops being usable storage and just becomes a stacked prop.
Budget: Two secondhand suitcases: $8–15 each at flea markets or thrift stores, so $16–30 total.
12. Anchor the Whole Corner with a Washable Accent Rug
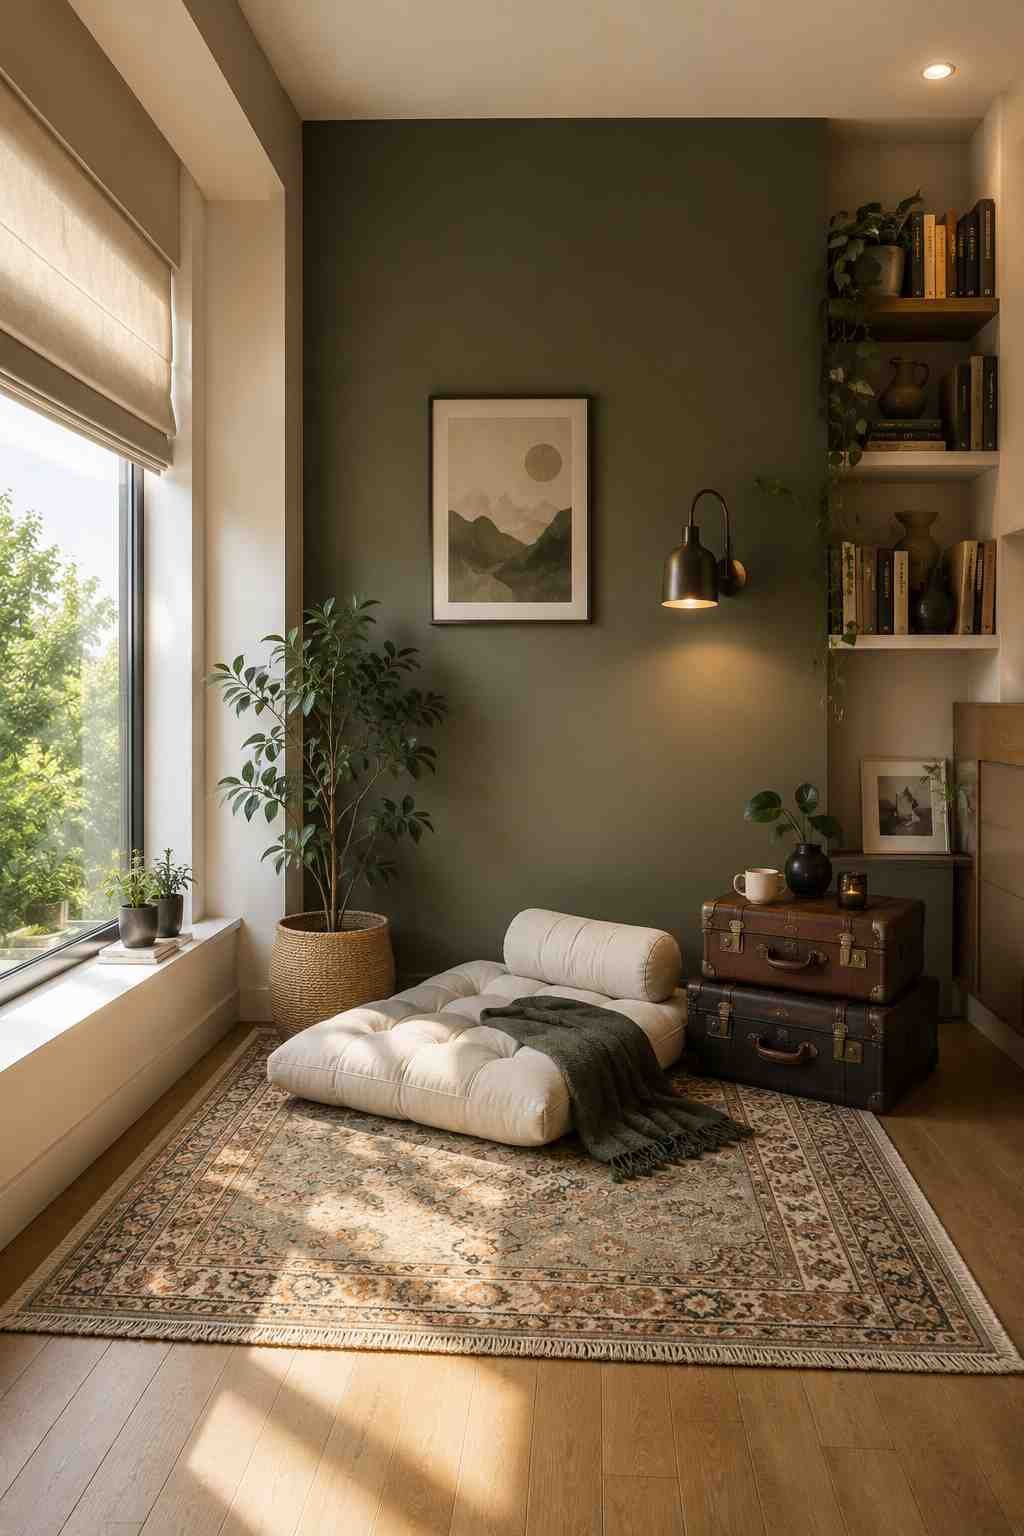
It’s easy to treat the rug as an afterthought, but a rug is what tells the eye “this corner has a purpose” before any furniture does. Even a floor cushion with nothing else around it looks intentional once it’s sitting on a defined rug rather than on a bare floor. A 3×5 or 4×6 size usually works for a nook- let it extend a little past the seating rather than sitting exactly underneath it.
Go washable if this is a daily-use spot. Coffee spills and pet hair are inevitable in a corner you actually use, and washable weaves now come in designs that convincingly mimic wool or vintage patterns rather than looking like plastic outdoor mats.
If buying new isn’t in the budget at all, move a rug from a lower-traffic room in your home — a guest room or hallway rug is frequently underused and can be reassigned to the nook with zero extra spend, refreshed with a quick vacuum and a fabric refresher spray.
Budget: Washable accent rug: roughly $30–38. Non-slip pad: $8. Total: $38–46 — or $0 if you relocate a rug you already own.
ALSO READ: 12 DIY Outdoor Christmas Decorations Using Recycled Materials
13. Sew a No-Sew Foam Cushion for an Exact Ledge Fit
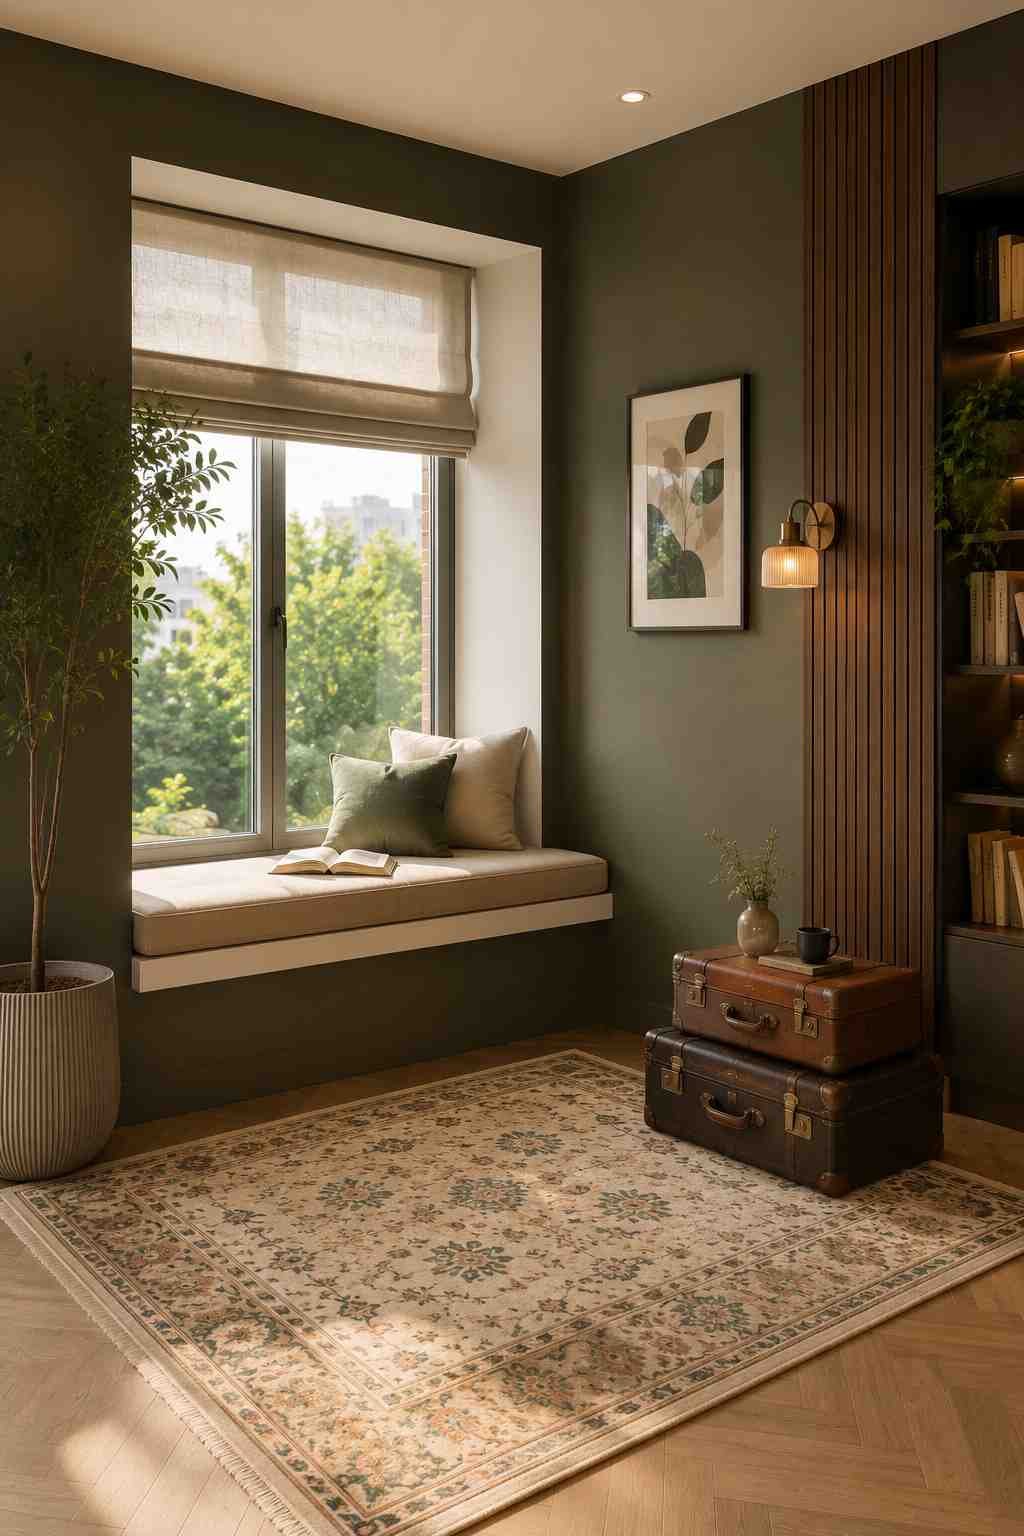
If your window does have a sill wide enough to sit on, but nothing fits it, store-bought cushions rarely match the exact dimensions, and custom-made ones start at $80. Cut upholstery foam to your ledge’s precise size, wrap it in a fabric remnant, and staple the fabric underneath a thin plywood base rather than sewing a cover- it gets you a precise fit without upholstery skills.
Use 2-3 inch density foam if the nook gets daily use. Thinner foam flattens within weeks and starts looking sunken rather than plush, which undoes the whole project. Wrap corners the way you’d wrap a gift box- fold the fabric into a neat diagonal pleat at each corner rather than bunching it, which is the single detail that makes a DIY cushion look store-bought.
Staple to the separate plywood base, not the ledge itself; the whole cushion lifts out as one piece, and the ledge underneath stays untouched, which matters as much for cleaning as it does for moving out.
Budget: Foam, cut to size: $16–22. Fabric remnant: $8–14. Plywood base (optional): $4–6. Total: $28–42.
Five Mistakes That Undo an Otherwise Good Reading Nook
These apply across every idea above, which is why they’re gathered here instead of repeated thirteen times.
- Buying the seating first and the lighting plan last. Glare and evening darkness are what actually make a nook unused after the first week; decide how you’ll handle both before you buy a single cushion.
- Matching everything too precisely. A cushion, throw, and rug in the same shade read as a set from a catalog rather than a space someone actually put together. Aim for the same color family, not the same swatch.
- Skipping the rug because the space feels too small for one. A small rug under a cushion still defines the corner, it’s the absence of one that makes a nook look unfinished, not the size of it.
- Overfilling the ledge or shelf with every book you own. A tightly edited five or six titles read as curated; a crammed shelf reads as overflow storage that happened to end up near a window.
- Ignoring what’s directly behind the nook. A cluttered wall or a visible charging cable in the background of every photo undercuts even a well-styled seating area- check the full sightline, not just the seat itself.
Frequently Asked Questions
Can you actually build a reading nook for under $50?
Yes, but only by sourcing one or two pieces secondhand rather than buying everything new. Every idea in this list stays under $50 on its own; the ideas above that involve a rug or a bench are the ones most likely to hit the top of that range, so pair them with a $0-cost idea like the floor nook or the patchwork cushion covers to average out.
Do I need a built-in window seat for any of this to work?
No. The floor nook, the cinder-block bench, and the ladder-shelf backrest are all built specifically for windows with no ledge or seat at all; a dedicated window seat is a bonus here, not a requirement.
Which of these ideas are safe for rentals?
The floor nook, the sari canopy, the cinder-block bench, the ladder shelf, the jar lighting, and the suitcase side table all involve zero drilling or wall adhesive. The picture ledge and blackout curtain can go either way depending on whether you use adhesive strips or a full mount- check with your landlord before drilling either.
How do I stop my reading nook from getting too much glare during the day?
Layer a sheer panel over a blackout curtain on a double rod (idea #10) so you can diffuse direct sun without losing the room to darkness. If a double rod isn’t possible, a single sheer panel alone still cuts most midday glare while keeping the space bright.
What size should a window reading nook be?
A 3×4 to 4×6 foot footprint is enough for one seating solution, one small side surface, and a rug that defines the space without crowding the rest of the room; you don’t need a full wall’s width for this to feel intentional.
How do I make a reading nook photograph well for Pinterest?
Shoot during the hour after sunrise or before sunset when light is warm and diagonal rather than flat overhead sun. Include one small human touch in the frame- an open book, a mug, a folded throw- rather than a perfectly staged empty seat, since lived-in detail is what gets saved and repinned.
Quick Checklist Before You Call It Done
- Seating chosen based on your actual ledge depth or floor space, not the prettiest option online
- A plan for both daytime glare and evening light, not just one or the other
- At least one secondhand or already-owned piece, not everything bought new
- A rug or defined boundary marking the corner, even a small one
- Books or objects edited down to five or six, not the full collection
- The wall or sightline behind the nook should be checked for clutter, not just the seat itself
The Bottom Line
A window reading nook doesn’t need a carpenter, a $150 chair, or a picture-perfect bay window; it needs one or two well-sourced pieces, a plan for glare and evening light, and the discipline to stop before the corner gets overdecorated. Pick two or three ideas from this list rather than attempting all thirteen at once. The nooks that actually get used, and photograph well because of it, are usually the most edited ones, not the most filled ones.