

Every December, I end up with the same pile in the garage- flattened shipping boxes, a few empty wine bottles, an old sweater I never got around to donating.
And every December, I search “recycled Christmas decorations” hoping for something new to do with them, only to get the same tire snowman and mason jar lantern that’s been circulating on Pinterest for a decade.
So this year, I actually sat down and worked through it: what can you make from things that are genuinely just sitting around the house, that doesn’t end up looking like a school craft project on your front porch?
These twelve made the cut. Nothing here needs power tools you don’t already own, and nothing needs a big craft-store run.
I’ve also been fussy about the finish on each one- a coat of matte black paint or a single warm-white light strand instead of the usual multicolor lights makes a much bigger difference than people expect, and I’ve called that out where it matters.
If you’re decorating a porch you actually want to be proud of- the kind you’ll photograph and still want to look back at next year, these are worth the extra half hour they take over the store-bought version.
Why Recycled Outdoor Decor Is Having a Real Moment
Between Thanksgiving and New Year’s, household waste spikes noticeably in most countries as packaging, wrapping paper, and disposable decor pile up.
Building your outdoor display from what’s already sitting in your garage, recycling bin, or thrift store cart is a genuine way to cut into that, and it happens to produce decor with far more personality than anything mass-produced.
Nothing on a store shelf has the same weathered patina as a real reclaimed window frame or the same warm glow as a hand-punched tin lantern.
A few ground rules before you start:
- Clean everything first; Grease, labels, and residue weaken paint and adhesives and attract dust once outside.
- Seal for weather; Anything staying outdoors needs an exterior-grade sealant, weatherproof spray paint, or a coat of marine varnish; indoor craft paint will chip and fade within weeks.
- Skip anything with lead solder, old wiring, or lithium batteries when repurposing electronics or vintage hardware. Sand sharp edges smooth.
- Use LED or battery lights outdoors; never use standard incandescent strands not rated for exterior use.
Now, the ideas.
1. Chicken-Wire Light Orbs

A step up from the usual dollar-store ornament, these look like something from a boutique hotel’s holiday display, and they’re made almost entirely from wire mesh, which most people throw away after a fencing or gardening project.
You’ll need: leftover chicken wire or hardware cloth, wire cutters, gloves, a battery-operated LED fairy light strand, and thin floral wire.
Steps:
- Cut a rectangle of wire mesh and roll it into a loose ball shape, tucking the cut edges inward so nothing’s sharp.
- Shape it by hand into a rounded sphere- imperfection here reads as intentional, not messy.
- Thread the LED strand through the mesh so light disperses evenly through the whole orb.
- Secure a loop of floral wire at the top for hanging, or leave the base flat to set them directly on steps or a porch ledge.
Time/budget: Under 20 minutes each, essentially free if you have wire on hand.
Styling note: Skip the multicolor lights- warm white only. Cluster three orbs in graduating sizes rather than scattering single ones for a much more curated look.
2. Punched Tin Can Star Lanterns
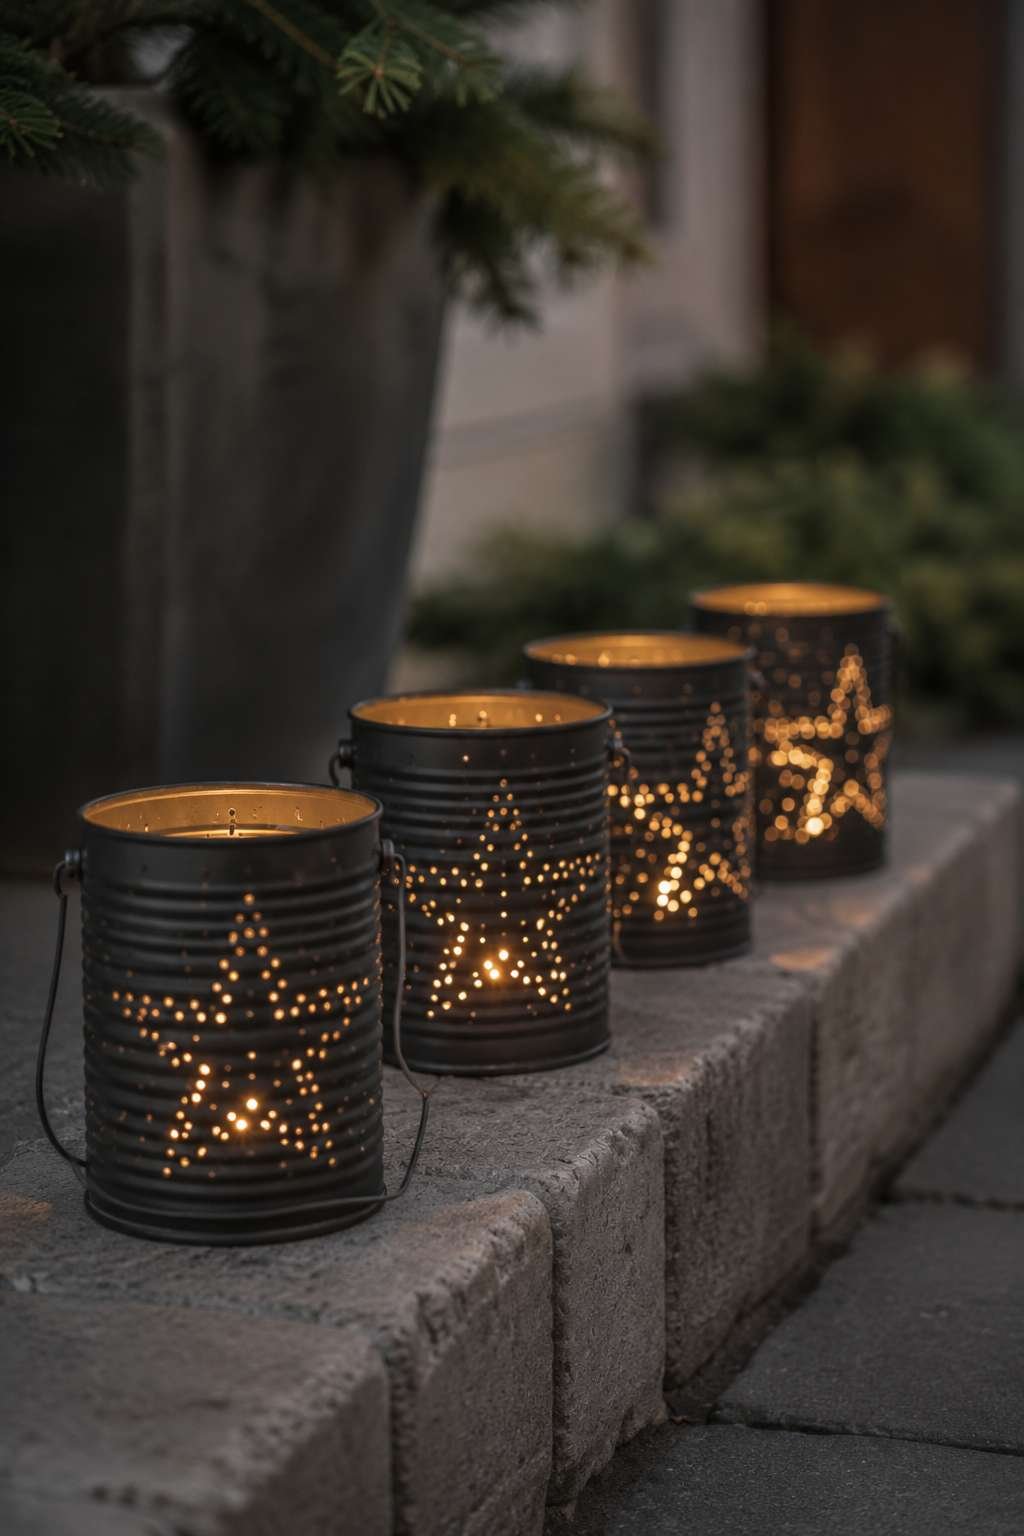
Tin can lanterns show up in almost every recycled-decor list, but most versions look like a kids’ craft project. The difference is in the finish: matte black spray paint and a clean geometric punch pattern instead of a random scatter of holes.
You’ll need: cleaned tin cans (labels removed), a hammer, a nail, painter’s tape, matte black spray paint, LED tea lights.
Steps:
- Fill the can with water and freeze it solid- this keeps the metal from denting as you punch.
- Sketch or tape a simple star or geometric grid pattern onto the can’s surface.
- Punch holes along the pattern with the hammer and nail, then let the ice melt and dry the can fully.
- Spray paint matte black (or brushed gold for a warmer finish) and let cure.
- Drop in an LED tea light and set it along a porch step or windowsill.
Time/budget: About 30 minutes active time per can; free to under $2 each, depending on paint.
Styling note: Uniform can size and identical hole patterns, lined up in a row, will always look more expensive than a mismatched cluster.
3. Gilded PVC Candle Pillars

Leftover PVC pipe scraps from any home project become tall faux candle pillars- a much more sophisticated take on the usual PVC candy cane.
You’ll need: PVC pipe offcuts in varying lengths, metallic gold or silver spray paint, flameless LED taper or pillar candles sized to fit the pipe diameter.
Steps:
- Cut pipe into varying heights (12–30 inches) using a hand saw.
- Sand the cut edges smooth.
- Spray paint in metallic gold or silver, applying two thin coats rather than one thick one to avoid drips.
- Once dry, insert flameless LED candles into the top of each pipe so the flame sits just above the rim.
- Group in odd numbers of varying height near your entryway or along a garden bed.
Time/budget: About 1 hour total; under $10 if you already have pipe scraps.
Styling note: This is the single highest “looks expensive” idea on this list relative to effort — it mimics the oversized lantern displays seen in high-end holiday storefronts.
4. Frosted Glass Bottle Pathway Lights

Wine and olive oil bottles get a second life as elegant, glowing path markers, a refined alternative to store-bought stake lights.
You’ll need: empty glass bottles (uniform shape works best), frosted glass spray paint, waterproof battery fairy lights or LED string lights, sand or pebbles for weight.
Steps:
- Wash bottles thoroughly and remove labels using warm water and a bit of oil.
- Apply frosted glass spray in light, even coats- this diffuses the light beautifully once lit.
- Add a few inches of sand or pebbles to the base for stability outdoors.
- Tuck battery-powered fairy lights inside each bottle.
- Line your front walkway or driveway with bottles spaced evenly apart.
Time/budget: 15 minutes per bottle; nearly free.
Styling note: Uniform bottle shapes in a straight line read editorial; mismatched bottles scattered loosely read garage sale. Choose one over the other on purpose.
ALSO READ: 35+ Christmas Decorations Ideas For the Living Room
5. Oversized Sculptural Cardboard Ornaments

Shipping boxes are the one recycled material almost everyone has an excess of by December, and turned into giant sculptural ornaments, they make a genuine architectural statement.
You’ll need: flattened cardboard, a compass or large circular template, box cutter, weatherproof exterior paint or metallic spray paint, exterior sealant, sturdy twine or wire.
Steps:
- Cut two identical large circles from cardboard (18–30 inches works well for outdoor scale).
- Cut a slit halfway through each circle – one from the top down, one from the bottom up, so the two pieces slot together into a 3D ornament shape.
- Reinforce the back of each circle with a second layer of cardboard, glued and weighted flat until dry, for rigidity.
- Paint in a single bold color or metallic finish and seal thoroughly with an exterior-grade sealant.
- Add a wire loop at the top and hang from a porch beam, tree branch, or hook.
Time/budget: 1–2 hours; under $5 if using boxes you already have.
Styling note: One or two oversized ornaments in a single saturated color will always outperform a cluster of small ones visually from the street.
6. Reclaimed Window Frame Wreath Wall
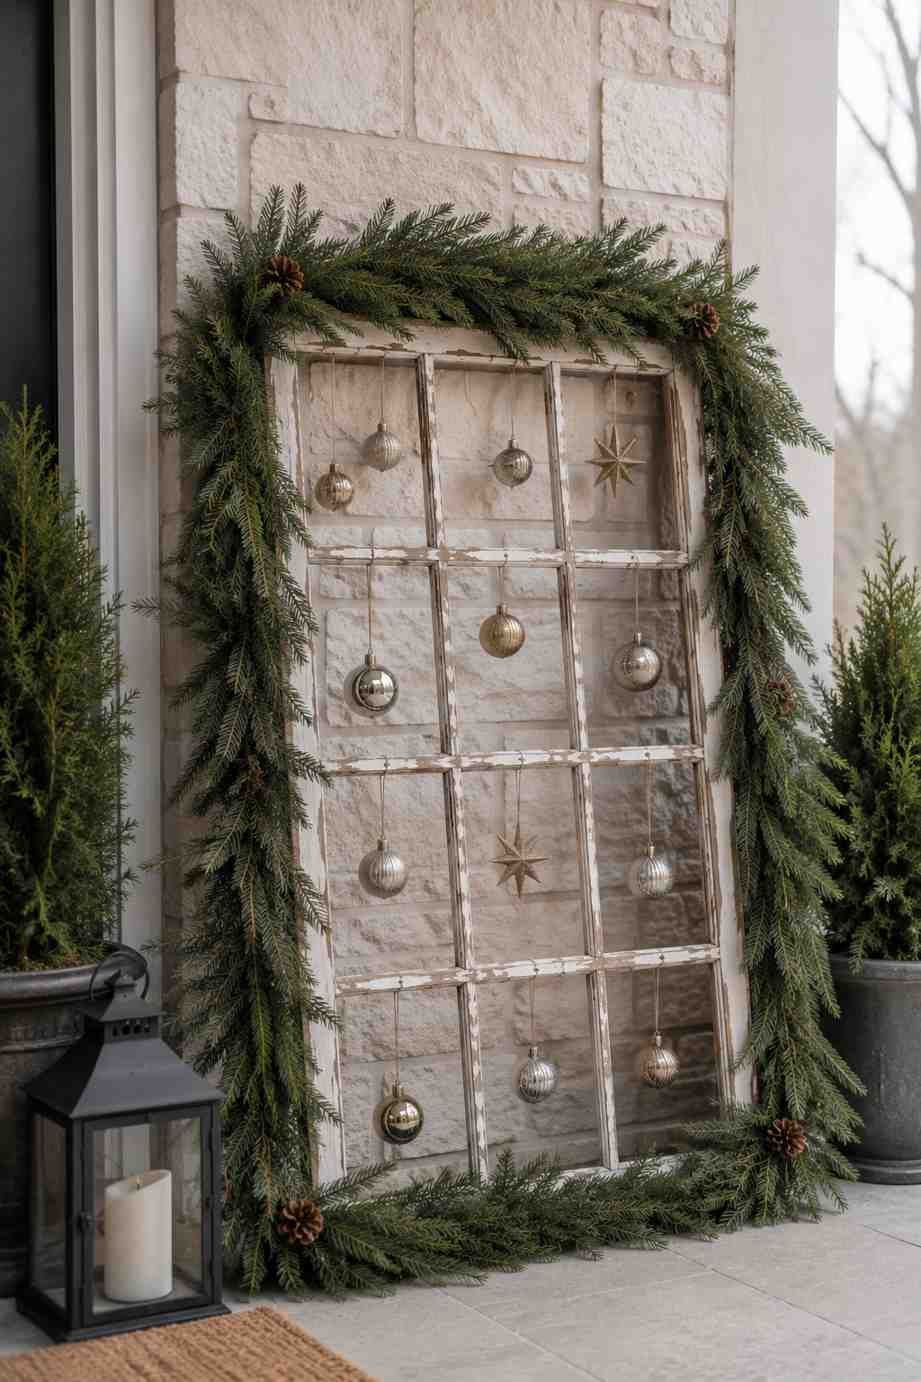
Old window frames from architectural salvage yards, garage sales, or your own renovation leftovers make a striking vertical display that no one else on the block will have.
You’ll need: an old multi-pane window frame, evergreen garland (real or faux), thin florist wire, small ornaments.
Steps:
- Clean the frame and lightly sand any peeling paint- leave a bit of the weathered finish for character.
- Wire evergreen garland around the outer frame’s perimeter.
- Hang small ornaments or dried botanicals inside a few of the individual panes using thin wire loops.
- Lean the frame against an exterior wall, or hang it flat on a shutter or fence.
Time/budget: 45 minutes; free to under $15 for a salvaged frame.
Styling note: Keep the ornament placement inside the panes sparse and asymmetric- one or two accents per pane, not a full pane of clutter.
7. Whitewashed Pallet Tree Silhouette
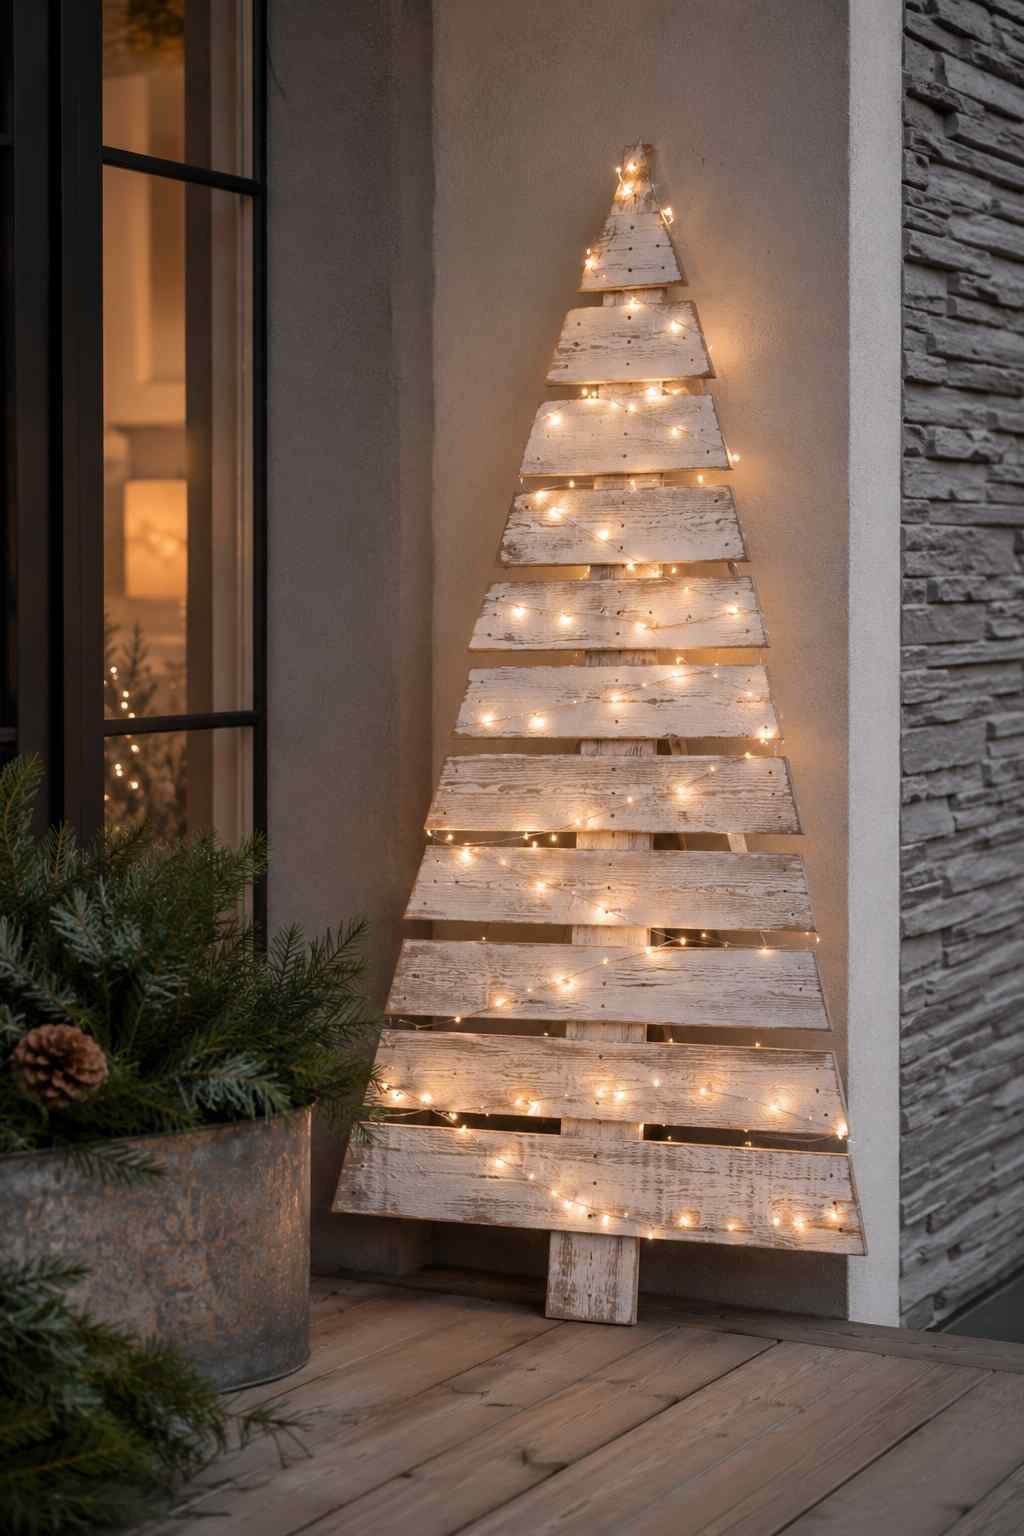
A single reclaimed pallet becomes a minimalist, Scandinavian-style Christmas tree silhouette- a strong alternative to a full tree for smaller porches.
You’ll need: a wooden pallet, a saw, white or whitewash exterior wood stain, string lights, and a wood stake or stand for support.
Steps:
- Disassemble or trim the pallet into a tree silhouette shape, or leave it intact and simply outline the shape with lights (less cutting, same effect).
- Sand any rough edges.
- Apply a whitewash stain rather than solid paint, so the wood grain still shows through.
- Wrap with warm white string lights in a zigzag pattern from base to top.
- Lean securely against a wall or mount on a simple stake base.
Time/budget: 1–2 hours; free if you have a spare pallet.
Styling note: The whitewash finish (versus solid white paint) is what keeps this looking intentional and modern rather than like leftover construction material.
8. Matte-Painted River Stone Border

Smooth stones from your yard or a garden supply store become a quiet, tasteful accent line along a walkway or flower bed – very different in tone from the more playful painted-rock projects usually seen in these lists.
You’ll need: smooth, flat river stones, white and matte black acrylic paint, exterior varnish, fine paintbrush.
Steps:
- Wash and dry stones thoroughly.
- Paint a simple graphic design – a single star, a minimalist snowflake line, or a solid dipped white base – rather than a full character face.
- Seal with exterior varnish so they hold up to rain and frost.
- Line them along a garden bed edge, walkway, or porch step in a single row.
Time/budget: 10 minutes per stone; nearly free.
Styling note: A repeated, simple motif across a dozen matching stones photographs far better than one detailed painted character.
9. Galvanized Bucket Topiary Planters

Old galvanized buckets, watering cans, or metal pails- the kind that pile up in garages and sheds, become elegant faux topiary planters for flanking a front door.
You’ll need: metal buckets, floral foam or sand for stability, faux boxwood or evergreen stems, ribbon.
Steps:
- Clean any rust off the bucket with a wire brush, or leave a light patina for texture if it suits the look.
- Fill with floral foam or sand to anchor the greenery.
- Arrange faux boxwood or evergreen stems into a rounded topiary shape.
- Tie a single ribbon band around the bucket rim- one color only, no bows if you want it to read modern rather than country.
- Place a matching pair on either side of your entrance.
Time/budget: 30 minutes; under $10, depending on greenery cost.
Styling note: Matched pairs symmetrically placed instantly read more high-end than a single asymmetric arrangement.
10. Wrapped Sweater-Yarn Wreath
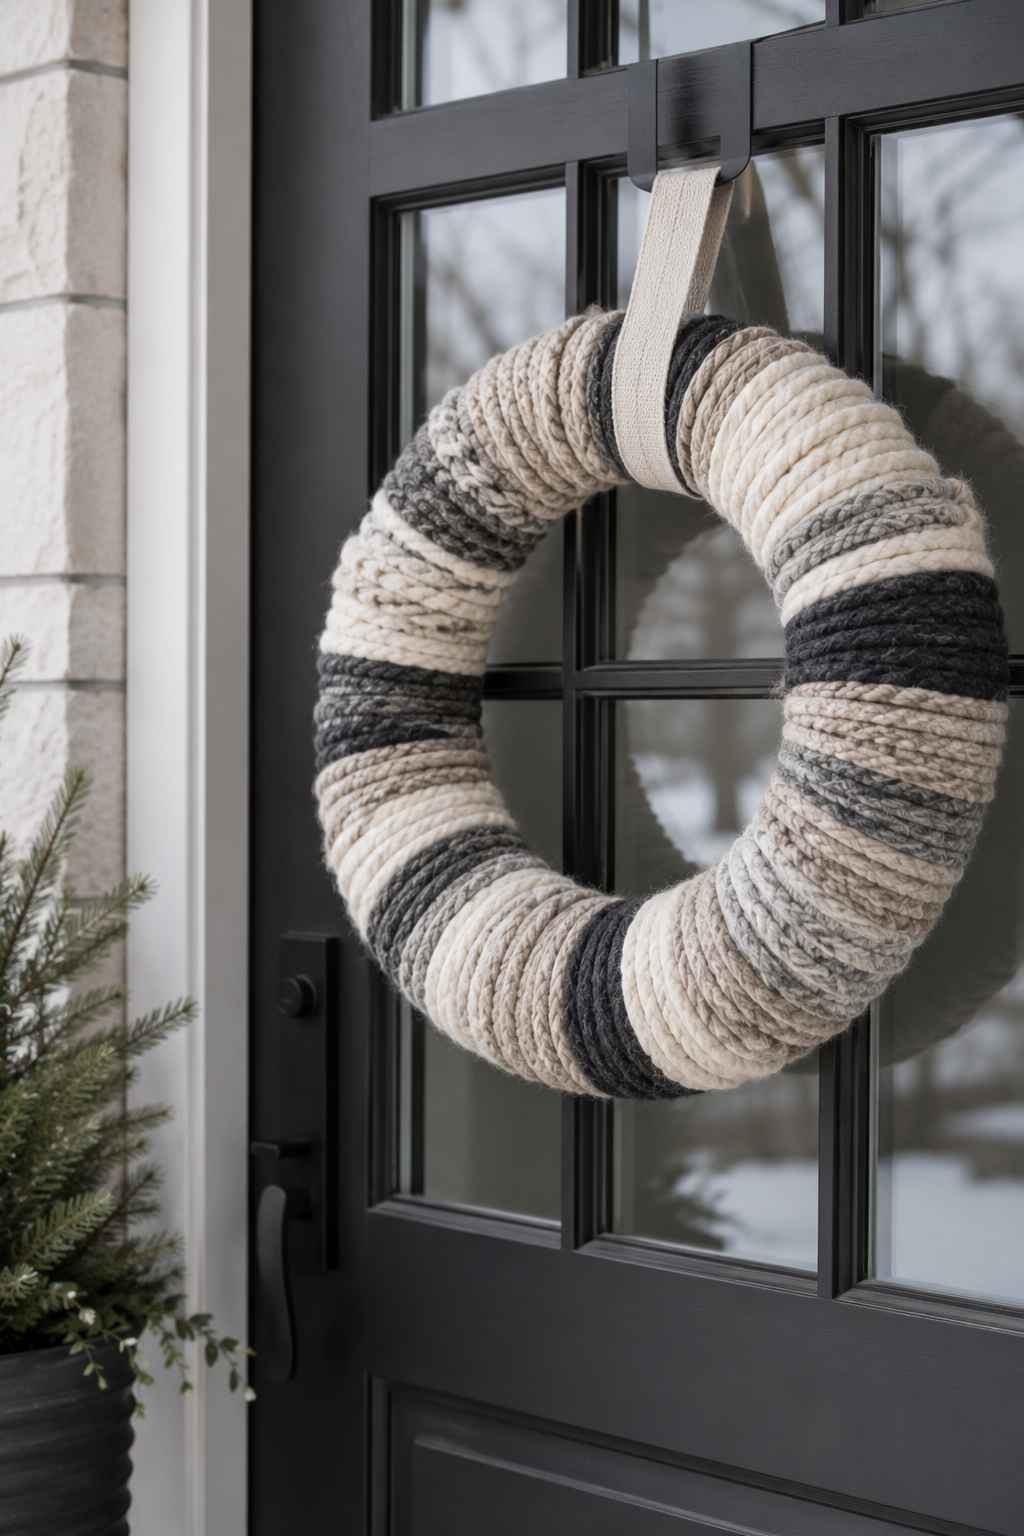
Old wool sweaters, cut into strips, wrap around a simple wire wreath form for a textured, neutral-toned wreath that fits a modern palette far better than a traditional red-and-green one.
You’ll need: an old wool sweater (or several in complementary neutral tones), scissors, a wire wreath form, and hot glue.
Steps:
- Cut the sweater into long strips, roughly 1–1.5 inches wide.
- Wrap each strip tightly around the wire form, securing the ends with a dab of hot glue.
- Layer two or three neutral tones- cream, oatmeal, charcoal- for texture and depth instead of a single flat color.
- Finish with a single sprig of dried greenery or a small brass ornament rather than a full bow.
Time/budget: 45 minutes; free if using sweaters you already own.
Styling note: This works especially well on a covered porch out of direct rain; for fully exposed doors, treat the wool with a fabric-safe weatherproofing spray first.
11. Broken Ceramic Mosaic Star Stakes

Chipped plates, mugs, or tiles that would otherwise go in the trash become a mosaic star stake for garden beds or planters- one of the more unexpected ideas on this list, and genuinely hard to find elsewhere.
You’ll need: broken ceramic pieces, a wooden or metal garden stake, exterior-grade tile adhesive, grout, a star- or simple-shaped backing board (plywood scrap works).
Steps:
- Cut or break ceramic pieces into small, manageable shards (wrap in cloth and tap gently with a hammer for control).
- Arrange the pieces onto the backing board in a star pattern before gluing, so you can adjust the layout first.
- Adhere each piece with exterior tile adhesive and let it cure.
- Apply grout between the pieces, wipe clean, and let dry fully.
- Attach the backing board to a stake and place it among garden greenery or a planter.
Time/budget: 1.5–2 hours including dry time; under $5 if using broken dishware you already have.
Styling note: Stick to a two-tone palette, white and one accent color, so the mosaic reads as designed rather than random.
12. Vintage Cutlery & Crystal Wind Chimes
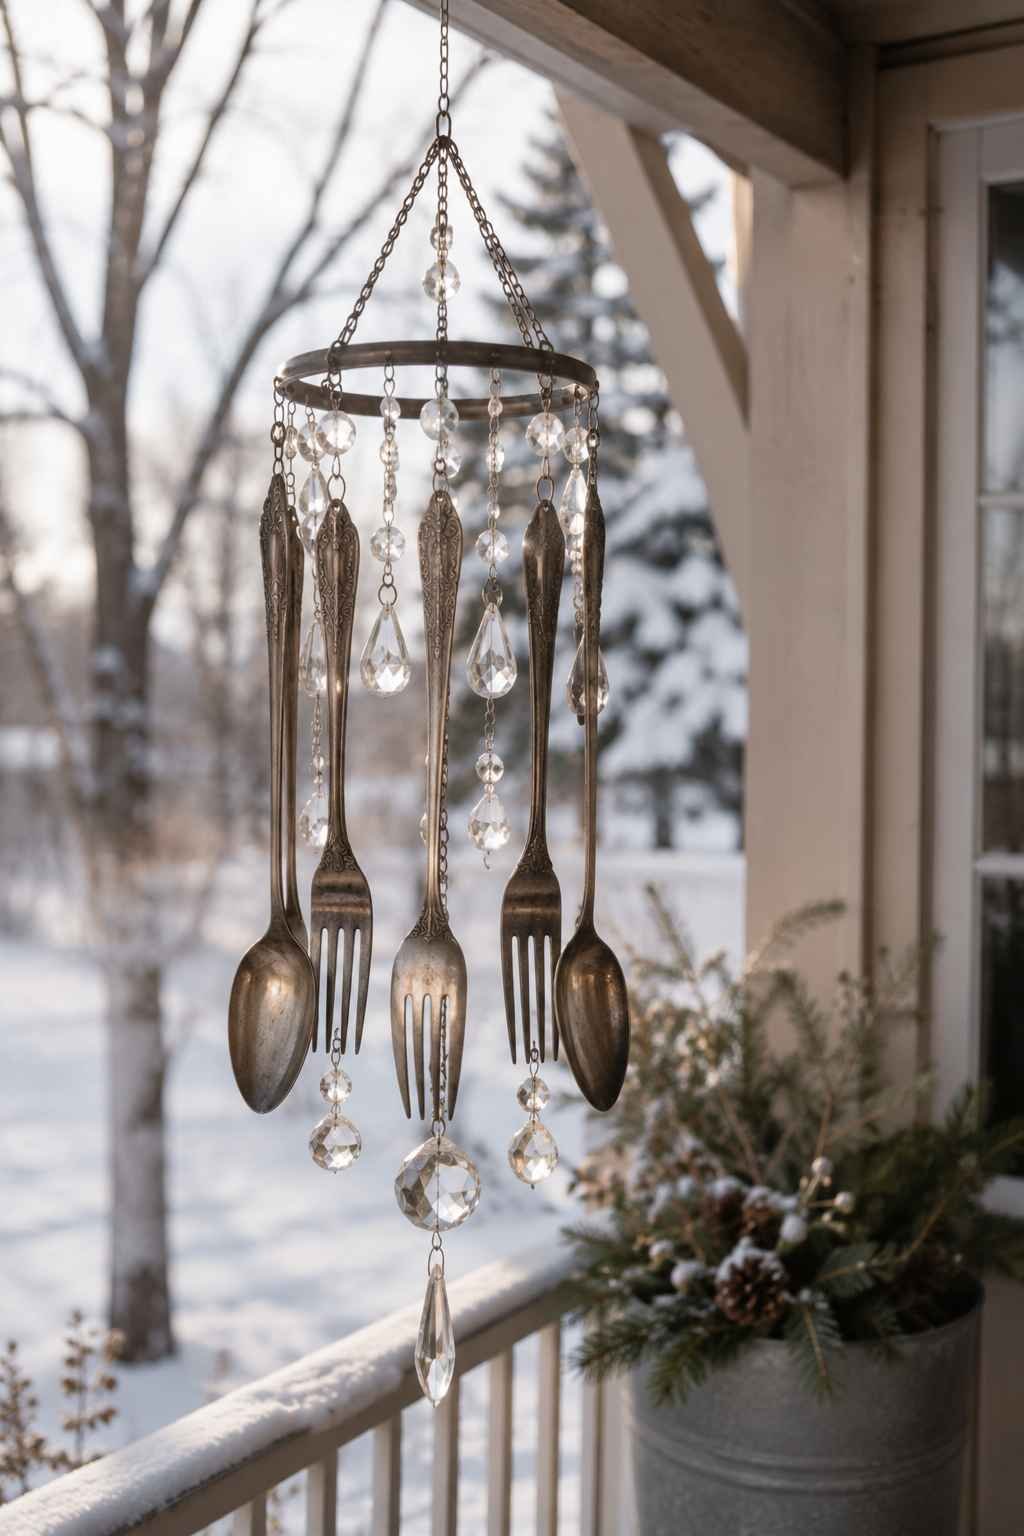
Mismatched vintage flatware and leftover chandelier crystals combine into a wind chime that catches both light and sound, a quietly luxe porch accent that costs almost nothing.
You’ll need: old forks and spoons, chandelier crystals or clear glass beads, a metal ring or embroidery hoop, and fine wire.
Steps:
- Wrap a length of fine wire tightly around the neck of each fork or spoon (just below the handle), twisting it firmly so it holds without slipping.
- Attach the wired end to the metal ring at varying lengths, so the pieces hang unevenly.
- Intersperse crystals or glass beads between the utensils for extra sparkle and sound.
- Hang from a porch beam or hook where it will catch both breeze and afternoon light.
Time/budget: 20–30 minutes; free to under $5 for the ring and wire. No drilling or power tools required.
Styling note: Uneven, varied lengths look more intentional here than a perfectly even row- it’s meant to move and catch light unpredictably.
ALSO READ: 30 Christmas Tree Decoration Ideas 2026 That Will Make Your Home Feel Magical
What recycled materials work best for outdoor Christmas decor specifically?
Metal (tin cans, galvanized buckets), glass, PVC pipe, and treated wood hold up best against moisture. Paper-based materials like cardboard can still be used outdoors if placed under cover and sealed well, but they’re better suited to a covered porch than full yard exposure.
What’s the most budget-friendly outdoor Christmas decoration on this list?
The matte-painted river stones and the wrapped sweater-yarn wreath cost the least, since both use materials most households already have- leftover paint and an old sweater.
How do I make recycled Christmas decorations look high-end instead of homemade?
Stick to a limited color palette (2–3 colors maximum), use a single finish throughout a display (all matte or all metallic- not mixed), and favor symmetry and repetition over scattered, mismatched arrangements. Warm white lighting over multicolor also makes an enormous visual difference.
Final Thought
None of these require specialty tools or a big crafting budget, just materials you likely already have and a slightly different finish than what shows up in most “recycled decor” lists. Pick two or three that fit your existing outdoor palette rather than trying all twelve at once; a cohesive small display will always outshine a crowded one.
Save this post so you can come back to it while you’re gathering materials- and pin your favorite idea below to build your own recycled Christmas decor board.
[…] ALSO READ: 12 DIY Outdoor Christmas Decorations Using Recycled Materials […]
[…] ALSO READ: 12 DIY Outdoor Christmas Decorations Using Recycled Materials […]