
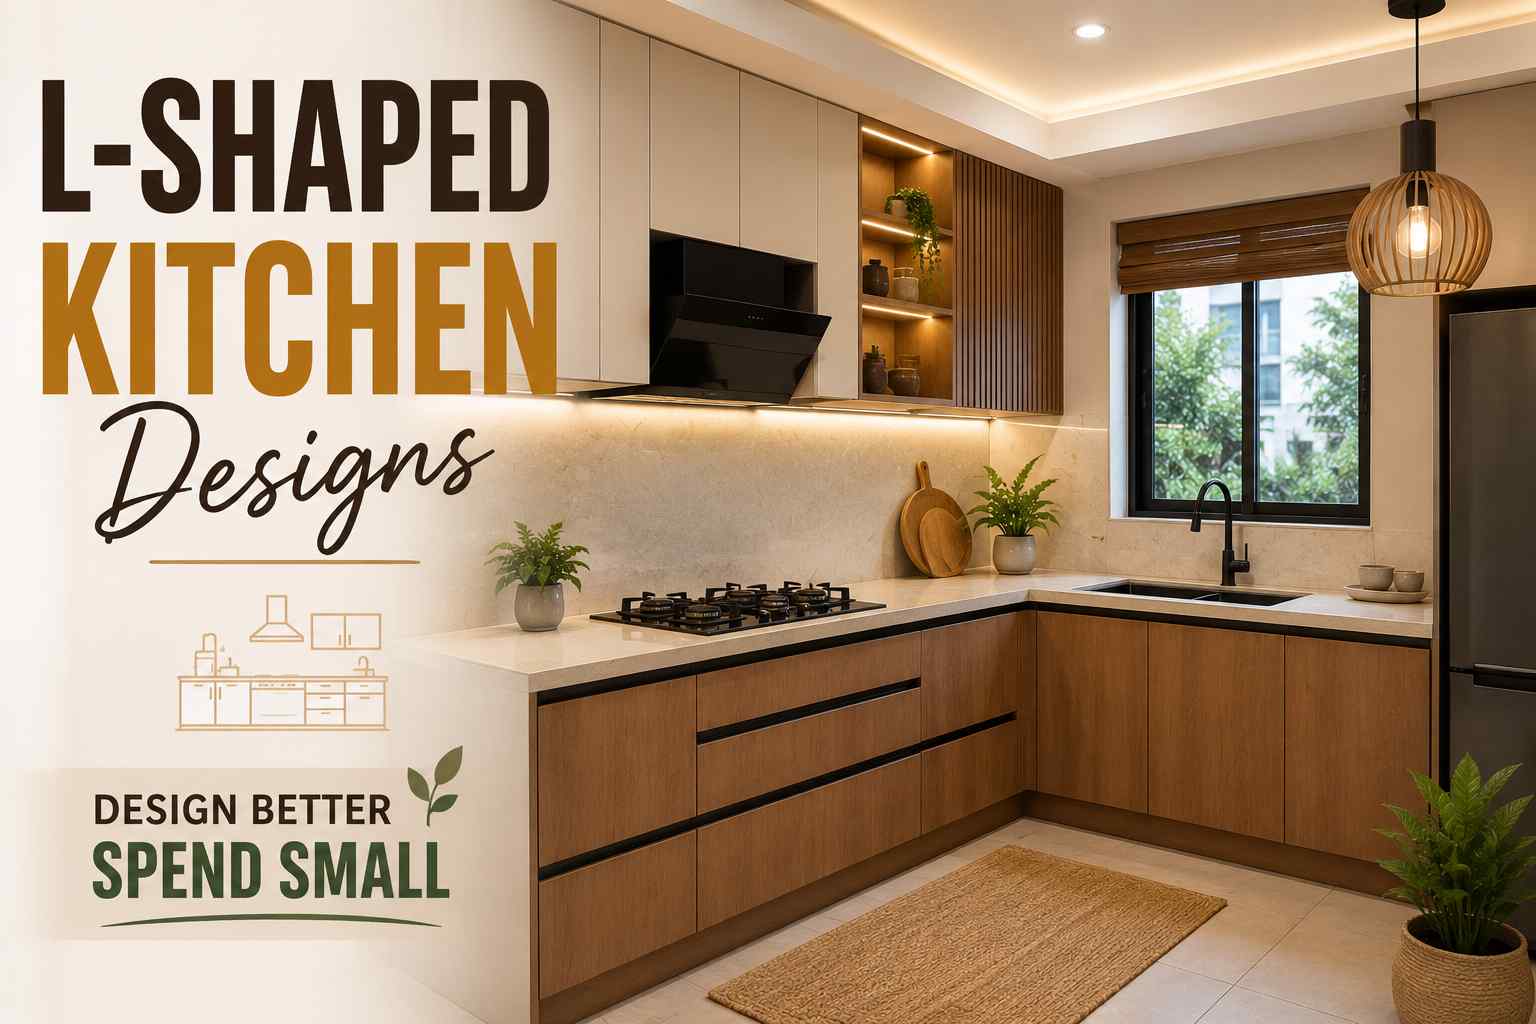
Here is something most kitchen design articles will not tell you: the average homeowner spends four to six months researching before committing to a single cabinet order. They bookmark dozens of Houzz photos, argue about paint colors for weeks, and then — almost universally — wish they had spent more time on the layout and less time on the aesthetics.
This guide exists to fix that. Every idea below goes beyond the photo. You will find out what materials to actually buy, what things cost in 2026, what size kitchen each idea requires, what real-world problems to watch for, and which details separate a kitchen that looks good in photos from one that works beautifully every single day.
What Is an L-Shaped Kitchen — And Why Does It Lead?
An L-shaped kitchen arranges cabinets, countertops, and appliances along two adjacent perpendicular walls, forming the shape of the letter “L.” One wall is longer (the primary run) and the second, shorter wall meets it at a 90-degree angle.
L-shaped kitchens lead all layouts at 35% of renovated kitchens, followed by U-shaped at 31%, according to the 2026 Houzz Kitchen Trends Study. That dominance is not a coincidence — the layout genuinely outperforms alternatives in the way most American households actually cook and live.
Why designers keep recommending it:
- More continuous countertop run than galley or single-wall kitchens
- Opens the center of the room naturally — ideal for an island
- Keeps the cook facing guests in open-plan homes
- Supports the kitchen work triangle without forcing it
- Works from 8×8 ft all the way to large open-plan spaces
- One of the most cost-efficient layouts to remodel — fewer linear feet of cabinetry than a U-shape
A note on professional help: 87% of renovating homeowners hire at least one professional for kitchen projects. Among those spending $50,000 or more, 98% hire at least one pro. This article will help you walk into those conversations informed — not dependent.
Get the Dimensions Right Before Anything Else
Every design decision in a kitchen flows from the dimensions. Choose a color before you measure and you are guessing. Here are the numbers that matter.
| Kitchen Size | Dimensions | Works Best For |
|---|---|---|
| Small | 8×8 ft to 8×10 ft | Apartments, condos, starter homes |
| Medium | 10×10 ft to 10×12 ft | Most single-family homes |
| Large | 12×12 ft and above | Open-plan homes, larger builds |
Non-negotiable clearances (NKBA standards):
- Aisle width with one cook: 42 inches minimum
- Aisle width with two cooks: 48 inches recommended
- Counter space beside the range: 15 inches one side, 12 inches the other
- Standard countertop height: 36 inches
- Refrigerator door clearance from adjacent wall: 2 inches minimum
Contractor note: Measure with every door and appliance open before finalizing anything. A fully open dishwasher door extends 24 inches into the aisle. A French door refrigerator extends 18 inches. These are the conflicts most homeowners discover after installation — not before. Your contractor should walk the space with appliance spec sheets in hand before the cabinet order is placed.
The Work Triangle — And Why the Zone Approach Is Taking Over
The kitchen work triangle places the refrigerator, sink, and range at three points of a triangle. The NKBA recommends the total perimeter fall between 13 and 26 feet. The L-shape achieves this effortlessly — which is a big reason the layout has dominated for decades.
In 2026, however, many kitchen designers are moving beyond the triangle toward a zone-based approach — designating distinct areas for prep, cooking, cleaning, beverages, and baking. If you have two cooks or entertain regularly, zones suit an L-shaped kitchen better than the traditional triangle. The two arms of the L naturally create two separate zones; you just need to plan intentionally for what happens in each one.
Classic L-shape triangle placement:
- Refrigerator at the end of the longer arm, near the entry
- Sink in the center of one arm, near a window if possible
- Range on the second arm with counter space on both sides
Real Cost Context Before You Start
Cabinet costs shock almost every homeowner in 2026. Most people expect the countertops or appliances to be the expensive part. In reality, cabinetry alone typically consumes 30–40% of the total remodel budget — more than any other single line item.
Here is what a realistic mid-range 10×10 L-shaped kitchen remodel actually costs, broken down by item:
| Line Item | Approx Cost |
|---|---|
| Semi-custom cabinets + installation | $14,000–$18,000 |
| Quartz countertops (installed) | $4,000–$6,500 |
| Backsplash tile + installation | $1,500–$3,000 |
| New appliances (range, hood, dishwasher, fridge) | $5,000–$9,000 |
| Flooring (hardwood or tile) | $2,500–$5,000 |
| Plumbing and electrical | $3,000–$6,000 |
| Lighting (under-cabinet + recessed) | $1,000–$2,500 |
| Labor (general contractor) | $8,000–$14,000 |
| Permits and misc. | $500–$1,500 |
| Contingency (always 15–20%) | $6,000–$10,000 |
| Total estimate | $45,500–$75,500 |
The number that always surprises people: Contingency is not optional padding — it is a professional standard. Even well-planned remodels encounter unexpected costs from hidden plumbing issues, outdated electrical panels, or structural surprises behind walls. Budget for them before you start.
Remodel tier overview:
| Tier | Scope | Estimated Cost |
|---|---|---|
| Cosmetic refresh | New countertops, backsplash, hardware, paint | $8,000–$18,000 |
| Minor remodel | Above + new cabinet doors and drawer faces | $15,000–$28,000 |
| Mid-range remodel | New semi-custom cabinets, appliances, flooring | $30,000–$55,000 |
| Major remodel | Custom cabinets, premium countertops, layout changes | $60,000–$100,000 |
| Luxury renovation | Full custom, structural work, professional appliances | $100,000–$200,000+ |
The 20 Design Ideas — Every One Explained in Full
MODERN L-SHAPED KITCHEN DESIGNS
1. All-White Minimalist Kitchen
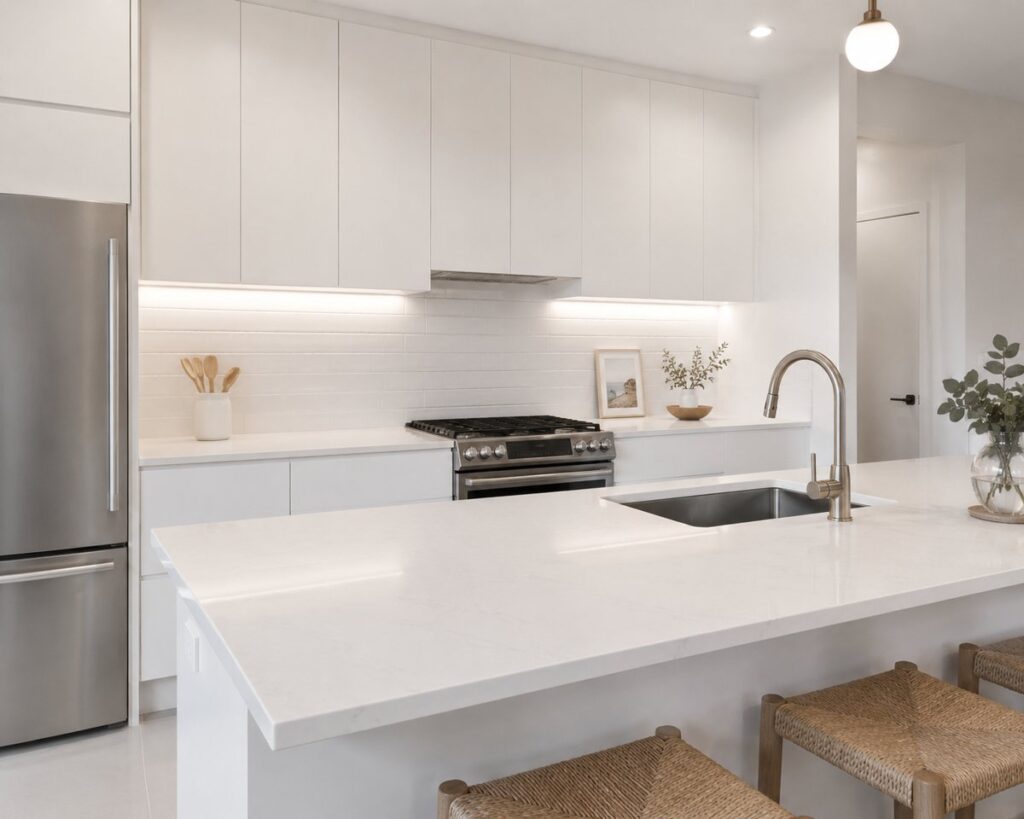
What it looks like: Flat-panel white cabinets with no visible hardware — either push-to-open or thin recessed finger pulls — white quartz countertops, and 3×9-inch white subway tile backsplash with white grout. The design relies entirely on form and material texture for visual interest, not color.
Who it works for: Homeowners who want a clean, timeless kitchen that photographs well, feels larger than it is, and appeals to the widest range of buyers at resale. Especially effective in apartments and condos.
What to specify:
- Cabinet door: Flat-panel (slab), painted MDF, bright white
- Countertop: White quartz — Calacatta Laza or Viatera Minuet run $70–$90/sq ft installed
- Backsplash: White ceramic 3×9 subway tile, white grout — $8–$15/sq ft installed
- Lighting: Under-cabinet LED strip lighting is non-negotiable here. Without it, an all-white counter in a north-facing kitchen reads as grey and flat. Budget $200–$500 for a quality under-cabinet LED system
What to avoid: All-white works only with good natural light. In north-facing or basement kitchens, the result is a kitchen that feels cold and institutional rather than clean and airy. Add warmth with a white oak floating shelf, warm-toned pendant lights, or natural linen window treatments — small additions that completely change the feel.
Honest opinion: This kitchen looks best in magazines and worst when a family of four actually uses it. If you have young children, consider a cream or greige alternative — it gives the same clean aesthetic with significantly better tolerance for daily fingerprints and splashes.
Approximate cost: $30,000–$55,000 for a mid-size 10×10 kitchen.
2. White Cabinets with Warm Wood Accents
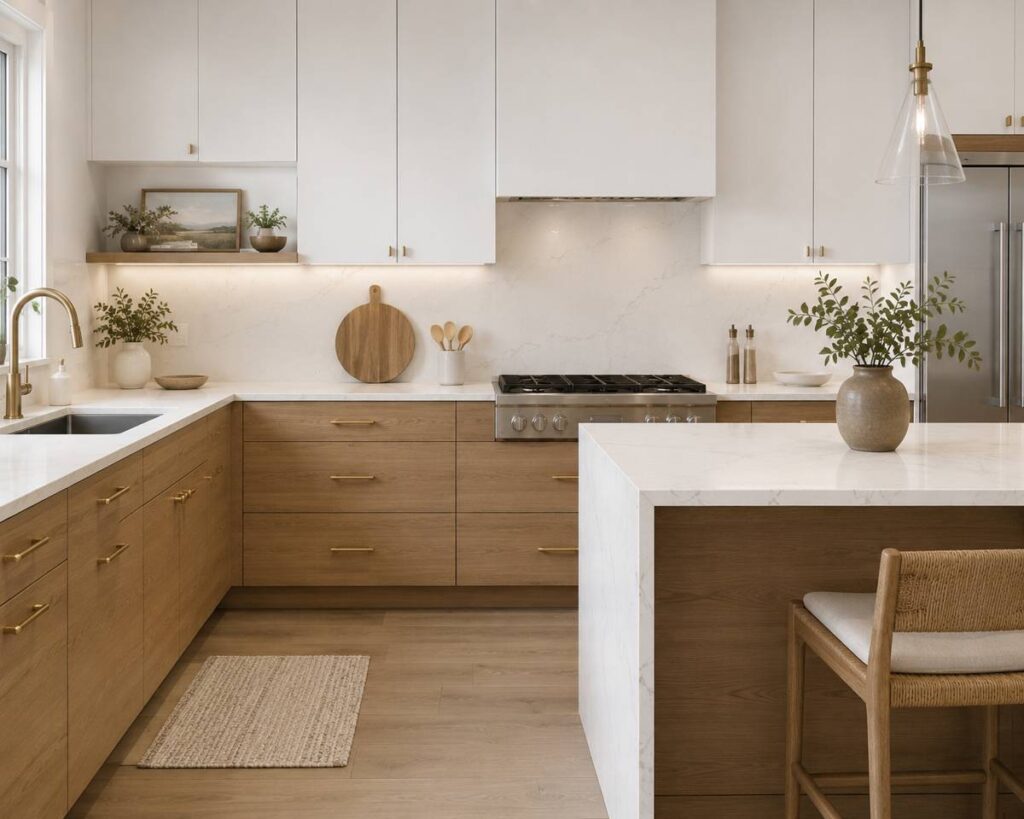
What it looks like: White upper cabinets paired with natural white oak or walnut lower cabinets, with a warm white quartz countertop. Sometimes includes a wood-tone island or a single floating wood shelf among white uppers. Hardware in brushed gold or champagne bronze.
Who it works for: Nearly everyone — and that is not a vague compliment. Wood cabinets have overtaken white in the 2026 Houzz Kitchen Trends Study, with nearly 3 in 10 renovating homeowners choosing wood — a 6-percentage-point jump from the previous year, while white declined 5 points. The white-and-wood combination captures both camps simultaneously. It appears in new construction from $300K condos to $2M custom builds.
What to specify:
- Wood lowers: White oak in a natural or light stain. Rift-cut white oak gives the cleanest, most contemporary grain pattern — specify this explicitly, as flat-sawn is the default
- Budget $200–$500 per linear foot for semi-custom white oak cabinets
- Countertop: Cambria Brittanicca Warm or similar warm-white quartz, $75–$110/sq ft installed
- Hardware: Unlacquered brass develops a natural patina; satin brass stays consistent — both suit this combination
The detail that separates good from exceptional: Run the wood grain horizontally on lower cabinet doors rather than vertically. Horizontal grain is more contemporary, creates a wider and more grounded visual effect, and is almost never done by default. Specify this explicitly with your cabinet maker.
What to avoid: Using too many different wood tones. Wood lowers, wood floor, and a wood island should all be from the same species family — all white oak, or all walnut. Mixing light oak lowers with a dark walnut island is one of the most common two-tone mistakes in this style.
Approximate cost: $35,000–$65,000 for a 10×10 to 12×12 kitchen.
3. Two-Tone Navy and White
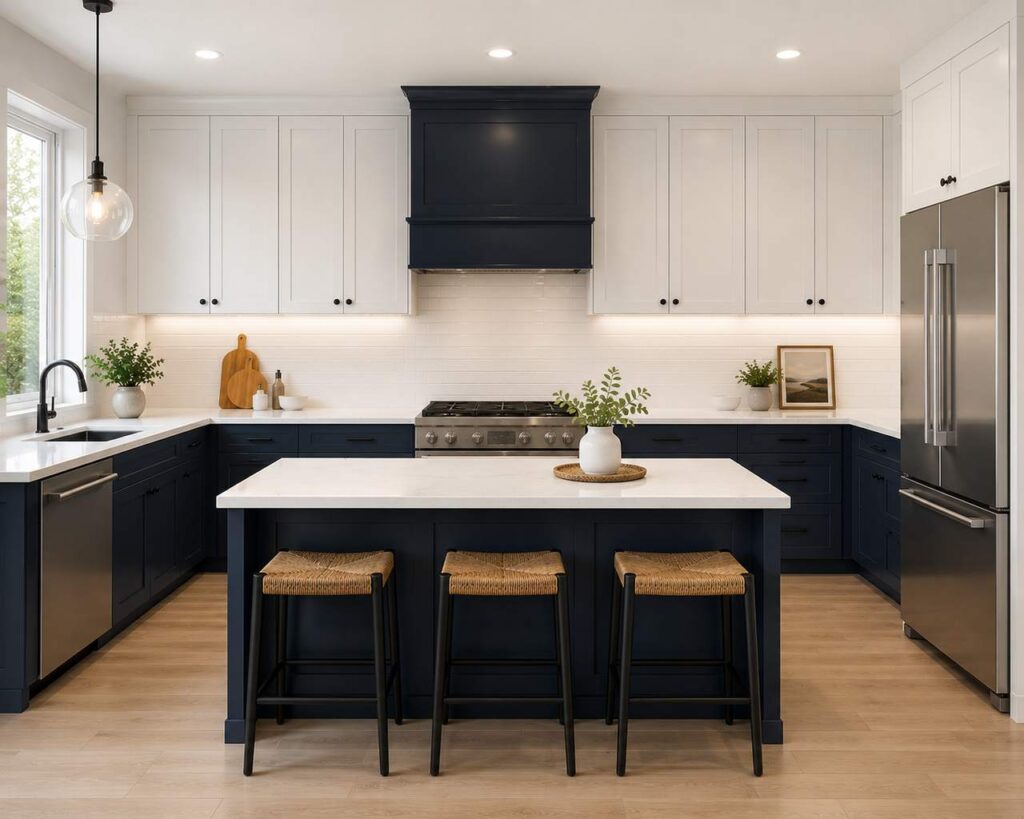
What it looks like: Deep navy blue lower cabinets, white upper cabinets, and a white or light grey quartz countertop. Hardware in matte black or brushed nickel.
Who it works for: Homeowners who want real personality in the kitchen without committing to an all-dark space. The white uppers keep the room bright and open; the navy lowers add weight and sophistication. Works beautifully in traditional, transitional, and coastal settings.
What to specify:
- Navy color: Benjamin Moore Hale Navy (HC-154) is the benchmark — a true sophisticated navy that reads consistently across different light conditions without pulling purple or greenish. Sherwin-Williams Naval (SW 6244) is an excellent close second
- Upper cabinets: Benjamin Moore Chantilly Lace (OC-17) pairs precisely with Hale Navy
- Countertop: White quartz with soft grey veining — Silestone Calacatta Gold or similar
- Hardware: Matte black for the strongest contrast; brushed nickel for a softer traditional pairing
The detail that elevates this design: Paint the range hood box in matching navy. A wood hood box finished in the same navy as the lower cabinets — rather than a stock stainless steel hood — ties the entire design together and gives the kitchen a fully custom, built-in appearance. This one detail, costing $300–$800 extra, changes how the whole kitchen photographs.
What to avoid: Navy in low-light kitchens without a compensating white island or light countertop. Strong colors need strong light to land correctly. If your kitchen faces north, consider using navy exclusively on the island and keeping the perimeter lowers white.
Approximate cost: $32,000–$60,000 for a 10×10 kitchen.
4. Sage Green Shaker Cabinets
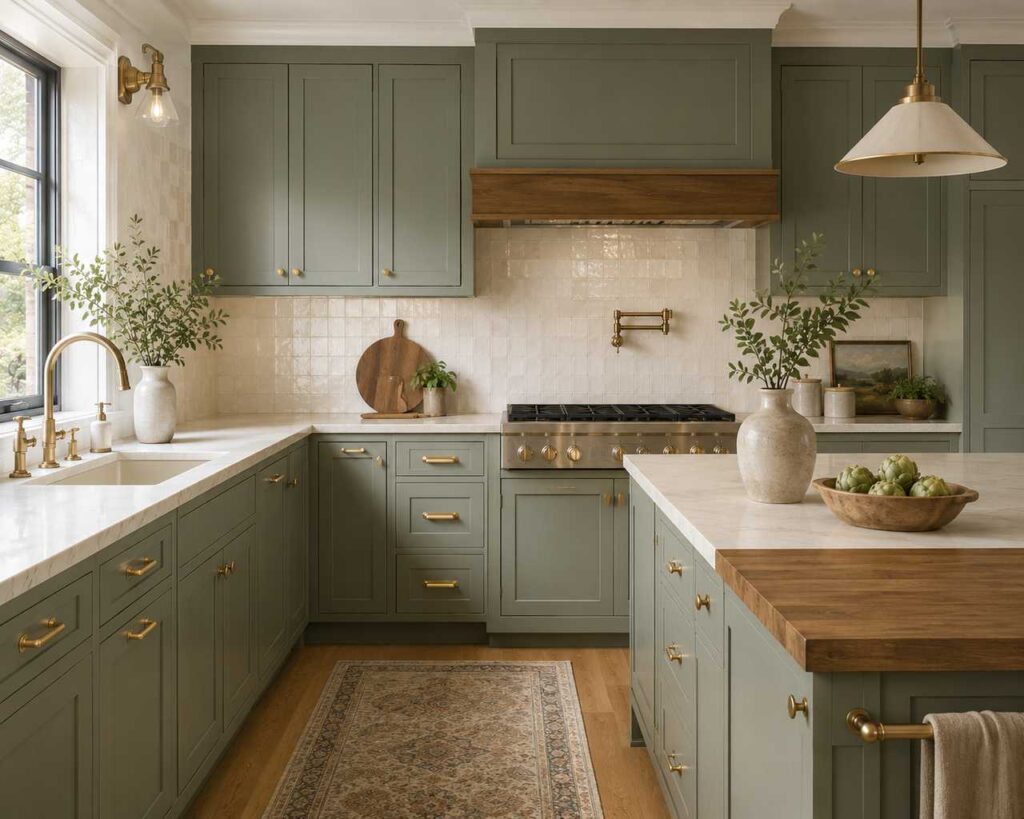
What it looks like: Soft sage or olive green Shaker-style cabinets with a cream or warm white countertop, butcher block accents, and unlacquered brass hardware. Warm, organic, and approachable.
Who it works for: Homeowners who want color but are cautious about going bold. Sage green is genuinely forgiving — it shifts slightly with the light (greyer in low light, warmer and more yellow-green in strong sunlight) but never looks harsh or aggressive. Green now edges out gray as the sixth most popular cabinet color in 2026, up from lower positions just two years ago.
What to specify:
- Sage green colors: Sherwin-Williams Sage (SW 0017) is the most accessible. Benjamin Moore Hampshire Rocks (HC-101) is slightly more complex. Farrow & Ball Mizzle (No. 266) for a more sophisticated, layered green that reads differently in every light
- Cabinet door: Shaker — the recessed panel suits sage green’s organic character better than flat-panel, which reads more corporate and cold in this color
- Countertop: Honed Calacatta marble for a premium look ($80–$150/sq ft), or white quartz for practicality ($70–$100/sq ft)
- Hardware: Unlacquered brass is the definitive pairing — it develops a natural patina over months and years that only deepens the organic quality of the kitchen
- Backsplash: Cream or white zellige tile — the handmade Moroccan tile with intentional surface variation — is the highest-impact choice at $20–$35/sq ft
The honest tradeoff: Unlacquered brass looks stunning from day one, but fingerprints show constantly for the first three to six months before the patina develops enough to absorb them. If this sounds frustrating, specify satin brass instead — similar warmth, significantly more forgiving in a working kitchen.
What to avoid: Pairing sage green with cool-toned grays or stark white. Sage is a warm green — it needs warm whites (cream, linen, off-white), warm wood tones, and warm metals. Cool gray countertops with sage cabinets is a combination that interior designers consistently flag as uncomfortable, even if homeowners cannot immediately identify why.
Approximate cost: $28,000–$52,000 for a 10×10 kitchen.
5. Charcoal Gray with Warm Brass’
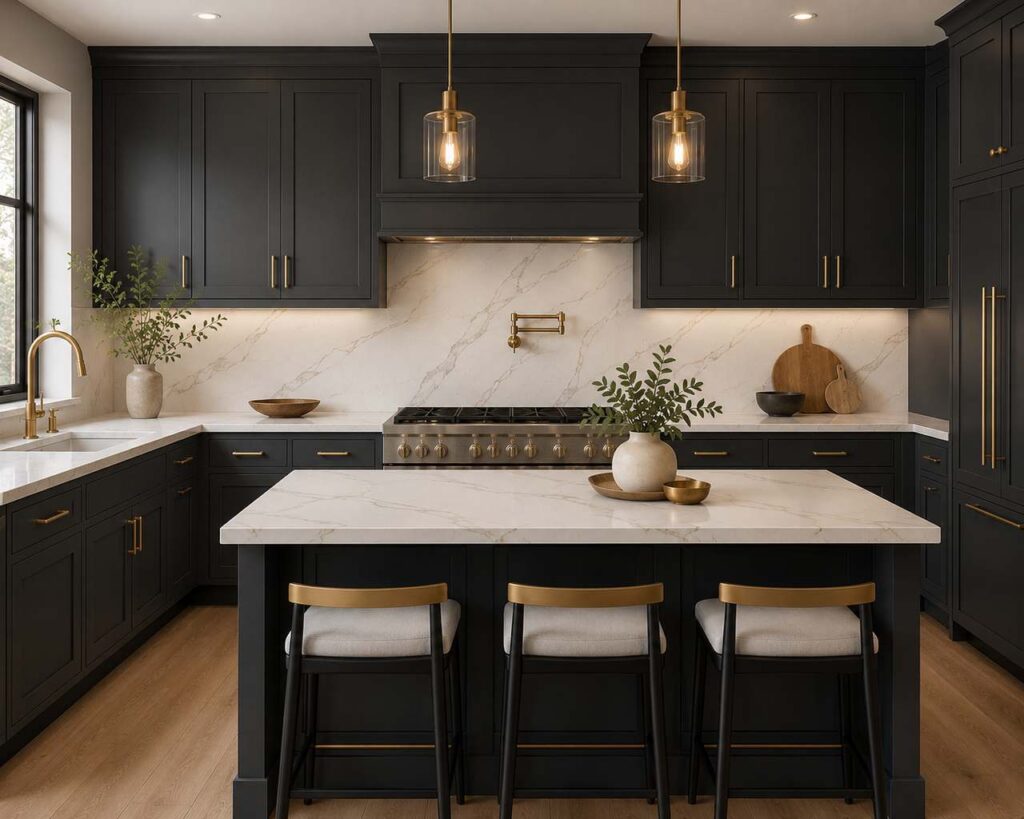
What it looks like: Matte charcoal gray cabinets throughout — no two-tone — with satin or unlacquered brass hardware, a white Calacatta quartz countertop, and a continuous quartz slab backsplash in the same material as the counter.
Who it works for: City apartment owners, design-conscious homeowners who want drama without going all-black, and anyone planning to sell within 5 years who wants a kitchen that photographs exceptionally well.
What to specify:
- Charcoal color: Benjamin Moore Kendall Charcoal (HC-166) is a warm charcoal that reads sophisticated rather than cold. Sherwin-Williams Peppercorn (SW 7674) is the equivalent on the SW side
- Cabinet finish: Matte paint only — matte hides fingerprints far better than semi-gloss in dark colors. Semi-gloss charcoal shows every handprint immediately
- Countertop: White Calacatta quartz — the veining provides visual relief. Cambria Brittanicca or MSI Calacatta Laza are strong mid-range options
- Hardware: Satin brass over unlacquered brass here — patina on dark cabinets looks inconsistent in a way that reads as dirty rather than aged
The upgrade that justifies itself: A continuous quartz slab backsplash in the same material as the countertop — running from counter surface to the bottom of upper cabinets without grout lines — is the most dramatic single upgrade in a high-contrast kitchen. It also eliminates the grout lines that collect grease and are nearly impossible to keep clean behind the range. Budget $1,500–$3,500 additional for the slab backsplash versus tile.
What to avoid: Open shelving in a charcoal kitchen. Dark backgrounds make every imperfect display choice obvious. Open shelves in a charcoal kitchen demand perfectly curated, color-coordinated objects — the moment one mismatched mug appears, the whole wall looks wrong. Keep this kitchen clean and fully closed.
Approximate cost: $38,000–$70,000 with a quartz slab backsplash.
6. All-White with Black Hardware
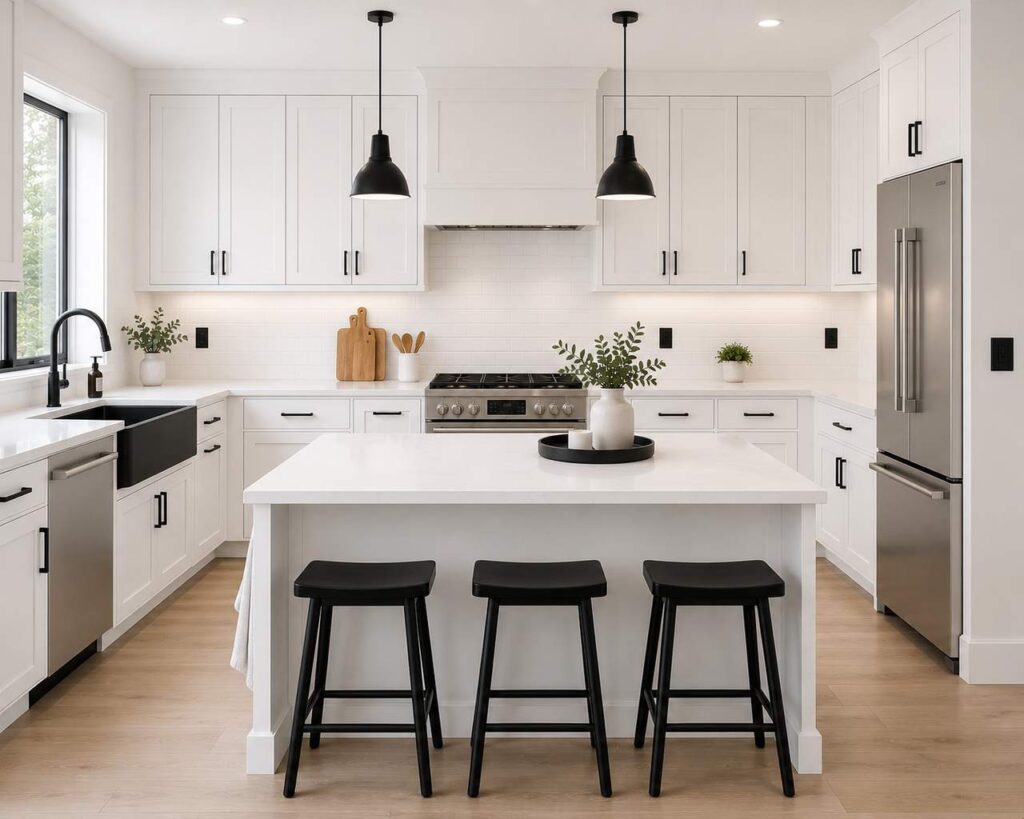
What it looks like: White Shaker cabinets with matte black bar pulls or cup pulls, white quartz countertop, and white tile backsplash. The black hardware is the only contrast element — everything else stays white. Graphic, clean, and consistently popular in new construction.
Who it works for: Homeowners who find the all-white kitchen too sterile but are not ready to commit to colored cabinets. Families who want cabinets that hide marks. A strong choice for anyone who plans to sell within 7–10 years.
What to specify:
- Hardware: Matte black bar pulls, 5 or 6.25-inch center-to-center. Amerock, Liberty, and Rejuvenation offer solid lines at $5–$20 per pull. For a more substantial feel, Emtek or Schaub matte black pulls run $25–$60 each
- Sink: A matte black farmhouse sink extends the hardware story to the sink itself. Ruvati and KRAUS are well-reviewed mid-range options
- Faucet: Matte black — Delta, Moen, and Kohler all carry extensive matte black kitchen lines at $150–$500
The detail that costs nothing but looks expensive: Swap the standard white or beige light switch plates and outlet covers for matte black ones. They cost $3–$8 each at any hardware store and create a level of intentionality that makes the kitchen look professionally designed rather than assembled. Almost nobody does this. It takes fifteen minutes and makes an immediately visible difference.
What to avoid: Matte black hardware with stainless steel appliances. The two finishes fight each other in a way that reads as unresolved. If you are keeping stainless appliances, shift the hardware to brushed nickel instead. If you want true matte black throughout, panel-ready or matte black appliances are the consistent choice.
Approximate cost: $25,000–$48,000 for a 10×10 kitchen.
Also Check – Small Living Room Decor Ideas
TRADITIONAL AND TRANSITIONAL DESIGNS
7. Warm Wood Traditional Kitchen
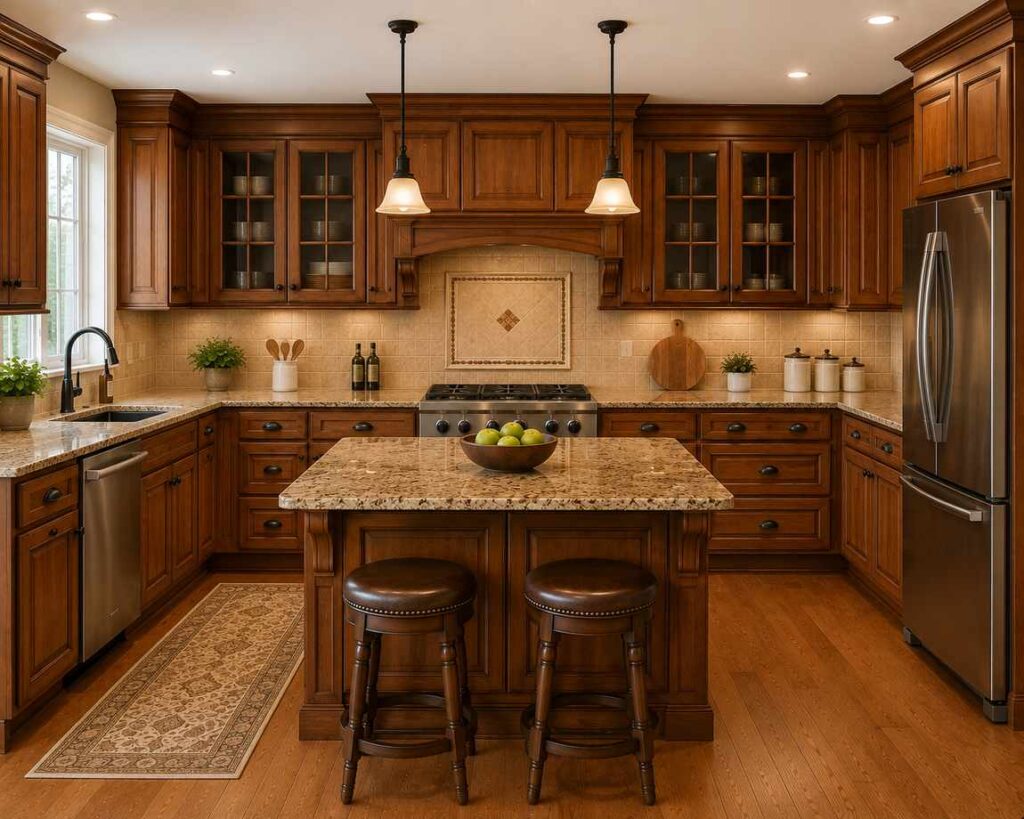
What it looks like: Medium-tone stained wood cabinets — cherry, maple, or hickory — with granite countertops in brown, beige, or cream tones, a ceramic tile backsplash, and oil-rubbed bronze hardware. This is the kitchen of permanence: it looks like it has always been in the house.
Who it works for: Homeowners who do not follow design trends and want a kitchen that looks as good in 20 years as it does today. Strong in craftsman, colonial, and traditional-style homes. Wood cabinets have returned strongly in 2026 with medium wood tones leading at 15% of renovated kitchens — validating that the warm wood traditional kitchen was never really out of favor, just temporarily overshadowed by the all-white decade.
What to specify:
- Wood species: Cherry has the most visual warmth and develops a beautiful amber patina over time. Maple is more neutral and takes stain evenly. Hickory has dramatic grain and natural color variation — striking but not for everyone
- Stain tone: Medium-brown to honey — avoid very dark espresso stains, which peaked in 2005–2015 and now read as dated
- Countertop: Granite in warm tones — Santa Cecilia, Giallo Ornamental, or New Venetian Gold all complement warm wood. Granite requires annual sealing but is excellent for heat resistance
- Hardware: Oil-rubbed bronze — the dark, almost-black finish grounds the warm wood without competing with it
What to avoid: Pairing warm wood cabinets with a cold stark white countertop and chrome fixtures. Warm wood demands warmth in the materials beside it. A bright white countertop against honey-colored cherry cabinets creates an uncomfortable temperature clash that experienced designers spot immediately.
Approximate cost: $28,000–$55,000 for a 10×10 kitchen.
8. English Country Kitchen
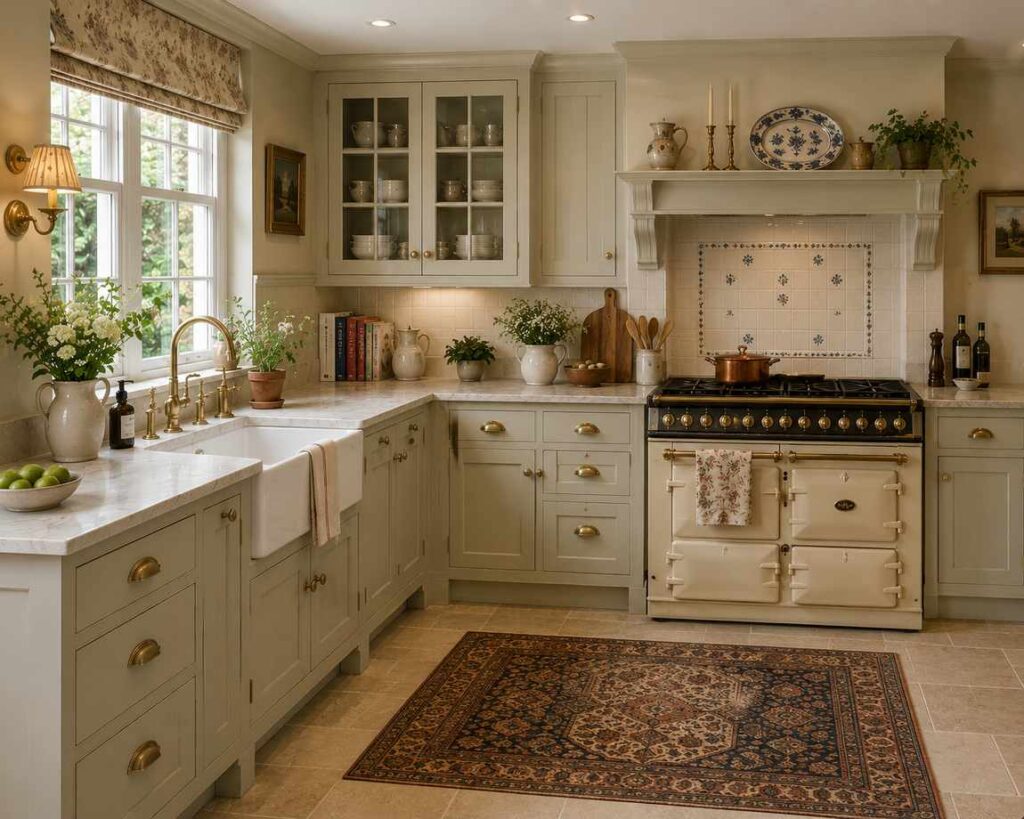
What it looks like: Inset cabinetry in warm cream or soft sage with glass-front upper cabinets, a deep Belfast or butler sink, honed stone countertops, warm brass fittings, and a range cooker as the centerpiece. Dominant in the UK; increasingly sought in upscale US homes.
Who it works for: Homeowners who want a kitchen that feels collected and personal over decades — not designed and assembled in a single remodel. The English country kitchen rewards imperfection: mismatched ironstone mugs on open shelves, seasonal flowers by the sink, well-worn cookbooks stacked by the range. It is the deliberate opposite of the minimalist kitchen.
What to specify:
- Cabinet construction: Inset — the door sits flush within the frame, like fine furniture, rather than overlaying it. Costs 20–30% more than standard overlay but delivers a completely different visual quality
- Paint: Farrow & Ball is the canonical choice for this style. Elephant’s Breath (No. 229), Pavilion Gray (No. 242), or Mizzle (No. 266) for cabinets. Cornforth White (No. 228) for walls
- Sink: Cast iron Belfast sink — Rohl or Shaws are the benchmark brands, both available in the US
- Range: La Cornue or Wolf in the US; AGA or Rangemaster in the UK — the range is the architectural centerpiece of this kitchen, not just an appliance
- Countertop: Honed (not polished) Carrara marble or honed granite — the matte finish matches the kitchen’s unpretentious, working character
What to avoid: Mixing any contemporary element into this style — a stainless steel hood over cream inset cabinets, chrome handles, or flat-panel doors. The English country kitchen demands internal consistency. One modern element breaks the spell entirely.
Approximate cost: $45,000–$95,000 — inset cabinetry and specialty fixtures add significantly.
9. Modern Farmhouse Kitchen
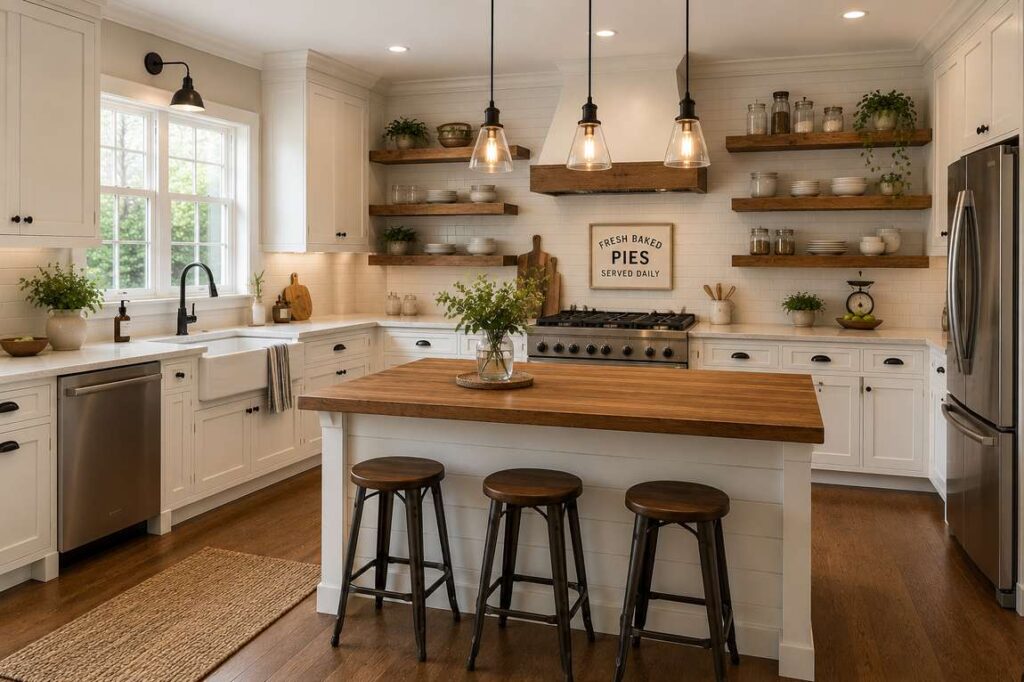
What it looks like: White or off-white Shaker cabinets, an apron-front farmhouse sink, butcher block counters (or honed marble for a refined version), open floating shelves, and Edison pendant lighting above the island or peninsula.
Who it works for: The modern farmhouse kitchen has been one of America’s most consistently popular aesthetics for over a decade — and shows no sign of fading in 2026. It suits suburban and rural settings, and homeowners who want warmth without the formality of a traditional or colonial kitchen.
What to specify:
- Farmhouse sink: Fireclay is the most authentic and durable material. Kohler’s Whitehaven is the benchmark; Kraus and Ruvati offer more affordable alternatives. Budget $500–$1,800 depending on brand and size
- Butcher block: John Boos walnut or maple, $40–$80/sq ft. Beautiful and warm — but requires oiling every 1–3 months. Use butcher block away from the sink and range; use stone or quartz around water and heat sources
- Floating shelves: 2-inch thick white oak or pine with simple bracket hardware, $150–$400 per shelf installed
- Pendant lights: Edison filament pendants in warm amber glass or wire cage, $60–$200 each, hung 30–36 inches above counter
The mistake almost everyone makes: The shiplap backsplash. It looks ideal in farmhouse kitchen photos, but shiplap is wood — it absorbs grease and is essentially impossible to clean thoroughly behind a range. Use shiplap on a wall that does not get direct cooking splatter, or use a tile that mimics the shiplap texture for the backsplash itself.
Approximate cost: $28,000–$55,000 for a 10×10 kitchen.
SMALL L-SHAPED KITCHEN DESIGNS
10. Open Shelving on the Upper Wall
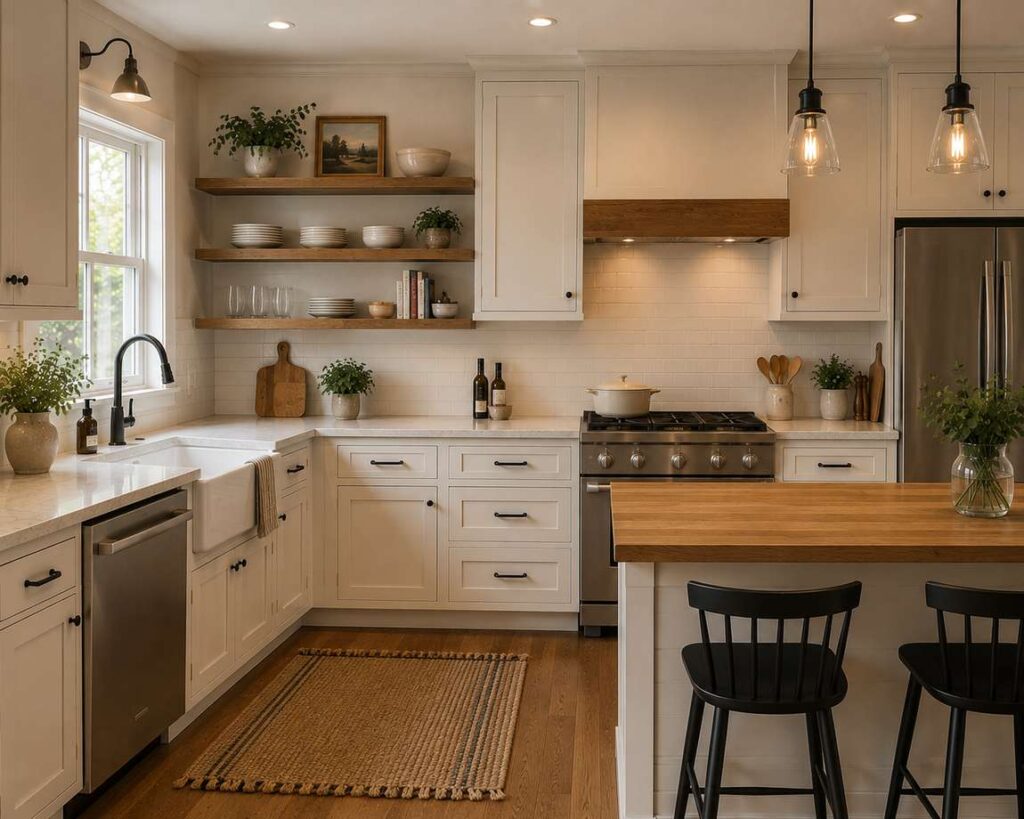
What it looks like: One section of upper cabinets replaced with 2–3 open floating shelves displaying everyday dishes, a plant or two, and a few cookbooks. The rest of the kitchen keeps closed cabinets.
Who it works for: Small kitchens where visual weight is the enemy. Removing one section of upper cabinets opens the wall, connects the room to the ceiling, and makes the kitchen feel dramatically more spacious. This is particularly effective in apartments where structural changes are not possible.
What to specify:
- Shelf material: 2-inch thick solid white oak or pine. Thicker shelves look more substantial and hold weight more convincingly. The thin 3/4-inch shelves you find at most box stores look flimsy when loaded with dishes
- Brackets: Simple black metal L-brackets for modern and farmhouse kitchens; wood corbels for traditional settings. $15–$60 each
- Weight capacity: Standard floating shelf brackets support 25–50 lbs. Specify this with your installer if you plan to store cast iron or large platters
- What to actually put on them: Stack of 4–6 matching white plates, 3–4 matching glasses, one small plant, one cookbook. That is it. The open shelf must look deliberately curated
The truth about open shelves: Homeowners consistently love open shelves at installation and begin quietly regretting them around month six when they realize that everything on those shelves is coated in a thin layer of cooking grease and dust. Limit open shelves to items you use and wash daily. Your grandmother’s good china does not belong there.
Approximate cost: $200–$800 per shelf installed — significantly less than upper cabinets at $100–$300 per linear foot.
11. Light-Reflective Backsplash
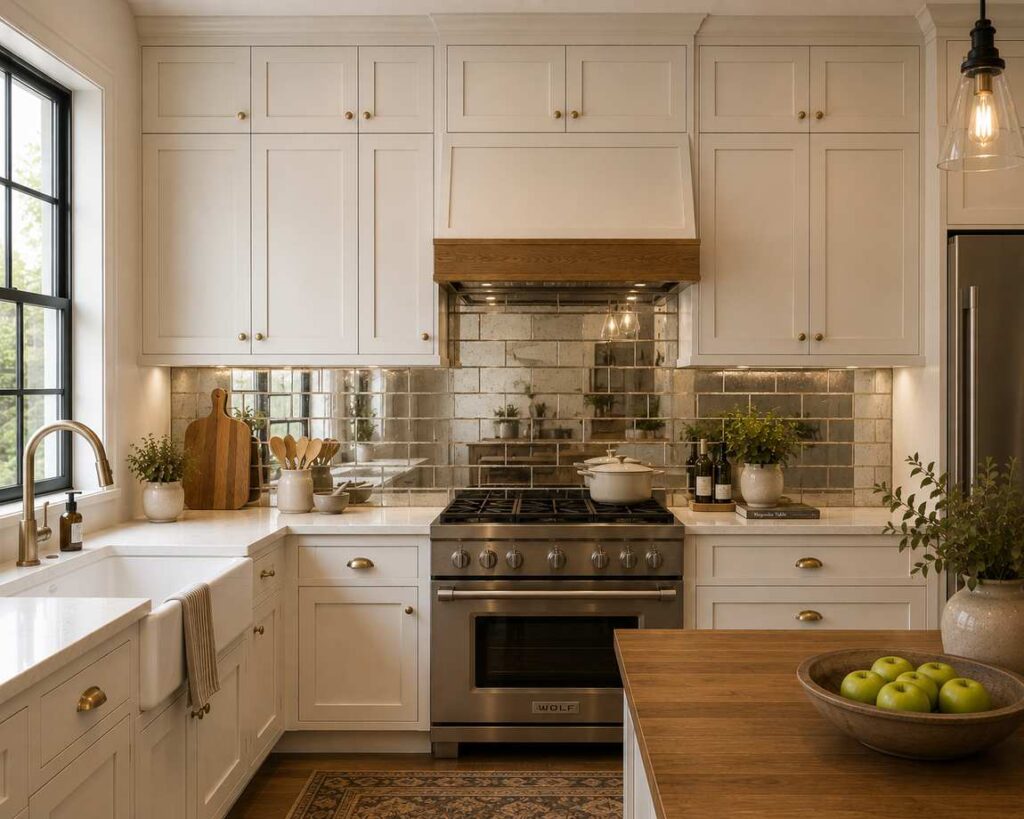
What it looks like: A mirrored, high-gloss, or large-format glass tile backsplash that reflects light back into the kitchen — effectively making the space appear both brighter and larger than it is.
Who it works for: North-facing kitchens. Basement kitchens. Any kitchen with limited windows where the backsplash wall receives little natural light. Renters and apartment owners who cannot make structural changes but can upgrade surfaces.
What to specify:
- Antiqued mirror tile — with a slightly aged, smoky surface — looks far more sophisticated than standard flat mirror tile. Available at Home Depot and Wayfair at $10–$25/sq ft
- High-gloss white or cream ceramic subway tile reflects significantly more light than matte-finish tile. Specify the gloss level explicitly when ordering — not all white subway tile is the same
- Large-format glass tile (12×24 inches): fewer grout lines means more continuous reflective surface. $15–$35/sq ft
What to avoid: Any mirror material directly behind the range. Cooking grease, steam, and heat discolor mirror adhesive over time, and cleaning the backsplash deeply enough to keep mirror grease-free is nearly impossible in a working kitchen. Use the reflective backsplash on the sink wall or the short arm of the L — use proper tile behind the range.
Approximate cost: $800–$2,500 for materials and installation, depending on area and tile choice.
12. Integrated Appliances
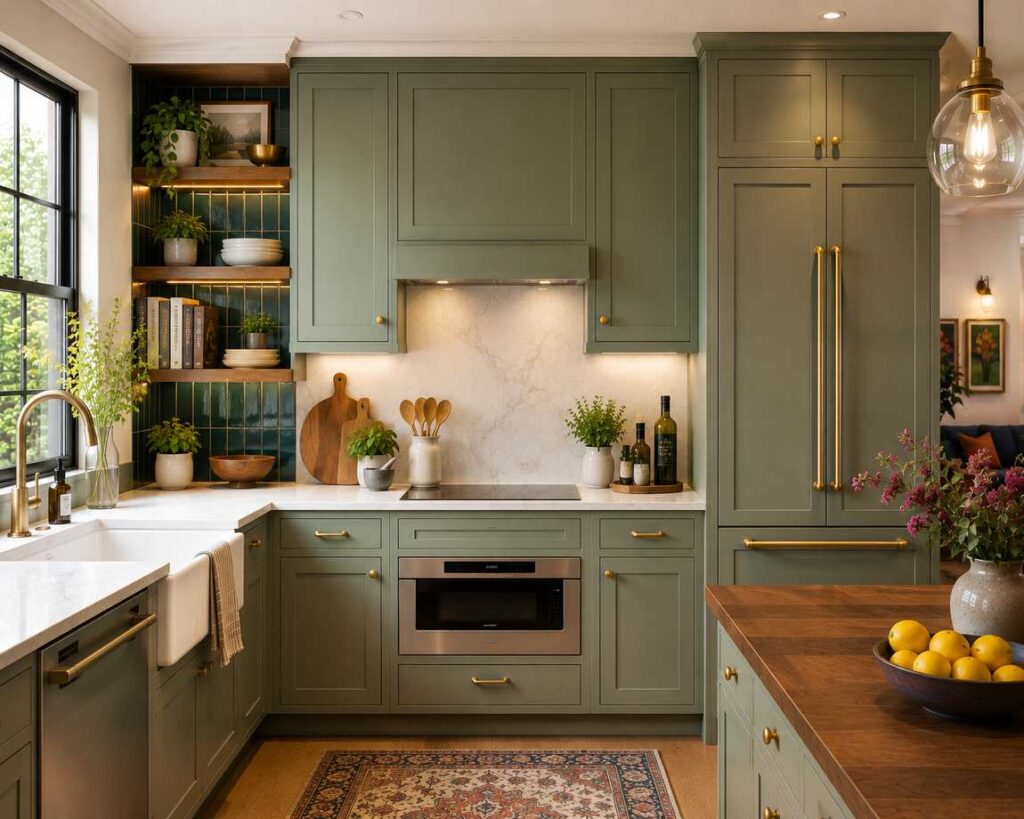
What it looks like: A refrigerator with custom panels that match the surrounding cabinetry. A dishwasher with a matching panel. A microwave drawer built into the base cabinet run. All the appliances disappear — the kitchen looks like a continuous wall of cabinetry.
Who it works for: Small kitchens where visual simplicity is essential. Open-plan spaces where the kitchen is visible from the living room and the presence of standard appliances would visually disrupt the space.
What to specify:
- Panel-ready refrigerator: Fisher & Paykel, Sub-Zero, and Liebherr are well-reviewed. Bosch offers more affordable panel-ready models. The appliance itself costs $2,000–$12,000+; panels are ordered from your cabinet shop to match the door style exactly
- Panel-ready dishwasher: Bosch, Miele, and Fisher & Paykel are most commonly specified. Dishwasher: $800–$2,500; panels: $200–$500 additional
- Microwave drawer: Sharp, KitchenAid, and Bosch make under-counter microwave drawers that install in a base cabinet at $700–$1,500. Far more ergonomic than over-the-range microwaves — you are not lifting hot, heavy dishes above your head
Contractor note: Panel-ready appliances require specific ventilation clearances at the top and sides. These clearances must be confirmed before the surrounding cabinet dimensions are finalized. A cabinet ordered 1/2 inch too narrow to accommodate the ventilation requirement means the panel will not fit — a costly mistake to fix after fabrication.
Approximate cost: $4,000–$15,000 for a panel-ready refrigerator, dishwasher, and microwave drawer set.
L-SHAPED KITCHEN ISLAND IDEAS
13. Classic Rectangular Island
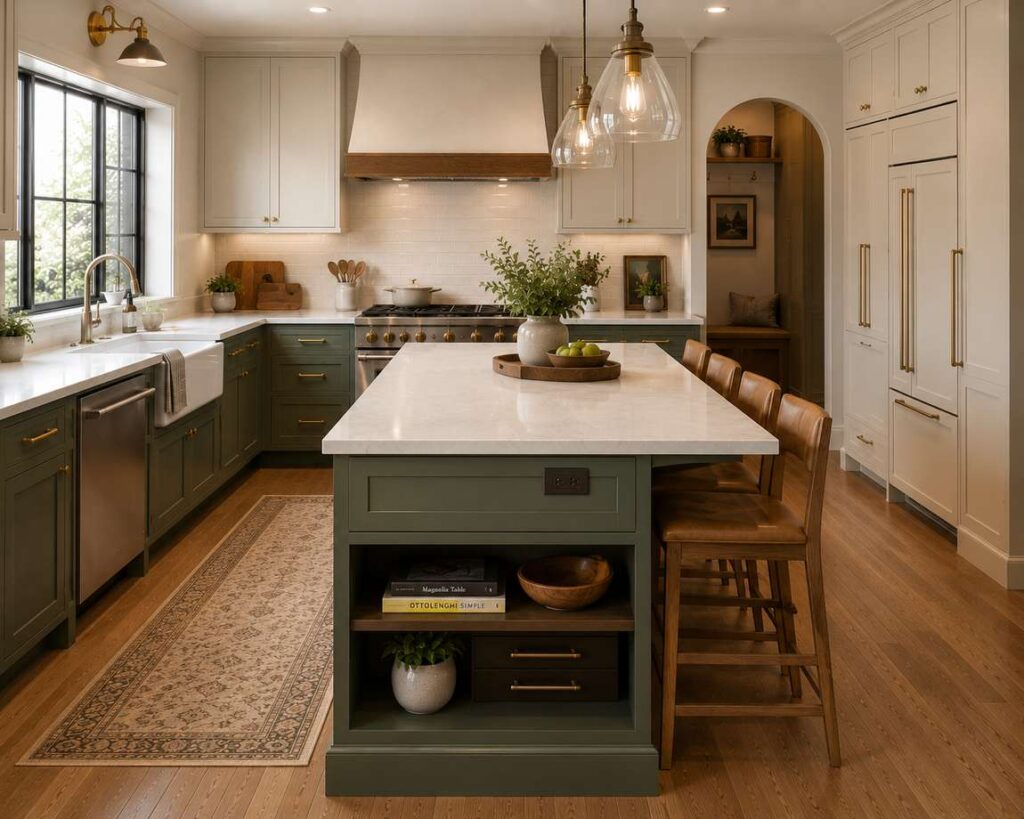
What it looks like: A rectangular cabinet structure parallel to the longer arm of the L, with a countertop overhanging 12–15 inches on one side for bar stools. Functions as both a prep station and casual dining counter.
Who it works for: Kitchens 10×12 feet and larger where 42 inches of clearance can be maintained on all sides. Two-cook households and frequent entertainers.
What to specify:
- Island dimensions: 24–36 inches wide × 48–84 inches long. Under 24 inches wide is too narrow for comfortable prep; over 36 inches wide requires a large room to maintain proper clearance
- Countertop overhang: 12–15 inches on the seating side. Position the overhang away from the cooking zone — bar stools should not sit in the path between the range and the refrigerator
- Storage: Every inch of island base should have storage — drawers (most accessible), open shelving (requires styling), or cabinet doors with roll-out shelves. An island that is just a countertop on four legs is a missed opportunity
- Electrical: A duplex outlet recessed into the countertop edge or a pop-up outlet in the surface. Islands without power are islands that cannot serve as coffee bars, charging stations, or additional appliance zones
Approximate cost: $3,000–$10,000 for a freestanding or semi-custom island including countertop.
14. Waterfall Edge Island
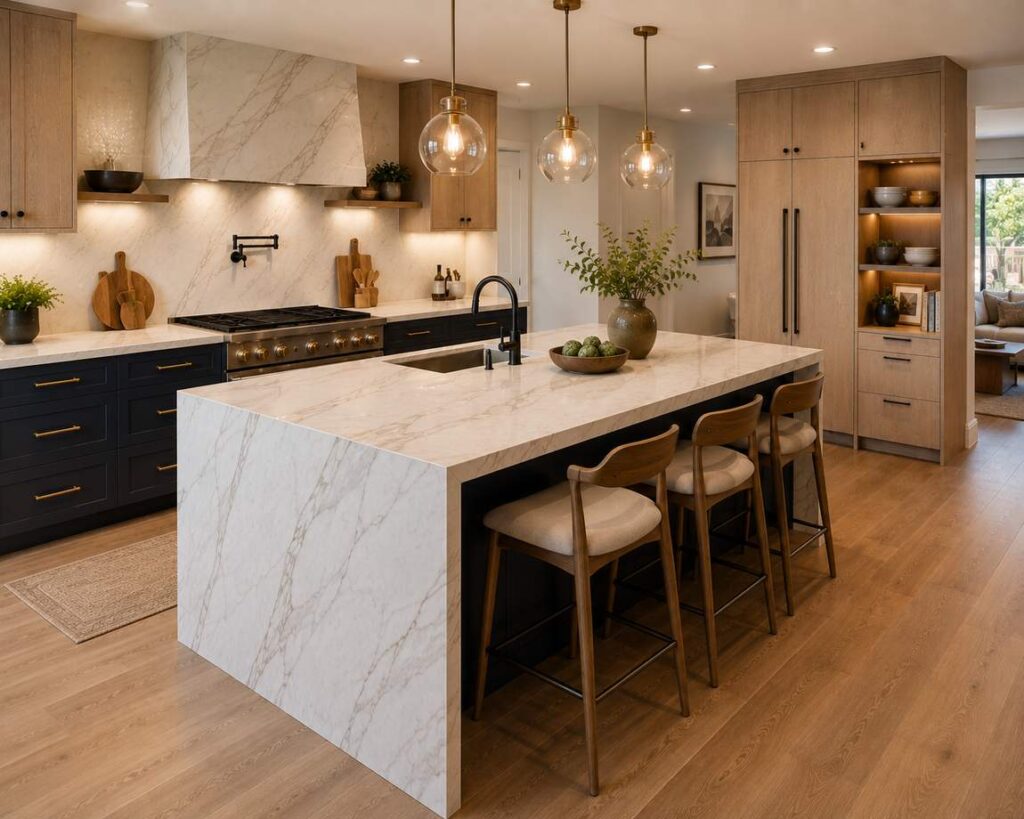
What it looks like: The island countertop material continues vertically down one or both sides to the floor — a continuous surface that waterfalls over the edge. Sculptural, architectural, and immediately the focal point of the kitchen.
Who it works for: Premium remodels where one dramatic focal point is the goal. Open-plan spaces where the island is visible from the living and dining areas.
What to specify:
- Best materials: Quartz (most durable and pattern-consistent), natural stone (beautiful but requires precise book-matching), or wood — walnut or white oak waterfall islands are a strong Japandi design choice
- Book-matching: On veined stone or quartz, the pattern must mirror at the corner where the top meets the vertical side. This requires slabs from the same lot, cut precisely. View the slab layout in person at the fabricator before approving the cut — do not accept a rendering alone
- Base cabinet color: A contrasting base under the waterfall top is particularly strong — white oak waterfall over a navy or charcoal base, for example
The one thing to confirm before you cut: Ask your fabricator to show you a physical mock-up of the corner join before cutting. On heavily veined stone, a poorly matched corner looks chaotic and cannot be fixed without replacing the entire slab.
Approximate cost: Adds $1,500–$4,000 to a standard island countertop depending on material.
15. Contrasting Island Color
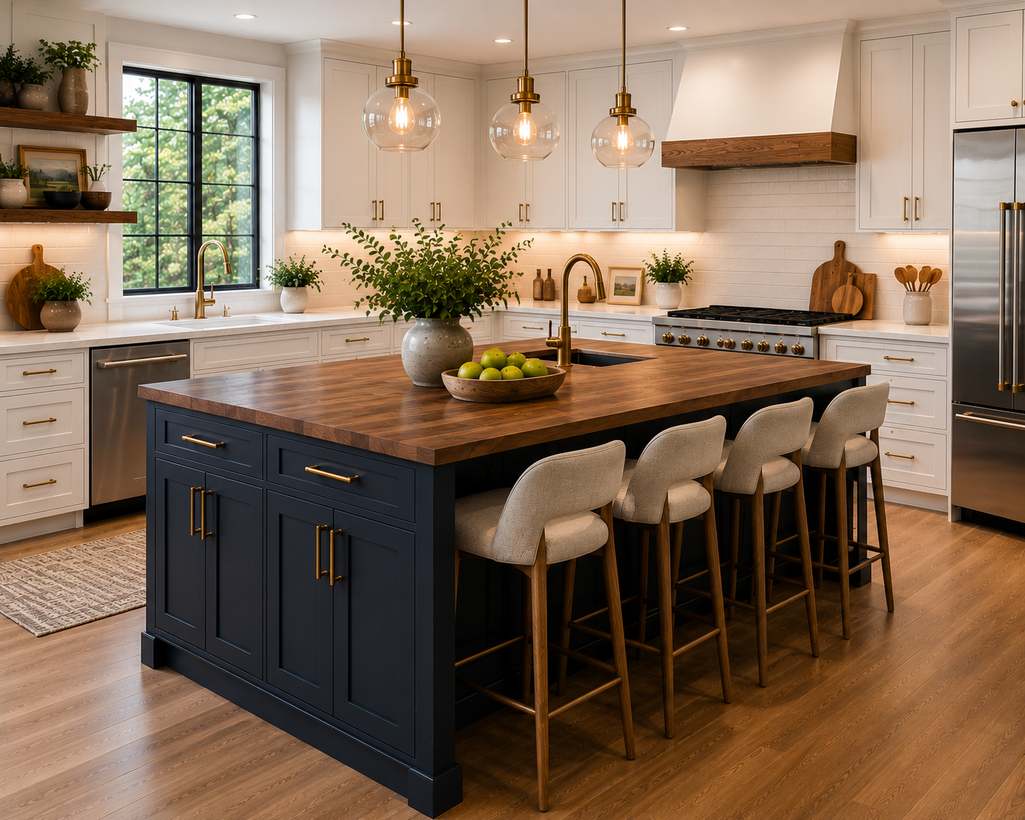
What it looks like: Light or white perimeter cabinets with a dramatically different island — navy, forest green, charcoal, or terracotta. The island becomes the kitchen’s visual anchor.
Who it works for: Homeowners who want personality without committing color to the entire perimeter. The island color can be repainted in a future refresh without touching the rest of the kitchen — lower-risk way to make a bold choice.
What to specify:
- Island colors that work in 2026: Benjamin Moore Hale Navy, Sherwin-Williams Peppercorn, Farrow & Ball Calke Green (No. 80), and Sherwin-Williams Iron Ore
- Countertop on the island: Use a different material from the perimeter when budget allows — dark butcher block on a navy island, or warm white marble on charcoal. Intentional contrast reads as curated rather than mismatched
- Hardware: Match to the island’s character, not to the perimeter hardware — matte black on dark islands, unlacquered brass on navy or green
Approximate cost: No additional cost versus a same-color island — the difference is paint or finish choice only.
16. Island with Prep Sink
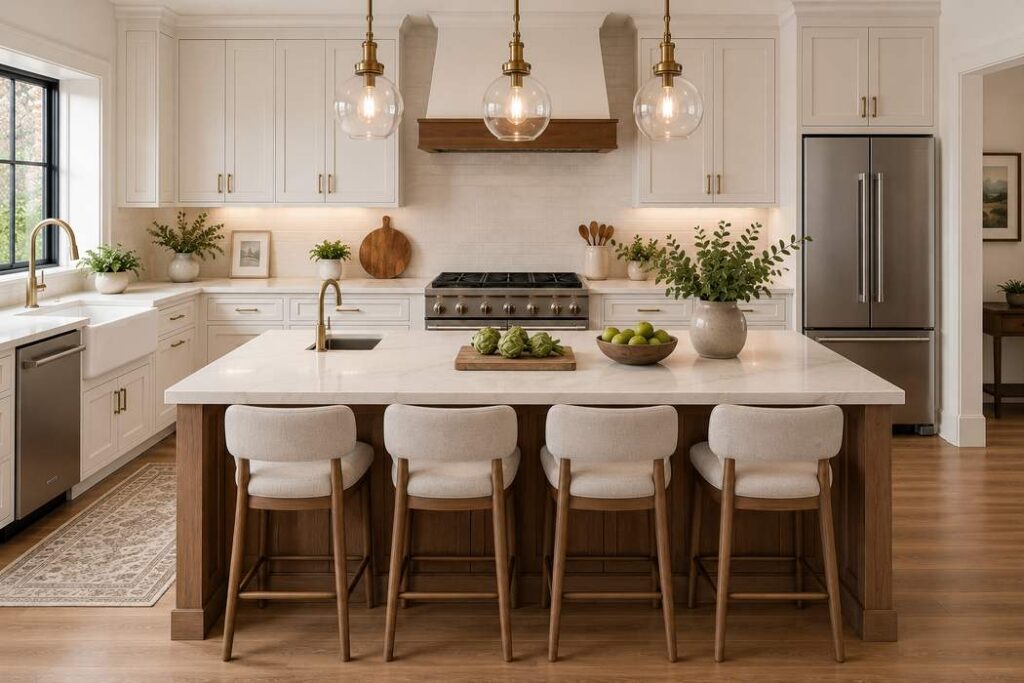
What it looks like: A smaller secondary sink — 15–18 inches — installed in the island countertop. Used for vegetable washing, drink prep, and cleanup while the main sink handles dishes.
Who it works for: Two-cook households, frequent entertainers, and kitchens where the main sink is far from the primary prep zone.
What to specify:
- Sink size: 15×15 inches for a simple prep sink; up to 18×18 for more versatility. Single bowl undermount
- Cold-only plumbing: For a vegetable prep sink, cold-only is sufficient and saves $200–$400 in plumbing cost
- Drain: In slab foundation homes, the drain must run through concrete — this adds $500–$2,000. Work this out with your plumber before finalizing the island position
Contractor note: The prep sink plumbing decision must be made before the island position is fixed — not after. Changing the drain location post-installation in a slab home is an extremely expensive retrofit.
Approximate cost: $800–$2,500 additional including sink, faucet, and plumbing.
STORAGE-FOCUSED DESIGNS
17. Blind Corner Pull-Out (Magic Corner)
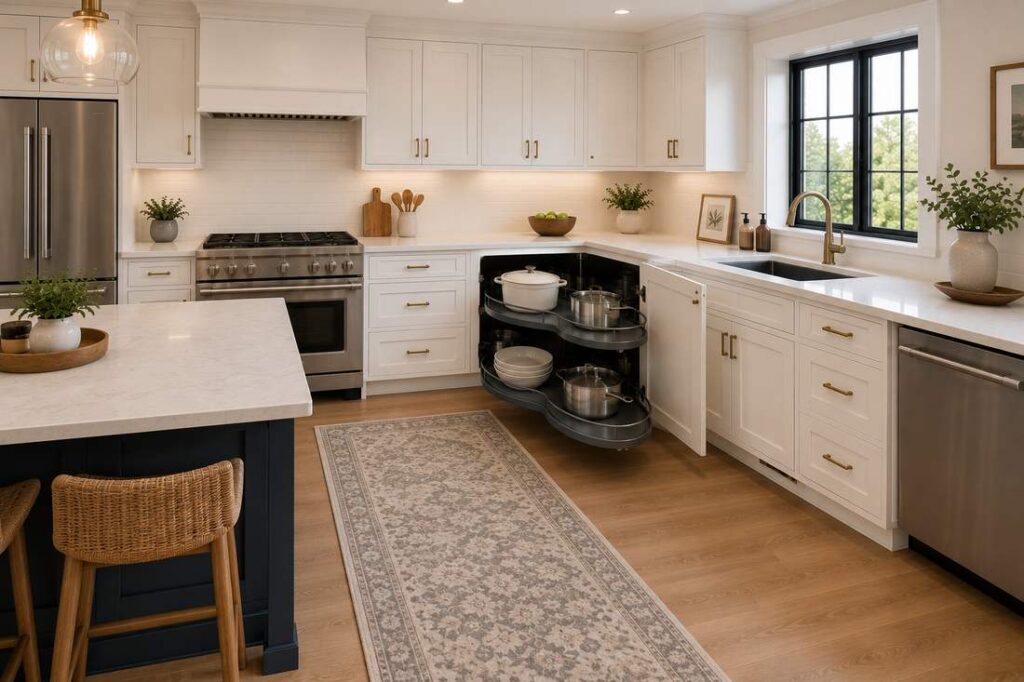
What it looks like: At the inner 90-degree corner of the L — typically a deep, dark zone accessible only by crouching and reaching — a pull-out mechanism brings shelves forward into the aisle when the door opens. Nothing stays hidden. Everything is reachable.
Who it works for: Every single L-shaped kitchen. The inner corner is the most valuable storage zone in the layout, and without a solution, it is wasted entirely.
What to specify:
- Le Mans pull-out: Two kidney-shaped shelves on a pivot mechanism. Manufactured by Häfele, Rev-A-Shelf, and Sugatsune. Requires 32–36 inches of interior cabinet width — confirm this before ordering
- Blind corner pull-out: Two-tier unit that slides straight out. Requires less interior space. Rev-A-Shelf BC series is available at Home Depot for $150–$300
- Lazy Susan: The classic rotating solution — less efficient than pull-outs (items still hide behind each other) but significantly cheaper at $50–$150
Critical planning note: The corner storage solution must be specified before the cabinet order is placed — not after. Le Mans and pull-out units require precise interior cabinet dimensions that cannot be retrofitted into a standard corner cabinet.
Approximate cost: $150–$600 for hardware; $200–$500 for installation.
18. Deep Drawer Base Cabinets
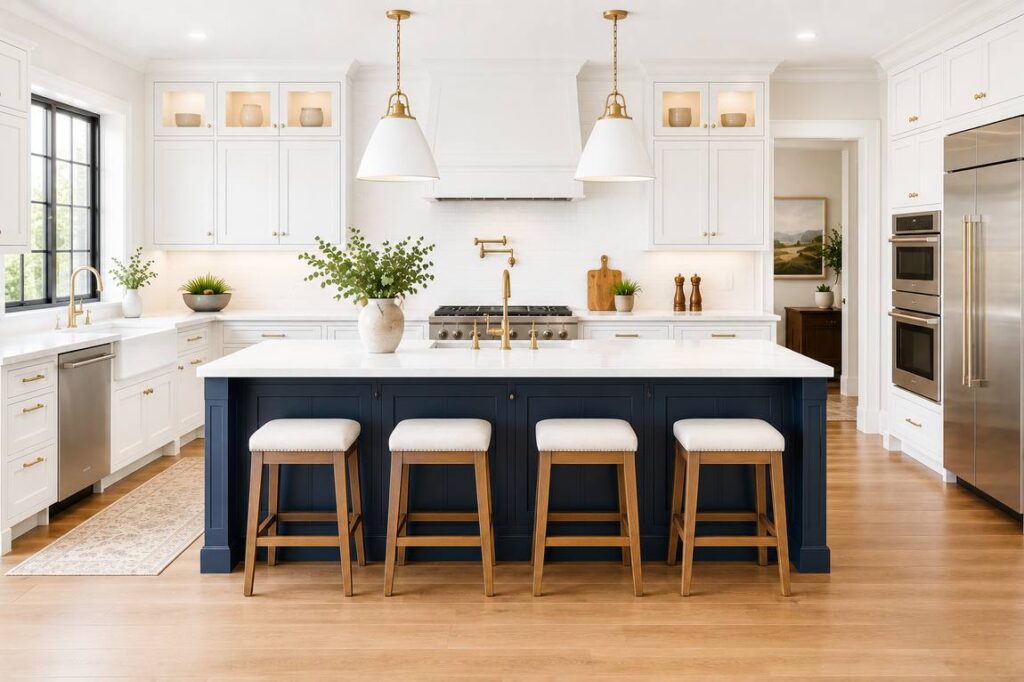
What it looks like: Three-tier pull-out drawers replacing all lower cabinet shelves — shallow top drawer for utensils, medium middle drawer for plates and bowls, deep bottom drawer for pots and pans. No hinged base doors at all.
Who it works for: Anyone who has spent time crouching to reach the back of a base cabinet shelf. Deep drawers are the most functional upgrade available in a kitchen remodel. Full visibility, full access, no crouching.
What to specify:
- Drawer slides: Full-extension, soft-close undermount — Blum Tandem Plus Blumotion is the benchmark, rated for 75 lbs per drawer. Do not accept side-mounted or face-frame slides in a quality kitchen
- Bottom drawer height: Minimum 10 inches interior; 12 inches allows most pots and lids to stand upright. Include a peg system — wooden pegs in a drilled grid — to organize pots vertically
- Exceptions: Leave hinged cabinet doors under the sink (drawers cannot accommodate plumbing) and adjacent to the dishwasher where a trash/recycling pull-out typically lives
Approximate cost: 15–20% premium over standard door-and-shelf base cabinets.
19. Pantry Tower with Pull-Out Shelves
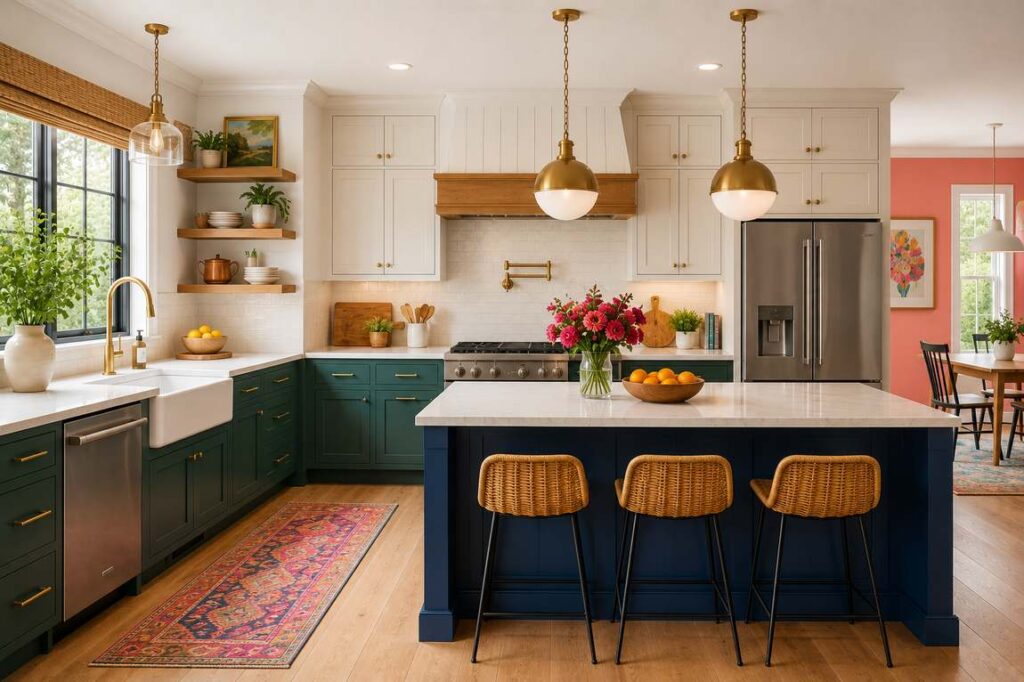
What it looks like: A full-height cabinet (84–96 inches tall, 18–24 inches wide) at the end of one L arm, with 5–8 full-extension pull-out shelves that slide out to reveal everything at once — no back row that disappears.
Who it works for: Households that buy in bulk. Families with kids who need quick access. Anyone tired of discovering expired cans at the back of a deep pantry shelf six months after purchase.
What to specify:
- Full-extension pull-out shelves — not 3/4 extension. If items at the back are still unreachable, the pull-out defeats its purpose. Specify full-extension explicitly
- Adjustable shelf spacing in 1-inch increments — pantry needs change over time
- Brands: Rev-A-Shelf 4WP series is widely available and well-reviewed at $200–$500 per section
What to avoid: Locating the pantry tower beside the range. Heat from cooking degrades oils, spices, and some pantry items stored in adjacent cabinets. Position the pantry tower at the far end of one arm, away from the cooking zone.
Approximate cost: $1,500–$4,000 for a full-height pantry tower with pull-outs, installed.
COLOR COMBINATIONS IN DEPTH
20. Forest Green and Cream
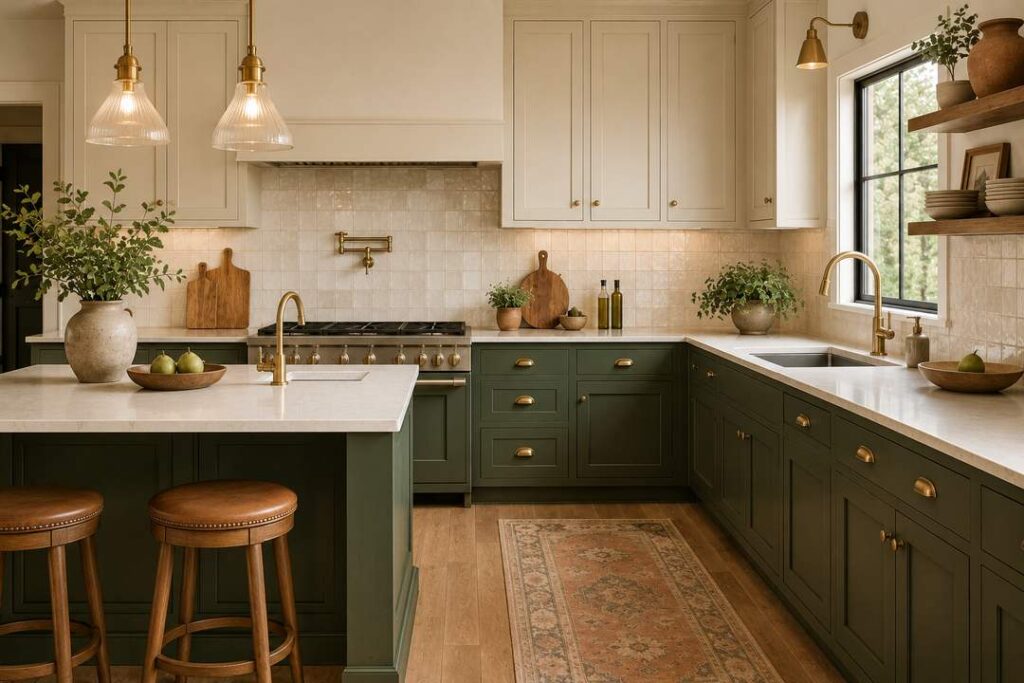
What it looks like: Deep forest or sage green lower cabinets, cream or off-white upper cabinets, a warm white countertop, unlacquered brass hardware, and a zellige tile or natural stone backsplash. The warmest, most organic kitchen combination trending globally in 2026.
Who it works for: Homeowners drawn to the biophilic design movement — kitchens that feel connected to nature, grounded, and calming. Transitional and traditional home styles.
What to specify:
- Green colors: Farrow & Ball Calke Green (No. 80), Studio Green (No. 93), or Sherwin-Williams Rosemary (SW 6187)
- Cream uppers: Benjamin Moore White Dove (OC-17) or Chantilly Lace (OC-65) — both pair without reading as stark white against the green
- Backsplash: Handmade zellige tile in cream or terracotta — the intentional surface variation and warmth complement green cabinets far better than machine-perfect subway tile
- Floor: Natural oak hardwood or terracotta tile grounds the organic palette
Approximate cost: $30,000–$58,000 for a 10×10 kitchen.
Appliance Placement: Rules That Prevent Expensive Mistakes
Refrigerator: End of the longer arm, near the entry — easy grocery loading. Confirm 2 inches of hinge clearance. Counter-depth refrigerators (24 inches deep) are strongly preferred in L-shaped kitchens — they sit flush with cabinet faces and never block the aisle the way standard-depth models can.
Range: Center of one arm, never in or near the corner — you cannot stand comfortably at the inner 90-degree corner to cook. Minimum 15 inches of counter to one side, 12 to the other. Never under a window — wind pressure affects gas flames and condensation creates a persistent cleaning problem.
Range Hood: Precisely centered above the range, 24–30 inches above the cooking surface. Plan the duct route to the exterior wall or roof before ordering cabinets. Discovering after installation that the duct has nowhere to go requires demolishing finished cabinetry.
Sink: Adjacent to the dishwasher — always. The rinse-and-load sequence requires them to be side by side. A sink on the opposite side of the kitchen from the dishwasher is one of the most common and most frustrating workflow errors in poorly planned kitchens.
Wall Oven: At the end of the shorter arm in a tall cabinet stack, positioned at counter height — the bottom of the oven at 36 inches from the floor. This eliminates the hazard of carrying heavy, hot roasting pans upward from a floor-level oven.
The Remodel Timeline: What to Expect Month by Month
A kitchen remodel can take anywhere from 6 weeks to 6 months depending on scope. In 2026, labor shortages and material lead times can extend timelines, so plan accordingly.
| Phase | Typical Duration |
|---|---|
| Design and planning | 3–6 weeks |
| Cabinet lead time (semi-custom) | 10–16 weeks |
| Countertop fabrication | 2–6 weeks after template |
| Appliance lead time | 4–12 weeks |
| Demolition | 2–5 days |
| Rough-in (plumbing + electrical) | 1–2 weeks |
| Cabinet installation | 3–5 days |
| Countertop installation | 1–2 days |
| Backsplash tile | 2–4 days |
| Appliance installation | 1 day |
| Punch list and finish work | 1–2 weeks |
| Total project timeline | 5–8 months |
Practical advice: Order cabinets and appliances first — these are your longest lead-time items. Many homeowners delay ordering because they are still making decisions, and then discover they need to wait 14–16 weeks for cabinets after the decision is finally made. This is the most common cause of project delays.
Cabinet and Countertop Maintenance: What Nobody Tells You Before You Buy
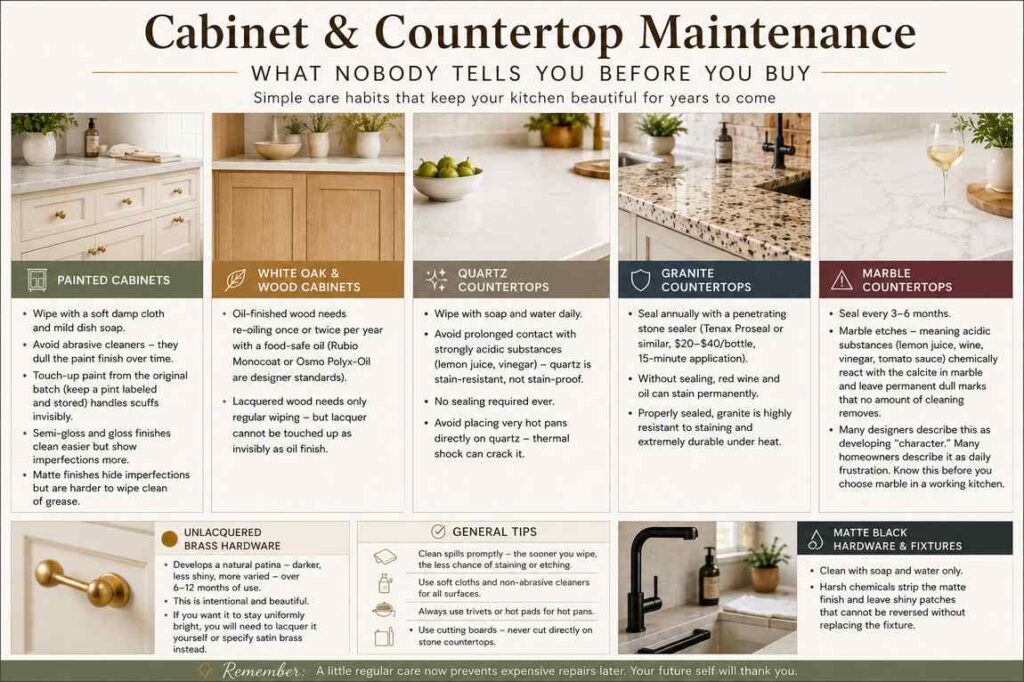
This is the section most kitchen articles skip — and it is the one you will wish you had read six months after installation.
Painted cabinets: Wipe with a soft damp cloth and mild dish soap. Avoid abrasive cleaners — they dull the paint finish over time. Touch-up paint from the original color batch (keep a pint labeled and stored) handles scuffs invisibly. Semi-gloss and gloss finishes clean easier but show imperfections more. Matte finishes hide imperfections but are harder to wipe clean of grease.
White oak and wood cabinets: Oil-finished wood needs re-oiling once or twice per year with a food-safe oil (Rubio Monocoat or Osmo Polyx-Oil are designer standards). Lacquered wood needs only regular wiping — but lacquer cannot be touched up as invisibly as oil finish.
Quartz countertops: Wipe with soap and water daily. Avoid prolonged contact with strongly acidic substances (lemon juice, vinegar) — quartz is stain-resistant, not stain-proof. No sealing required ever. Avoid placing very hot pans directly on quartz — thermal shock can crack it, despite what salespeople sometimes suggest.
Granite countertops: Seal annually with a penetrating stone sealer (Tenax Proseal or similar, $20–$40/bottle, 15-minute application). Without sealing, red wine and oil can stain permanently. Properly sealed, granite is highly resistant to staining and extremely durable under heat.
Marble countertops: Seal every 3–6 months. Marble etches — meaning acidic substances (lemon juice, wine, vinegar, tomato sauce) chemically react with the calcite in marble and leave permanent dull marks that no amount of cleaning removes. Many designers describe this as developing “character.” Many homeowners describe it as daily frustration. Know this before you choose marble in a working kitchen.
Unlacquered brass hardware: Develops a natural patina — darker, less shiny, more varied — over 6–12 months of use. This is intentional and beautiful. If you want it to stay uniformly bright, you will need to lacquer it yourself or specify satin brass instead.
Matte black hardware and fixtures: Clean with soap and water only. Harsh chemicals strip the matte finish and leave shiny patches that cannot be reversed without replacing the fixture.
5 Mistakes That Cost Homeowners the Most Money
Mistake 1: Moving the sink or range unnecessarily. Relocating plumbing or gas lines adds $2,000–$5,000 to any remodel before a single cabinet is ordered.
If your current sink and range placement work ergonomically, keep them. Many homeowners discover after demolition that the existing layout was actually functional — they just needed new cabinets and countertops around it.
Mistake 2: Finalizing cabinetry before confirming ventilation. The range hood duct must exit to the exterior — through an exterior wall or through the roof.
This path must be confirmed before the cabinet layout is finalized. Discovering after installation that the duct has no viable path requires demolishing finished cabinets. It happens more often than most people expect.
Mistake 3: Particle board cabinet boxes. Particle board absorbs moisture from the dishwasher, sink steam, and general kitchen humidity. It swells, warps, and fails — typically within 5–8 years in a working kitchen.
Always specify plywood box construction. It costs 10–20% more and lasts 3–4 times longer. This is the single structural decision with the longest-term impact on your kitchen.
Mistake 4: Underestimating the lighting budget. A single overhead fixture leaves the countertop in shadow — you are standing between the light source and your work surface.
Every kitchen needs three layers: under-cabinet task lighting above every counter run, ambient lighting (recessed or surface-mounted ceiling), and accent lighting inside glass cabinets or above open shelves. Budget $1,500–$4,000 for properly layered kitchen lighting.
Mistake 5: Deciding on corner storage after the cabinet order is placed. Magic corner pull-outs and Le Mans units require precise interior cabinet dimensions that are built into the cabinet box during fabrication — they cannot be easily retrofitted into a standard corner cabinet.
If you leave this decision for after ordering, you will end up with a lazy Susan or dead space. Neither is acceptable in an L-shaped kitchen where the inner corner is your most valuable storage zone.
Final Thought
Every kitchen decision compounds. The layout determines the workflow. The workflow determines what storage you need. The storage determines the cabinet configuration. The configuration determines appliance placement. The appliance placement determines ventilation. Ventilation determines where you can and cannot put cabinets.
Get the foundation right — work triangle, corner storage, aisle clearance, ventilation path — and every aesthetic decision becomes easier and more rewarding to make. Get the foundation wrong and no amount of beautiful tile or expensive hardware will fix the frustration of a kitchen that does not work.
The ideas in this guide are not a menu to pick one from. They are a vocabulary. Learn what makes each one work — the specific materials, the key details, the honest tradeoffs — and you will be equipped to design a kitchen that is genuinely yours, not a replica of someone else’s.
 Sumit Banerjee
[…] than a harsh one — much more in line with the quiet, warm-minimalist look that’s dominating modern kitchen design right […]
[…] ALSO READ: L-Shaped Kitchen Designs: 20 Ideas With Real Costs, Materials & Honest Advice (2026) […]
[…] still weighing this layout against the alternatives, it’s worth reading through our L-shaped kitchen layout ideas as well, since the two shapes solve slightly different problems depending on your room […]